


It would still be great if we could remote control the robot car with the smartphone. Exactly this is possible thanks to the built-in WIFI module of the ESP8266 NodeMCU. The small computer not only has various GPIO ports but can also log on to an existing WIFI or open an access point itself. For the example below, the robot car with its ESP8266 should log on to the local W-LAN and display a minimal web interface when you open the IP address of the robot car in the browser.
The following picture shows my little robot car a bit beautified by my daughter.

ESP8266 NodeMCU robot car wifi kids
First of all, a program must be written that contains the WIFI login and delivers the web interface for the control.
Develop WIFI and Web GUI function
For the ESP8266 NodeMCU there are a lot of libraries that we can use directly. So it is quite easy to integrate the small board into an existing WIFI and start a web server to display the web interface. Only the following two libraries have to be included and configured to display these functions.
#include <ESP8266WiFi.h>
#include <ESP8266WebServer.h>
Afterwards the WIFI configuration must be carried out. This is again done with two lines of program code. One line contains the name (SSID) of the local WIFI network and the second line contains the corresponding password.
// Set the WIFI SSID and password
// SSID of your WIFI
const char* ssid = "XXXXXXXXX";
//password of your WIFI
const char* password = "XXXXXXXX";
In the void setup() function of the program, the WIFI of ESP8266 NodeMCU is then started and the web server is initialized.
Then the programming of the robot car controller is done as we have already seen with the PCA9685 servo controller and the L298N H-bridge.
The finished program then displays a small web GUI which looks like the one shown in the following picture.
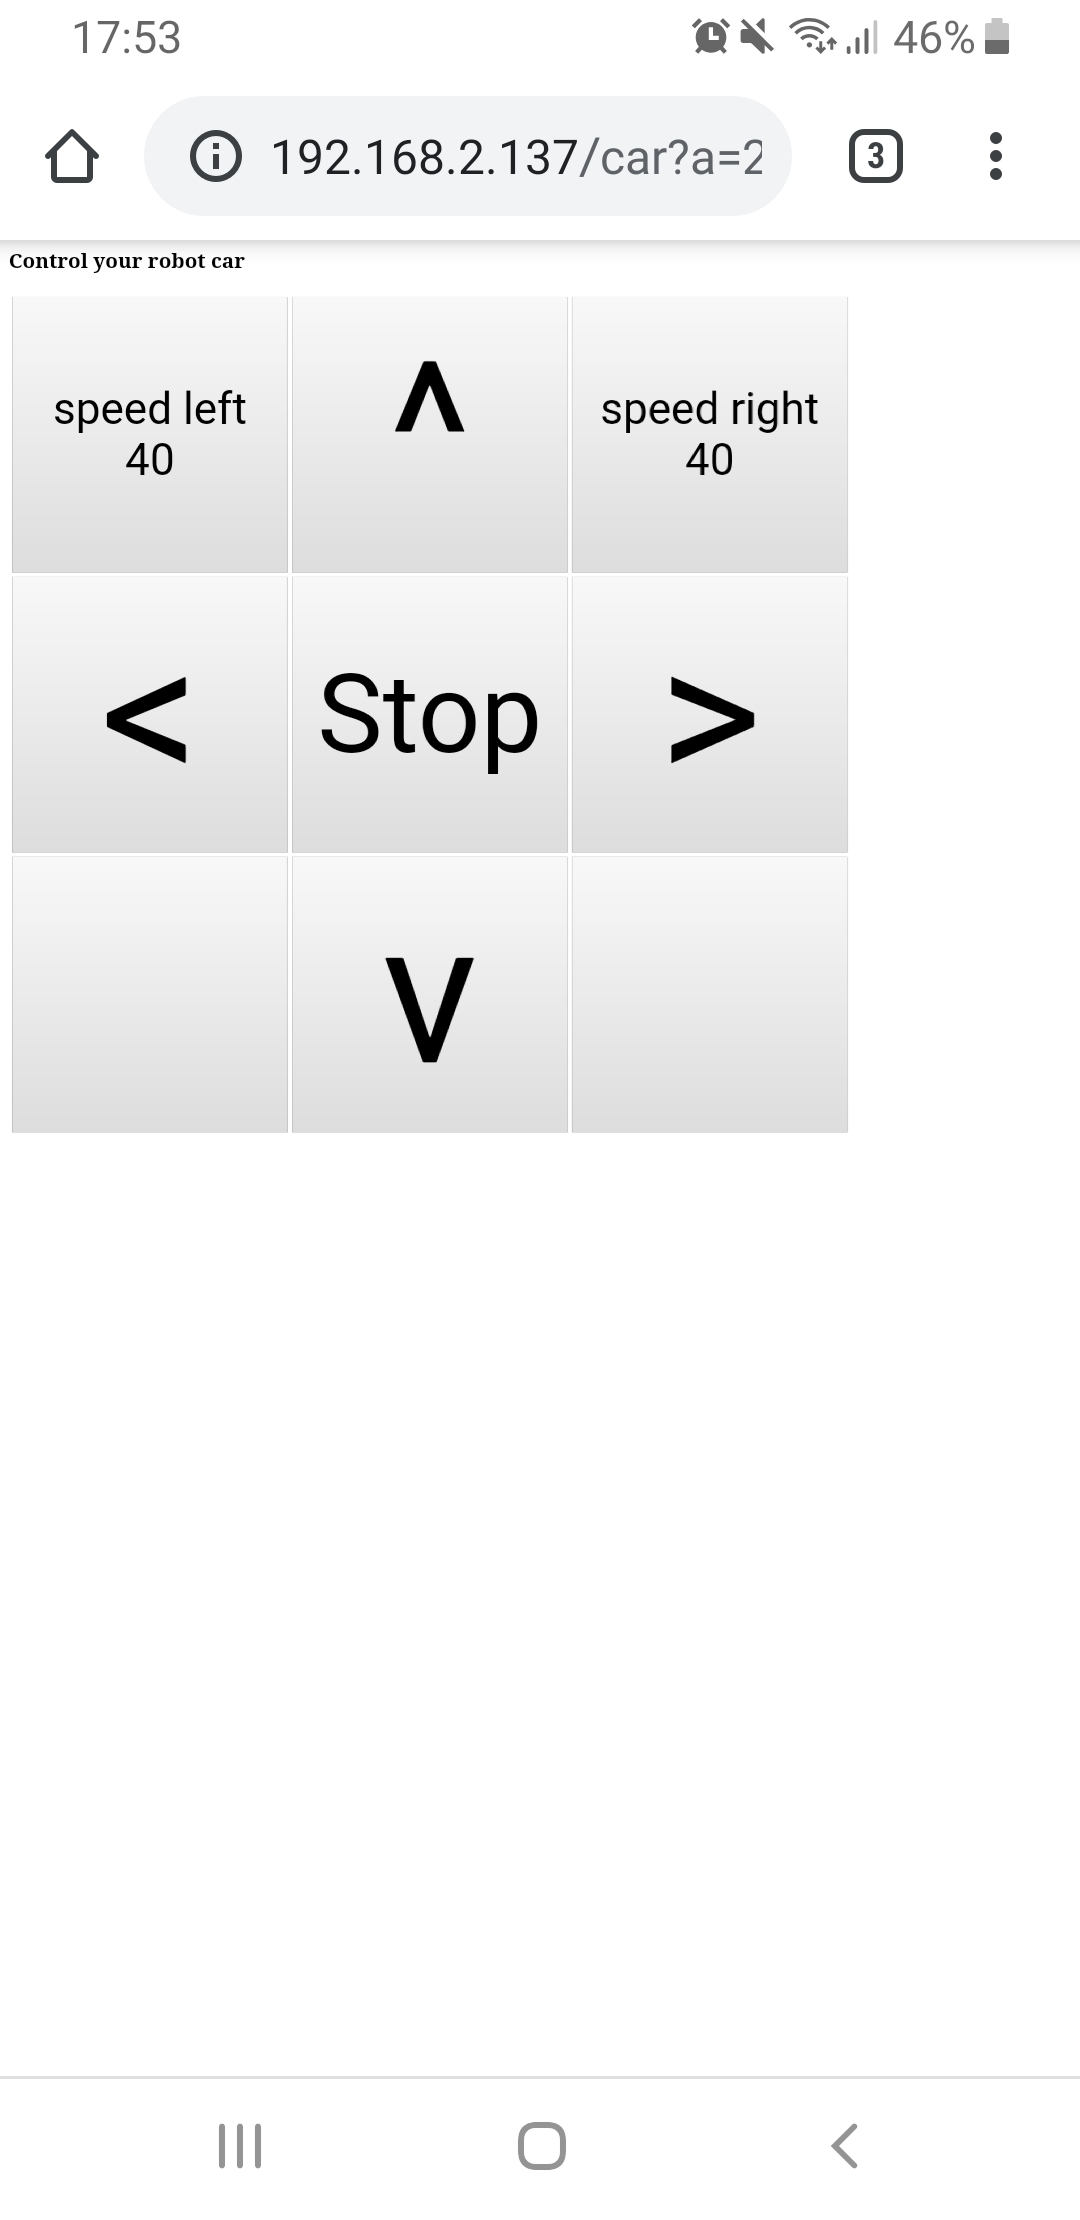
ESP8266 NodeMCU robot car wifi control
The finished program can be downloaded via the following download link.
Download: ESP8266 NodeMCU WIFI robo car program
Upload the program as usual to the ESP8266 via the Arduino IDE. All necessary libraries for the WIFI and the web server should already be available.
Hint: I noticed that the ESP8266 with active WIFI requires a bit more power. For example, I had more crashes with my aging power bank when the engines used a lot of energy, for example when turning on a carpet. With a new power-bank of the same size I didn’t have these problems anymore.
Summary
When the program is loaded on the ESP8266 NodeMCU developer board, the robot car logs on to the local WIFI and starts the web interface. From now on, it is possible to control the robot car remotely from a smartphone, for example. The five buttons can be used to execute functions in the program such as acceleration or rotation. From now on, of course, further functions can be implemented using the buttons that are not yet assigned, such as a “Robo-Dance” routine that makes the robot car spin wildly. But it could also be switched into the autonomous mode by pressing one of the buttons that are still free to be assigned. This mode controls the robot car together with the ultrasonic sensor.
Article Overview ESP8266 NodeMCU Robot Car:
Building robots with the ESP8266 development board – IntroductionBuilding robots with the ESP8266 development board – Power supply
Building robots with the ESP8266 development board – Components
Building robots with the ESP8266 development board – chassis
Building robots with the ESP8266 development board – Wiring Part 1
Building robots with the ESP8266 development board – Wiring Part 2
Building robots with the ESP8266 development board – Setting up the Arduino development environment
Building robots with the ESP8266 development board – Ultrasonic sensor and motor control
Building robots with the ESP8266 development board – WIFI remote control
Building robots with the ESP8266 development board – servo motor control
Building robots with the ESP8266 development board – OLED display
Building robots with the ESP8266 development board – Magnetometer
Building robots with the ESP8266 development board – GPS receiver introduction
Article Outlook:
Building robots with the ESP8266 development board - GyroscopeBuilding robots with the ESP8266 development board - GPS waypoints
Building robots with the ESP8266 development board - Solar cell


Recent Comments