


This article is divided into three sections. First, two programs are presented to check the functionality of the installed components. The first program tests if the ultrasonic sensor works and outputs the measured distance. The second program checks if the motors rotate at all and if so in the right direction. The third program then combines the first two programs into a fully-fledged control of the robot car so that it drives independently through the apartment.
Example program 1 – Ultrasonic sensor HC-SR04
With this small program it is possible to check if the ultrasonic sensor is working. So if the sensor is connected correctly, the appropriate libraries are installed and the sensor itself is not defective. Simply copy the program into the Arduino development environment into an empty program or sketch and transfer it to the NordeMCU.
The program is available for download here: esp8266 nodemcu test HC-SR04 program
Transfer and test program
Transferring the small program to the NodeMCU is very easy. To do so, press the button with the arrow pointing to the right in the upper left corner of the menu. You should now start programming the ESP8266 chip. The current status can be seen in the small console where the corresponding outputs are shown.
After the program is transferred, the distance measurement is displayed in the serial monitor window. This serial monitor can be accessed via the menu “Tools” and then click on “Serial Monitor”. Here again it is important to select the appropriate COM port and the correct speed of 9600.
The output should now look like the following picture in the monitor.
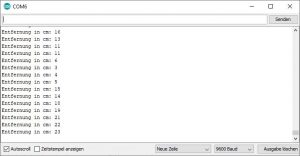
Arduino IDE HC-SR04 Programm serieller Monitor
If the transfer to the NodeMCU has worked and the display of the distance measurement in the serial monitor shows suitable values then the first program is now ready.
Example program 2 – motor control
This program now combines the PCA9685 servo controller and the L298N motor driver. It is used to make the motors turn with the wheels at all. But it also serves the purpose of determining whether the motors are connected correctly, i.e. whether they turn in the right direction as we want them to.
Now connect the second USB cable to your laptop so that the motor driver is also supplied with power. Otherwise the motors will not rotate.
Note: If you now power the motors with a power bank, it may happen that the motors do not turn. This is because the Power Bank and the PC have a different GND level and therefore the motor driver cannot distinguish a HIGH from a LOW signal. Therefore use only one power source so that ESP8266 and PCA9685 use the same GND as the L298N motor driver. Therefore use either only the PC or only the PowerBank as a power source.
The program is written in such a way that the left motor should turn forward first. Then the left motor changes the direction of rotation. Then the left motor stops and the right motor should turn forward and then turn backward. If the motors turn in this order in the right direction then everything is wired correctly. If not, the wiring of the motors on the motor driver must be replaced depending on the error pattern.
The program is available for download here: esp8266 nodemcu test PCA9685 L298N program
With this little program it should be possible to determine if the motors are turning in the right direction and if not, to adjust the wiring. If you have already understood the program so far, you can also adjust the programming in the code and thus control the direction of rotation of the motors via software.
Main program robot car
If now the ultrasonic sensor and the motor control are working, the main program for controlling the robot car follows. With this small program the robot car can find its way through the apartment on its own at random.
In the program itself is documented which function does what. Now install the program on your ESP8266 NodeMCU and connect the ESP and the motor driver to the PowerBank of your robot car. Now the car is free and can start immediately in your home.
The program is available for download here: esp8266 nodemcu robot control program
Video Robot Car
In the small video you can see the robot car driving independently through the apartment. It is easy to see how the random principle decides in which direction it turns and for how long it turns in that direction. As a result it drives wildly through the apartment.

Summary
The ultrasonic sensor measures the distance in centimeters to an object in front of the robot car and the engines turn. The test program for the motors has made it clear whether the motors are connected correctly and are turning in the right direction. This has already been a great success and the next article will be about sending the robot car on a long journey through the house alone. If everything went well, the robot car will now drive through the apartment autonomously. Now it is possible to adjust in the program code e.g. the minimum distance when the robot car should turn or drive backwards. Just work through the example program and get familiar with the If / Else queries and distances.
Article Overview ESP8266 NodeMCU Robot Car:
Building robots with the ESP8266 development board – IntroductionBuilding robots with the ESP8266 development board – Power supply
Building robots with the ESP8266 development board – Components
Building robots with the ESP8266 development board – chassis
Building robots with the ESP8266 development board – Wiring Part 1
Building robots with the ESP8266 development board – Wiring Part 2
Building robots with the ESP8266 development board – Setting up the Arduino development environment
Building robots with the ESP8266 development board – Ultrasonic sensor and motor control
Building robots with the ESP8266 development board – WIFI remote control
Building robots with the ESP8266 development board – servo motor control
Building robots with the ESP8266 development board – OLED display
Building robots with the ESP8266 development board – Magnetometer
Building robots with the ESP8266 development board – GPS receiver introduction
Article Outlook:
Building robots with the ESP8266 development board - GyroscopeBuilding robots with the ESP8266 development board - GPS waypoints
Building robots with the ESP8266 development board - Solar cell


Recent Comments