


I had looked at all the components in peace and quiet and spread them out on my large desk. Since I have already installed these acrylic glass cases several times in robot cars, the construction and the procedure was nothing completely new to me. The instructions of the Duckietown project how to assemble the robot car are also very nicely described with many pictures. However, the order is not ideal. Maybe it was because of me or because of a not very clear description because I had to take off parts and add more from time to time. But however the assembling worked very well and was finished after about 2 hours.
The description how the Duckiebot and Duckietown is built is only available in English. The current instructions can always be found here: https://docs.duckietown.org/
Duckiebot assembly
I recommend to familiarize yourself with the instructions for the assembly of the Duckiebot. It doesn’t hurt to read them completely once. So you understand what has to be assembled and in which order.
For the assembly of the Duckiebot I have used the following instructions: Assembling the DB18 Duckiebot
The following picture shows the floor assembly of the chassis with the two DC gear motors. These components are assembled first.
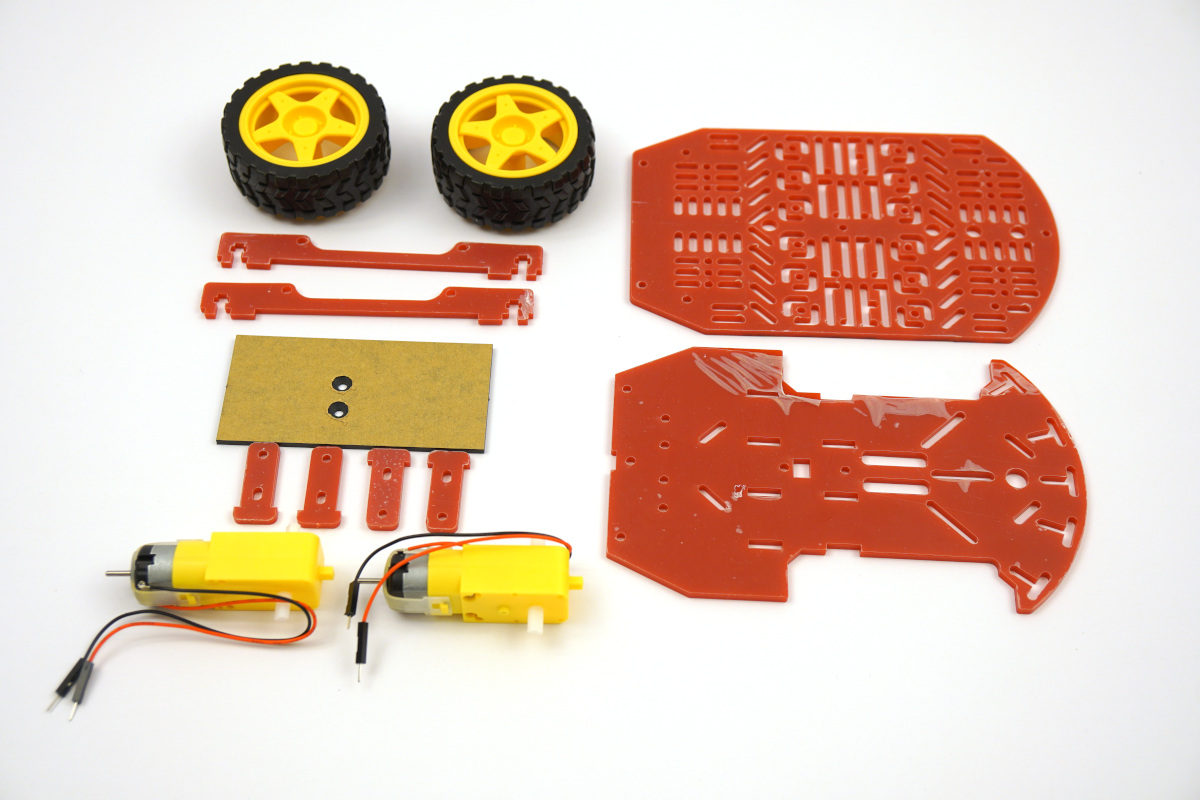
Duckietown Duckiebot chassis components
It does no harm to have a small flat metal file ready. Because the many small acrylic holders for the motors did not fit into the slots in the base plate. Here I had to widen them a bit, so I made the file wider so that the holders could slide into the slots.
Afterwards I could fix and screw the motors without any problems. The two wheels are then simply put on. The small ball wheel in the rear of the robot car is also fixed to the base plate with two long spacers.
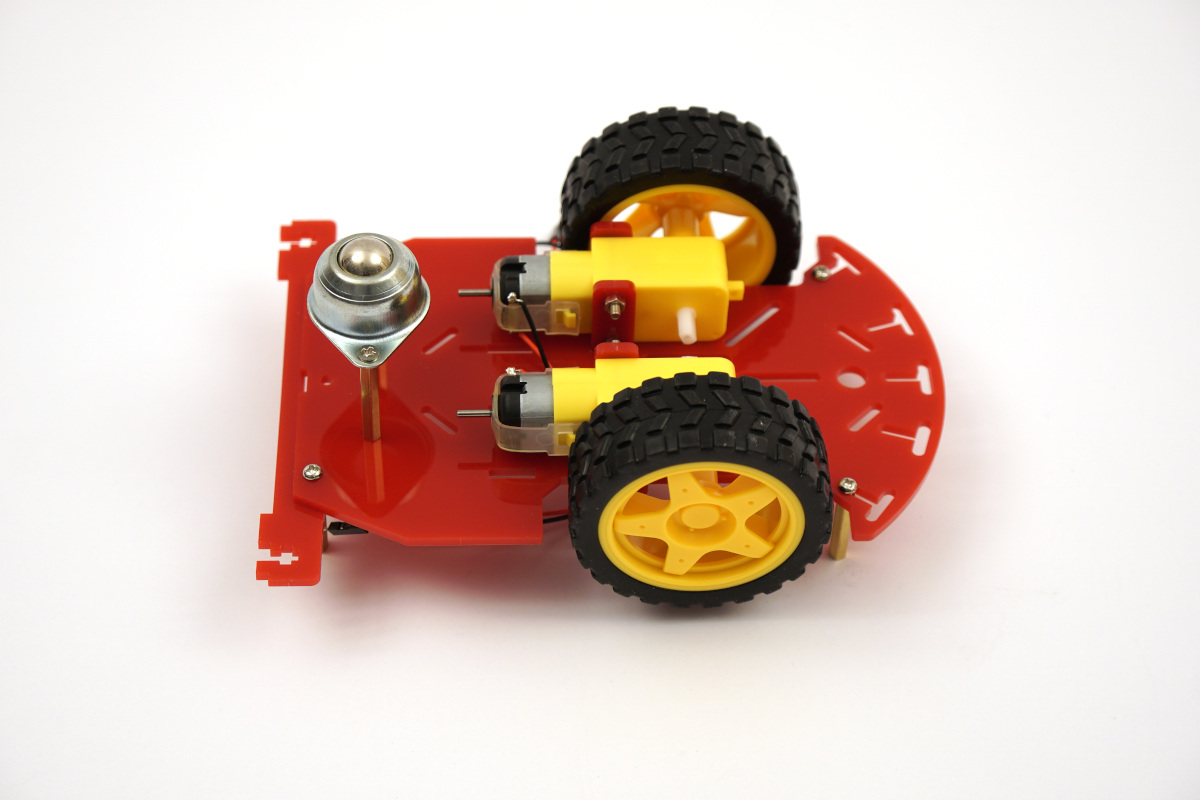
Duckietown Duckiebot chassis mounted DC motors bottom view
Once assembled, the robot car can stand on its three wheels. Then the four spacers for the second acrylic plate are mounted.
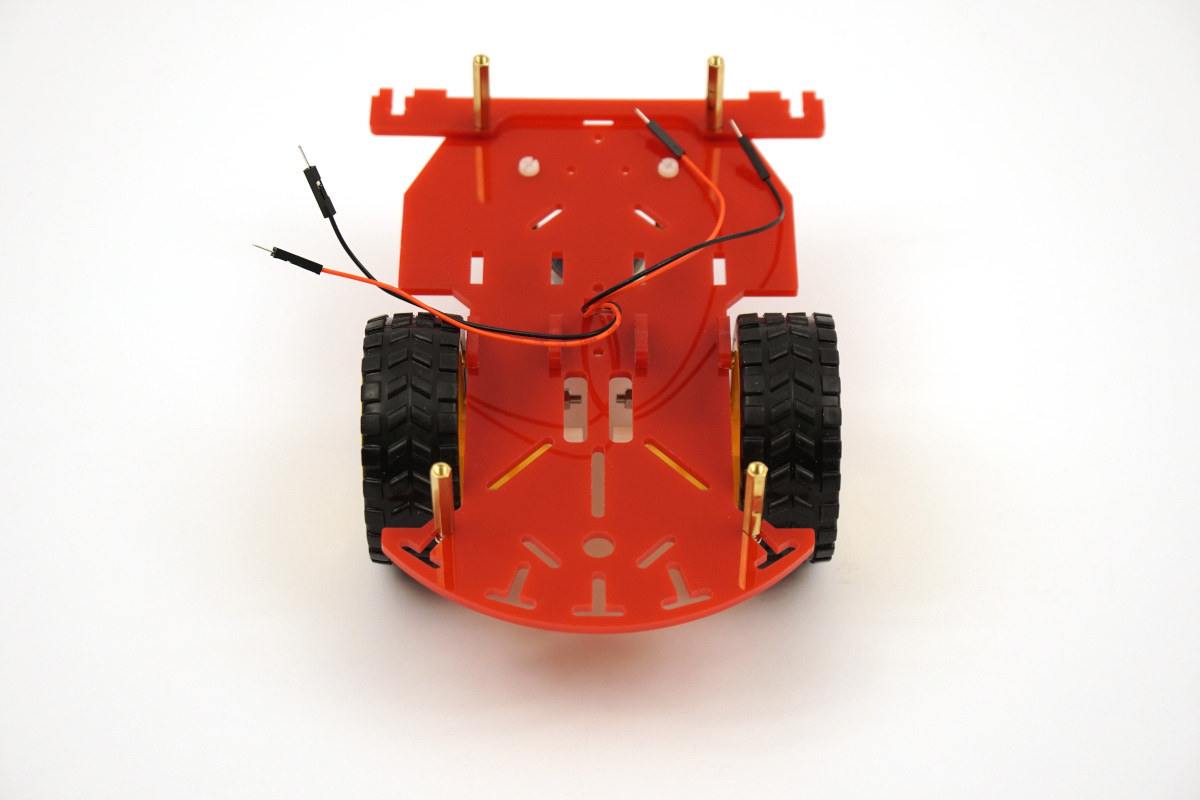
Duckietown Duckiebot chassis mounted DC motors
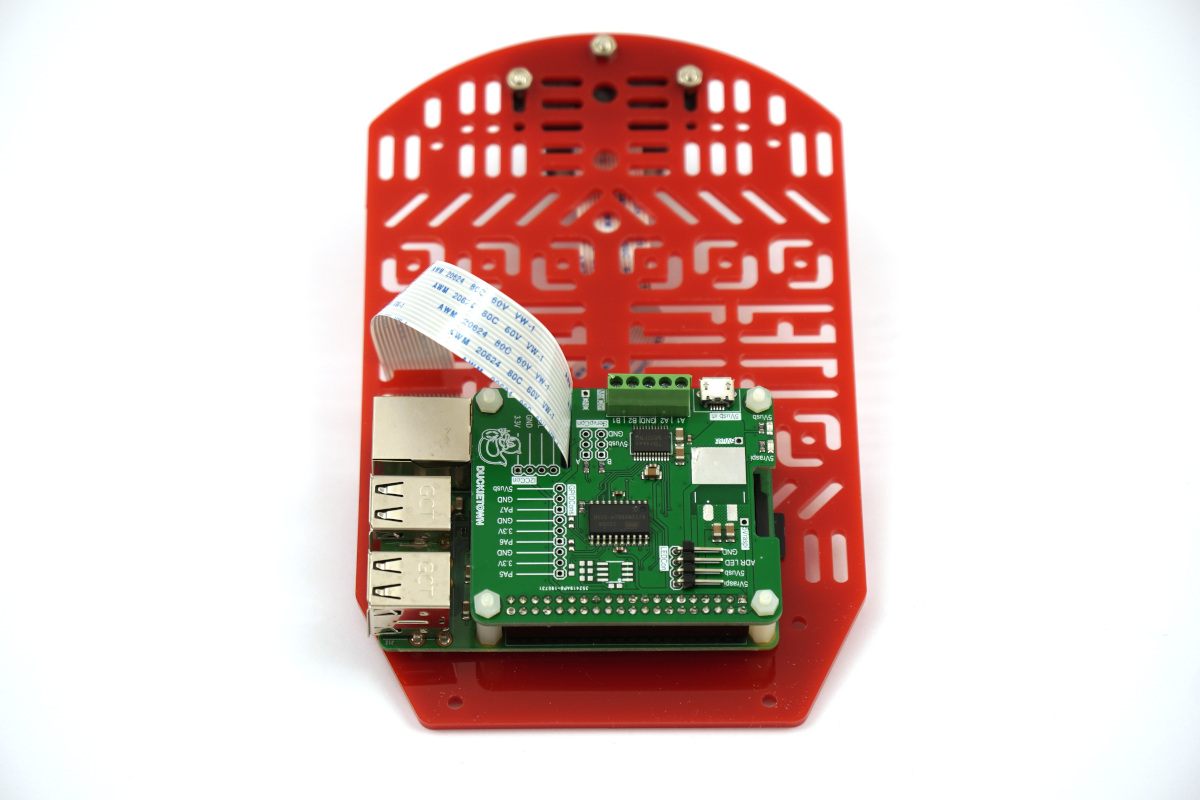
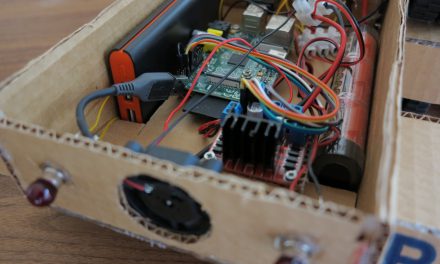
The camera is attached to the front of the robot. According to the instructions, the Raspberry Pi is to be attached between the upper and lower acrylic plate. I did not find this ideal solution, because I could hardly pull out the micro-SD card and the CSI cable for the camera did not have a nice guide.

Duckietown Duckiebot chassis camera mount
Nach der Anleitung soweit aufgebaut sieht der Duckiebot jetzt wie auf dem folgenden Bild gezeigt aus. Das CSI Kabel hatte ich wieder abzogen da es doch recht geknickt war. Dazu muss man allerdings wieder die obere Platte abschrauben da man sonst nicht an den Anschluss heran kommt um den Verschluss zu lösen.
Duckietown Duckiebot chassis mounted chassis Raspberry Pi original setup
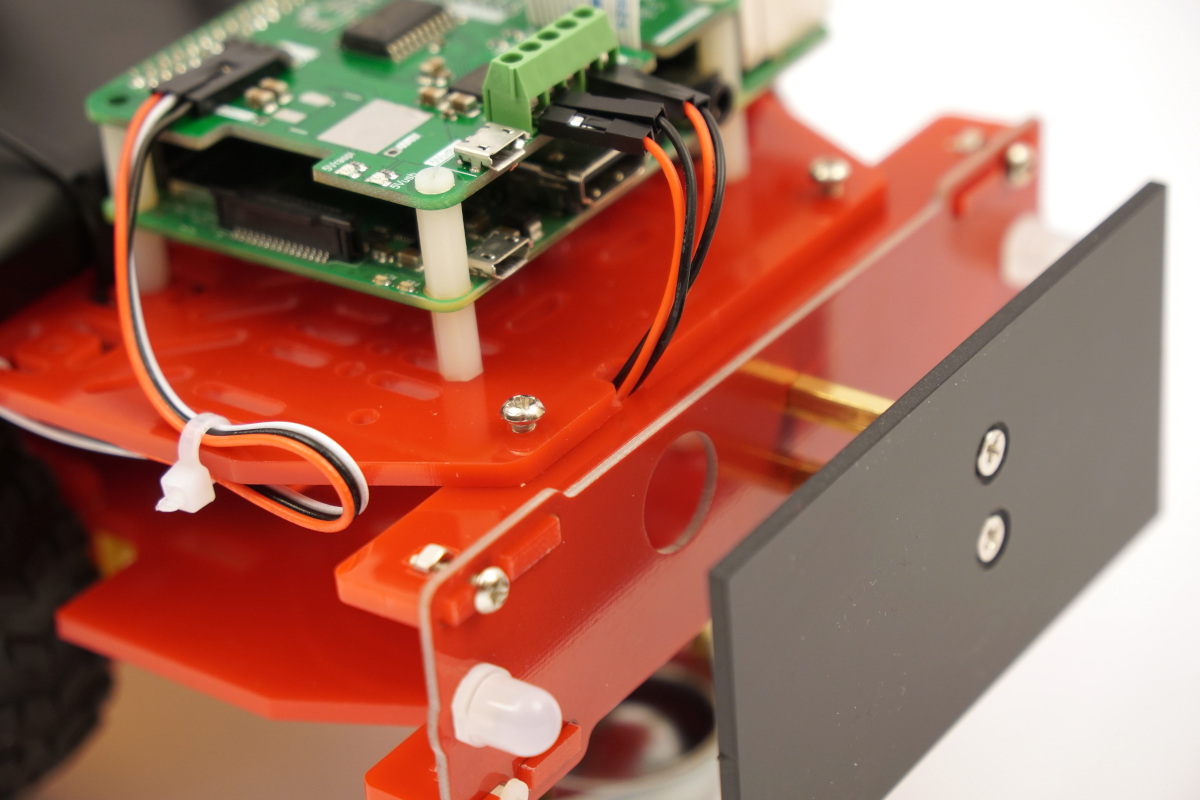
I have now tried to fix the Raspberry Pi on the top of the acrylic plate, the better to get to it. It is important that you fix the Raspberry Pi as far back as possible to the Duckiebot, because the power bench has to find a place for it.
Duckietown Duckiebot chassis Raspberry Pi mounted on top
Modified in this way, the four cables for the two motors must be inserted from bottom to top. To make this work I had to file a small groove into the acrylic glass. This small modification can be seen well on the following picture.
Duckietown Duckiebot ready to rear view
With the power bank and ready assembled, the Duckiebot now looks like this. The LED lights shine brightly directly after switching on. I have not yet installed any software on the SD card.
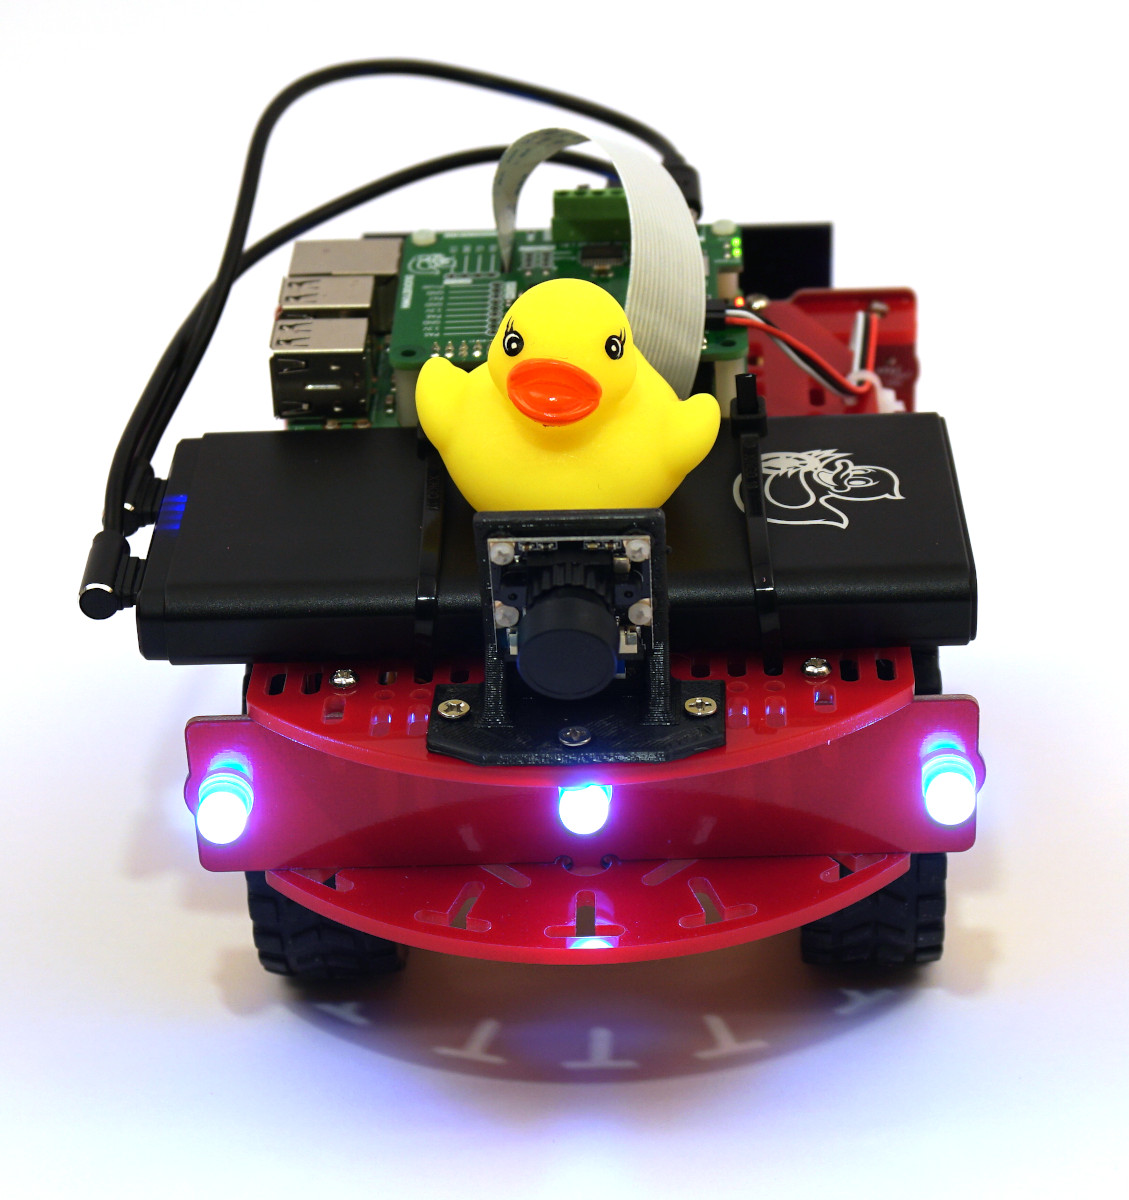
Duckietown Duckiebot ready to run
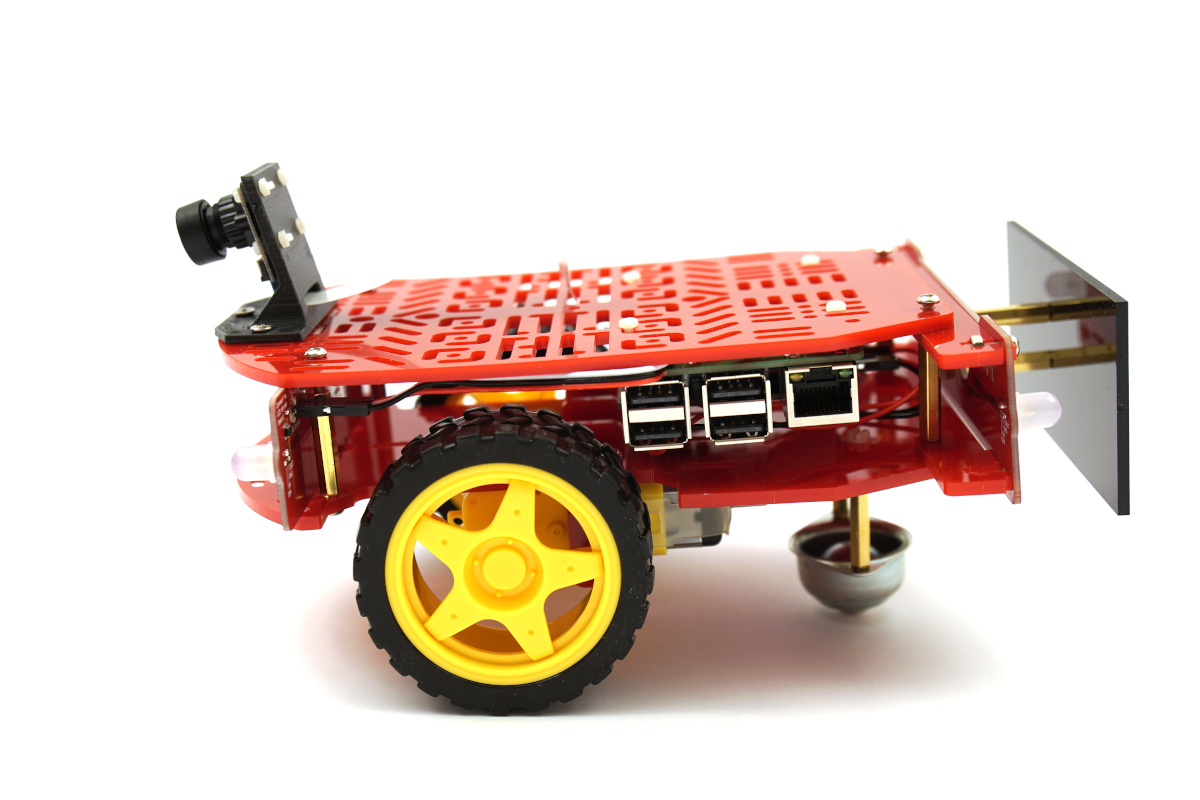
Here is a picture of the Duckiebot from the side.
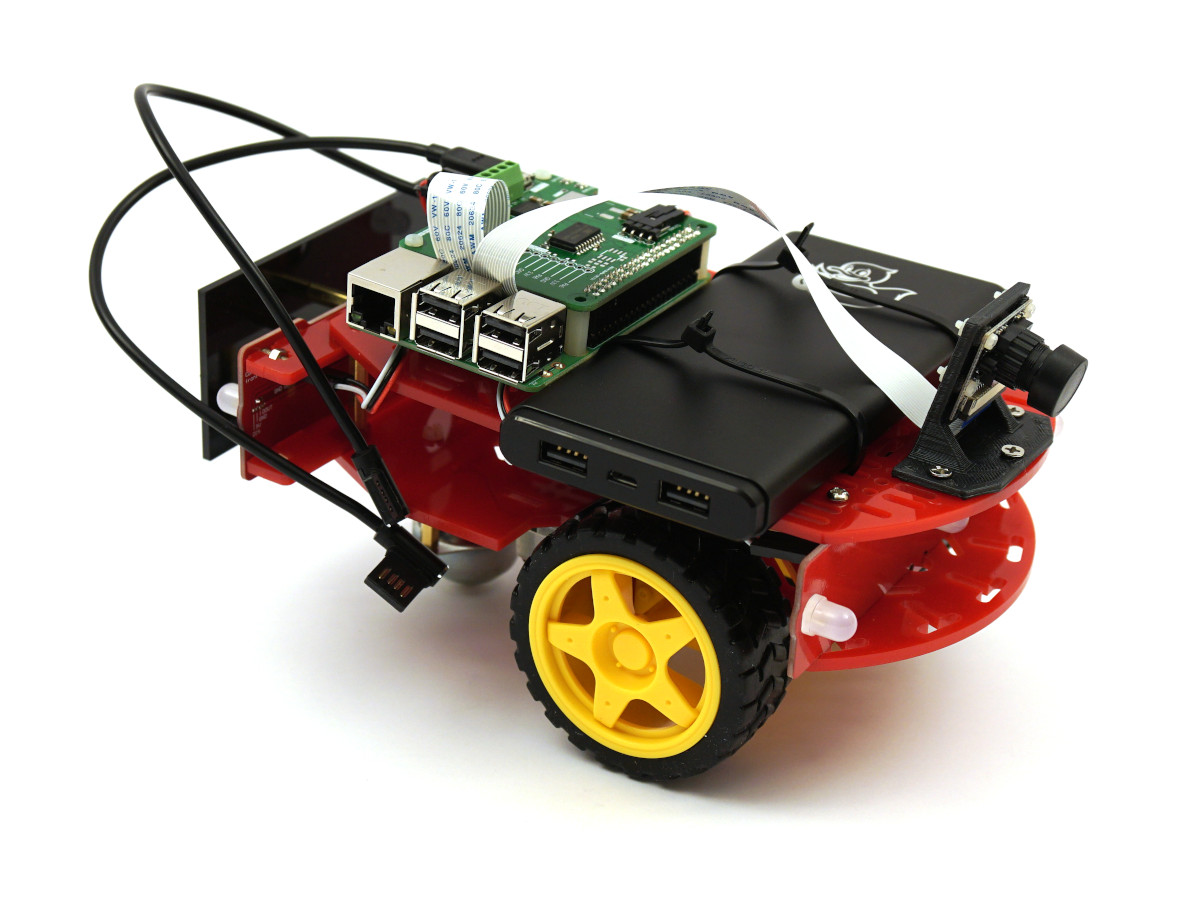
Duckietown Duckiebot ready to run side view
Summary
The assembly of the Duckiebot worked very well and all parts needed were included. Also the small screwdriver has proved itself. The instructions are okay, even if not ideal. But as already written it might have been my fault. With the modification to mount the Raspberry Pi on top of the Duckiebot I hope to get better access to the connections. Also I can simply plug the micro SD card in and out.
The following picture still shows the signs and traffic signs that are attached to the Duckiebot.

Duckietown Duckiebot ready to run with all components


Recent Comments