


Last year I stated with the disc box robot. The brain of the bot is a Raspberry Pi 3 Model B with Raspbian Jessie. The mecanum-car uses mecanum wheels to drive around which are very special wheels. With the mecanum wheels the robot is able to strafe – move from side to side. Each wheel needs to be controlled separately to control the moving’s of the bot. The mecanum bot uses four DC gear motors to spin the wheels. For controlling the four DC motors I installed two motor drivers. I am using two L298 H-bridges to control the four DC motor separately from each other.

Raspberry Pi robot with mecanum wheels front
This was enough theory on how to deal with a bot with mecanum wheels. The video below shows the robot driving around in my office the first time.
This video shows the bot driving around in my office.

The next picture shows the robot from inside with the Raspberry Pi, the two motor drivers, a step-down converter and a Raspberry Pi camera.
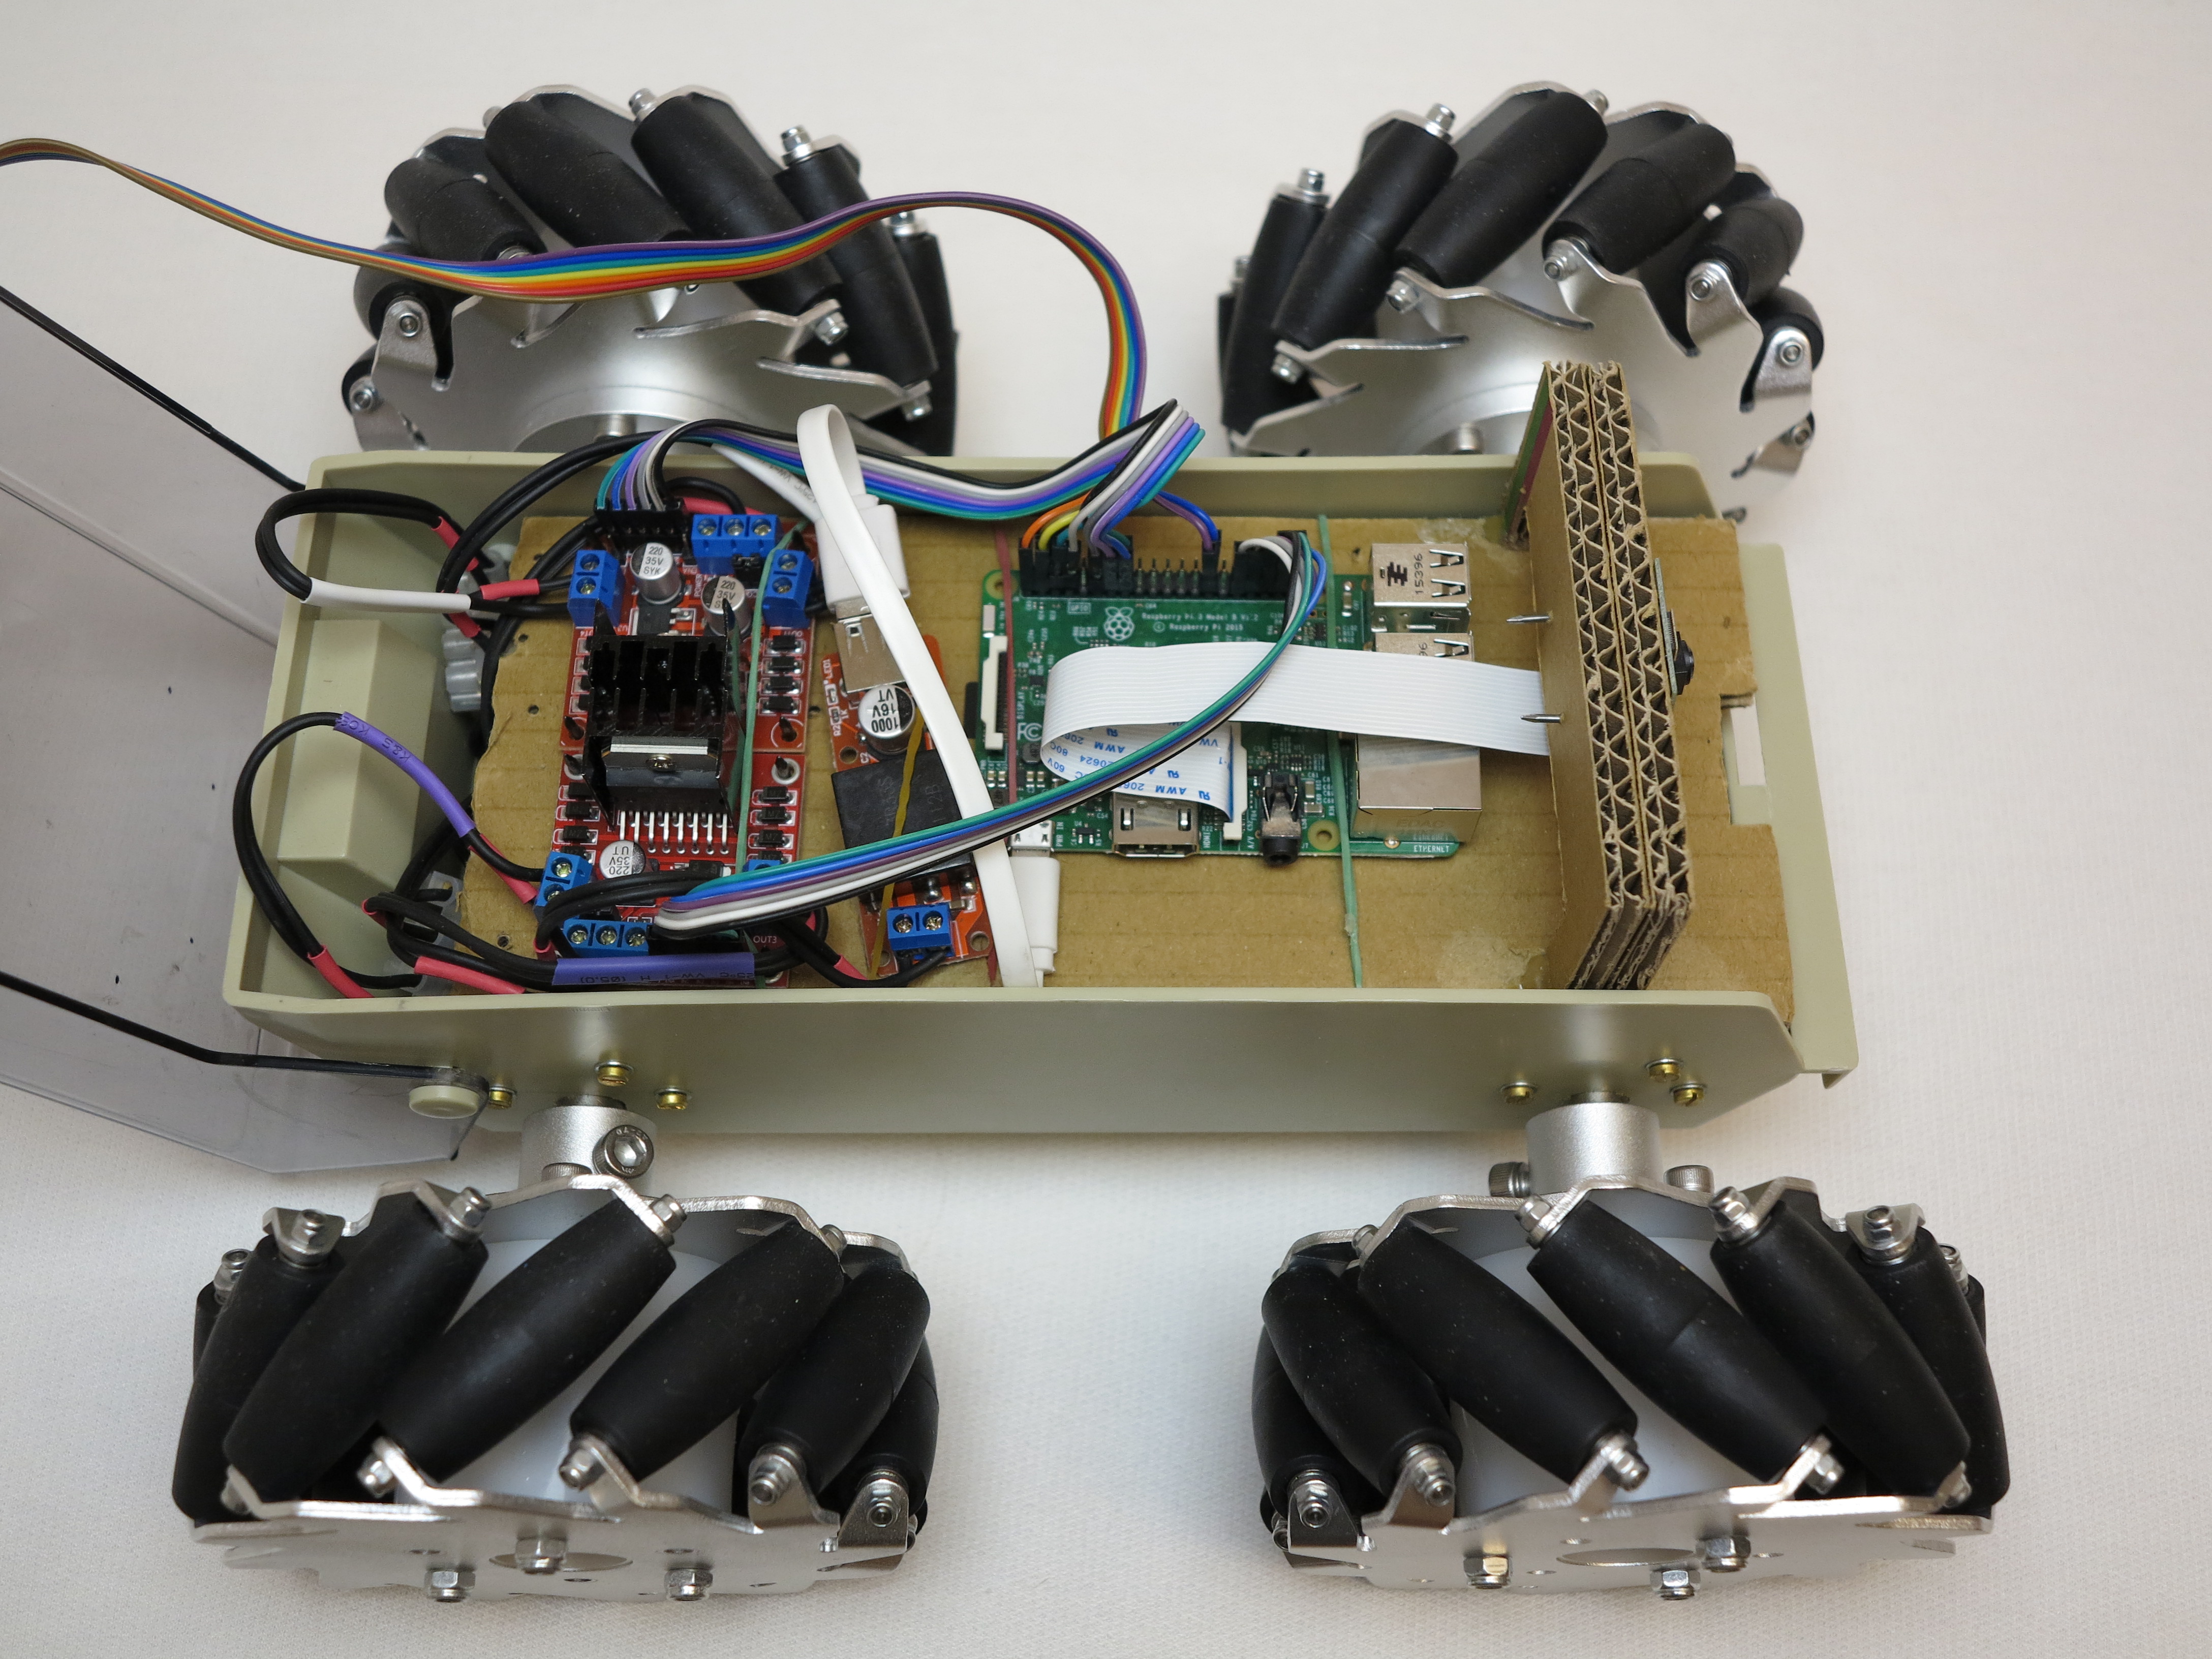
Raspberry Pi robot with mecanum wheels
I published a list with all the electronic components I typically use for more bots.
Raspberry Pi robot-car component list:
If I could awaken you interest how to build such a robot with a Raspberry Pi computer as central controlling unit you will find a list of components on my blog to help you. The component list is an overview of electronic components or ready to assemble kits which I used by myself and which I could recommend with good conscience. I used most of the components in my own projects and checked the functionality and compatibility with a Raspberry Pi.
This is the link to the component list: component list

ZeroBorg motor controller - robot-car components
In the back of the bot the two motor drivers are hooked up. On the right side next to the motors drivers the step-down converter is installed to supply the Raspberry Pi with 5 V. The DC motors are 12 V motors and I use two 7.2 V accus in series with 14.4 V to power the DC motors.
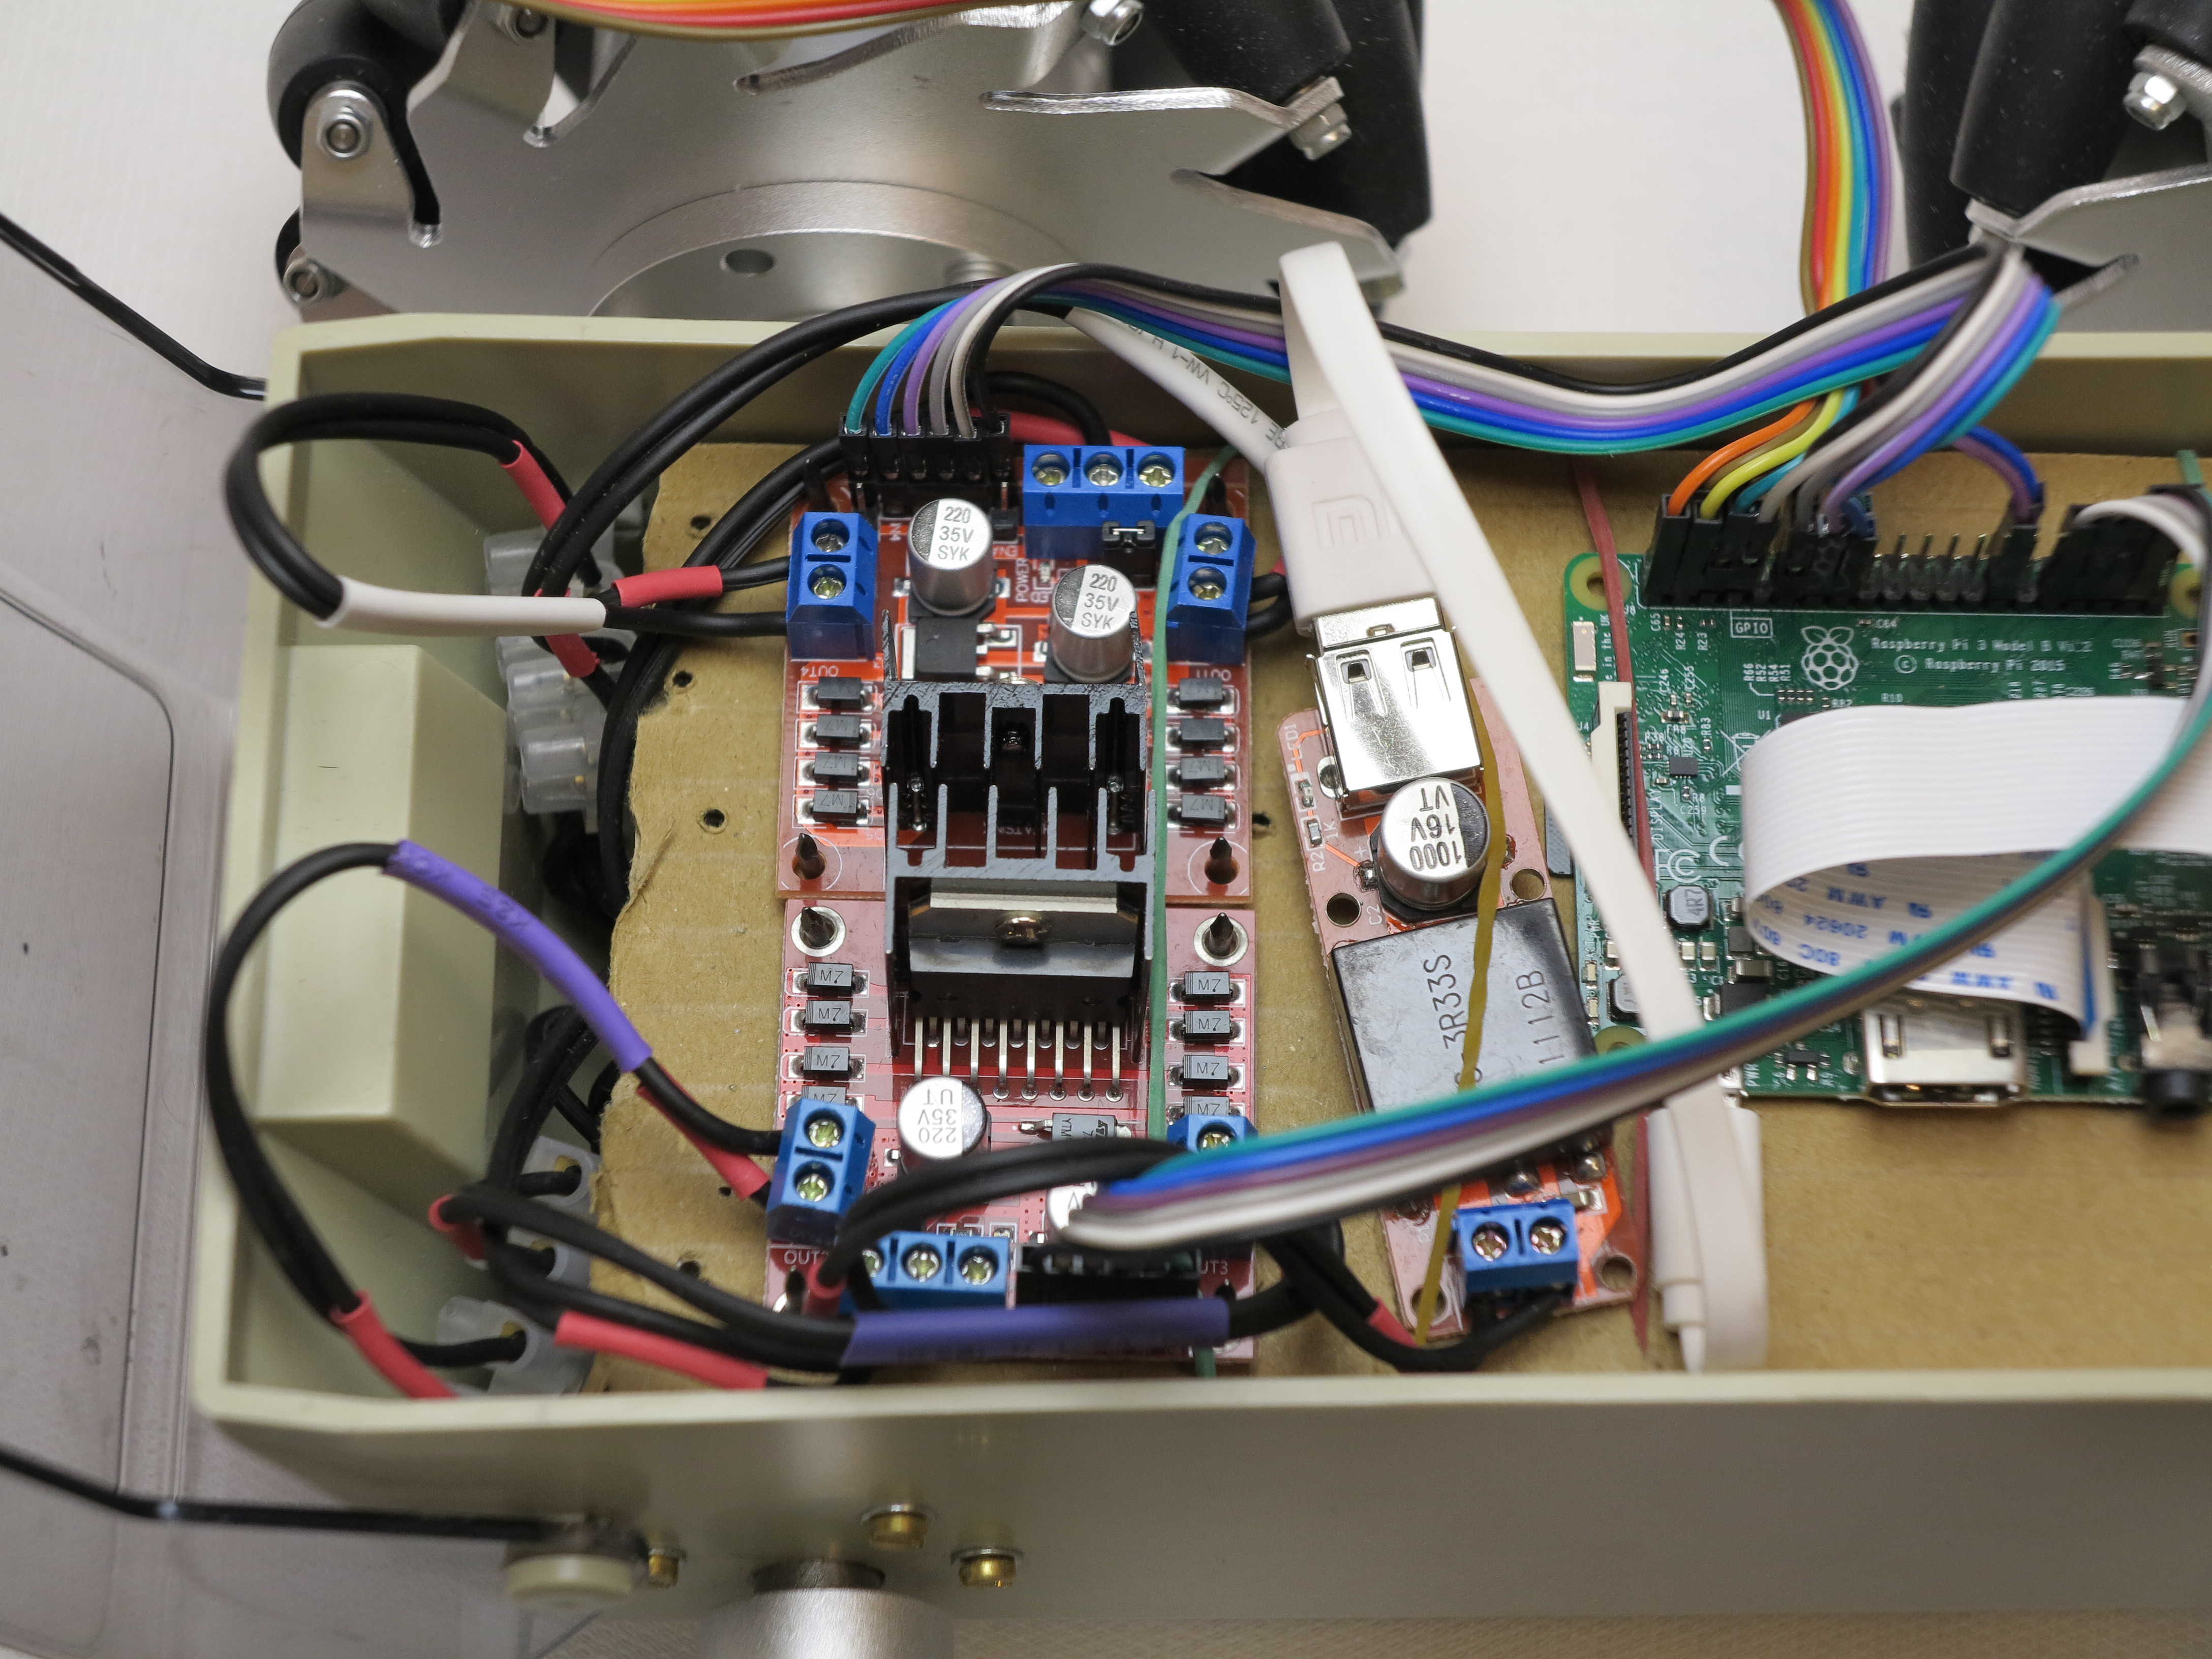
Raspberry Pi robot with mecanum wheels and two motor controllers
On top of the robot I installed a Raspberry Pi Sense HAT with different sensors. Actual I am not using any of the sensors to control the movements of the bot like I did in this tiny robot-car <link>. But I will enhance my Python programs for controlling the four DC motors and mecanum wheels in a smooth way to enable the botto drive special turns.

Raspberry Pi robot with mecanum wheels and Sense HAT

Build your own robot car with the Raspberry Pi!
Step by step to your own robot carThis book guides you in two parts through the project phases with the aim of building an individual, autonomously driving robot car. In the first part of the book you will learn the basics of robotics and the interaction of hardware, electricity and software. You build the chassis and wire the individual components - details can be found in the appropriate, richly illustrated chapters. An introduction to software installation and programming with Scratch and Python completes the first part. You do not need any previous knowledge in robotics and programming. In the second part of the book, you will familiarize yourself with the sensors required for autonomous driving. With the acquired knowledge you can individualize and further develop your robot car as you wish. The knowledge you acquire in this book will enable you to implement your own projects with the Raspberry Pi.
This book offers you that:
- Simply get into robotics with the Rasperberry Pi without prior knowledge
- Numerous illustrations, tables, circuit diagrams
- Information boxes with useful tips also for other Raspberry Pi projects
- Project code with syntax highlighting
- Two car projects: remote-controlled robot car via WLAN and self-driving car
- Hardware tips and recommendations for suitable accessories - Extensive project material as download: Raspbian image, parts list, chassis artwork and code
- Special features: Easy and robust cabling, use of high-precision time-of-flight laser distance measurement sensors, introduction to servo motors and suitable servo controllers, control via gamepad, use of an OLED display
Ingmar Stapel studied computer engineering and is currently working internationally as IT project manager and enterprise technical architect; in addition, he has been intensively involved with Raspberry Pi and robotics for years. He likes to share this knowledge with interested people from the tinkering scene at meet-ups on robotics. On his private blogs he also writes about many current technology trends.
Software: Python control program
I already developed a Python program to control one motor driver. Now I enhanced this program to deal with two motor drivers. It was not really difficult but to use the correct GPIO pins out of 12 was the challenge.
I also enhanced the Python program with which I control the movements of the bot . The program actual has no gui and you have to start it in the terminal. By pressing keys on the keyboard the robot is steered. As you see in the picture the interface informs you about the usage of the keys and the speed of each motor.
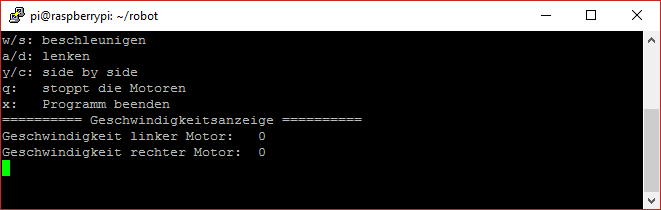
Python program to control the mecanum wheel robot
If you would like to download the program to control the two motor drivers and the interface with which you could drive the mecanum-car around both programs are available for download: python program to control the mecanum robot


Recent Comments