For the construction of the robot car or OpenBot, different components like a chassis and electronics are needed. All the components that are needed are very well available and do not cost a fortune. Many of the components are available at Ali Express, Amazon or other stores. The costs are about 80 Euro if you add batteries and the matching charger. If you order the electronics for example directly from Ali Express in China you can save a few Euros. If the components are purchased in Germany then they are a bit more expensive but also much faster delivered with warranty.
The following article divides the required components into a block of non-optional parts and a block of optional parts.
Note: As written in the introduction, I will refrain from using 3D printed parts for the time being. Because they are a price driver for me when I have to use 3D printing services.
List of required parts (not optional)
On the OpenBot page (homepage) you can find all the parts needed to build the robot car. Most of the parts I already had in my basement from other robot car projects and could use them directly for this great project.
As most of the time on my blog the following links point to the Amazon web store. These are affiliate links.
4WD Smart Car Chassis
This 4WD Smart Car Chassis I’m using since 2016 in different projects and have made very good experiences with it. Also the electronic components can be attached to it very well thanks to the many prepared holes in the two acrylic glass plates.
Arduino Nano MCU
The small Arduino Nano is needed to enable communication between the motor driver and the smartphone. It is virtually the link between the smartphone as the brain and the vehicle electronics.
Motor driver (H-Bridge)
For the control of the motors a L298N motor driver is installed. There are two models that work great. The one is a little bit smaller and has no LEDs to show the switching state and the other one is a little bit bigger but has LEDs to show clearly how the motors are driven. I list both here and both work for this project.
This model has the LEDs built in:
This model does not have the LEDs build in:
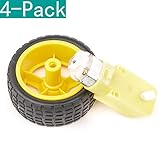
Gear motor
The yellow gear motors are grateful and can be operated with a voltage of 6V to approx. 11V. Also these motors can be easily mounted in the acrylic glass chassis. I have certainly already installed 30 of these motors and am really satisfied with them.
Two-core stranded wire
In order to connect the motors to the motor driver, a two-core cable with one strand is required.
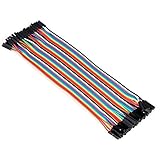
Jumper wires
Female-to-female jumper cables are required for the wiring of the electronics. With these you can connect the individual components like the motor driver to the Arduino by simply plugging them in.
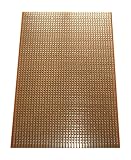
Stripe raster board 2.54
Such a breadboard is very advantageous to realize small power distributors for 5V in the robot car. This makes it easier to supply power to components such as the ultrasonic sensor.
Pin header
This pin header fits directly into the stripe grid board and can be soldered there directly on the back side.
USB OTG cable
The USB OTG cable is required to connect the Arduino Nano to the smartphone.
Note: Please make sure that the USB OTG cable fits your smartphone (USB-C / micro-USB) and the Arduino Nano.
My experience has shown that at the end of this project you will have different USB OTG cables depending on your smartphone selection.
Summary
In this first part of the description of the necessary components, the non-optional components were discussed. With these parts a robot car can be built up ready to use. The second part of the component description deals with the power supply and optional components such as switches and LEDs.
Article Overview OpenBot robot cuto:
OpenBot – Your smartphone controls a robot car – IntroductionOpenBot – Your smartphone controls a robot car – needed parts part 1-2
OpenBot – Your smartphone controls a robot car – needed parts part 2-2
OpenBot – Your smartphone controls a robot car – constructing a chassis
OpenBot – Your smartphone controls a robot car – Wiring
OpenBot – Your smartphone controls a robot car – Flashing the Arduino firmware
OpenBot – Your smartphone controls a robot car – Android App and first test run
OpenBot – Your smartphone controls a robot car – Record training data
OpenBot – Your smartphone controls a robot car – Set up training environment
OpenBot – Your smartphone controls a robot car – train the neural network
OpenBot – Your smartphone controls a robot car – Setting up Android Studio and your Smartphone
OpenBot – Your smartphone controls a robot car – compile your own OpenBot Android app


Recent Comments