

After reporting on the ordering process and logistics at PCBWay in the first part, the chassis is now finished on my workbench. The crucial question for every robot builder is: Does professional printing really save time, or do I have to reach for the file and drill again? I took a very close look at the components and compared them with the 3D print from my own Bambulab printer.
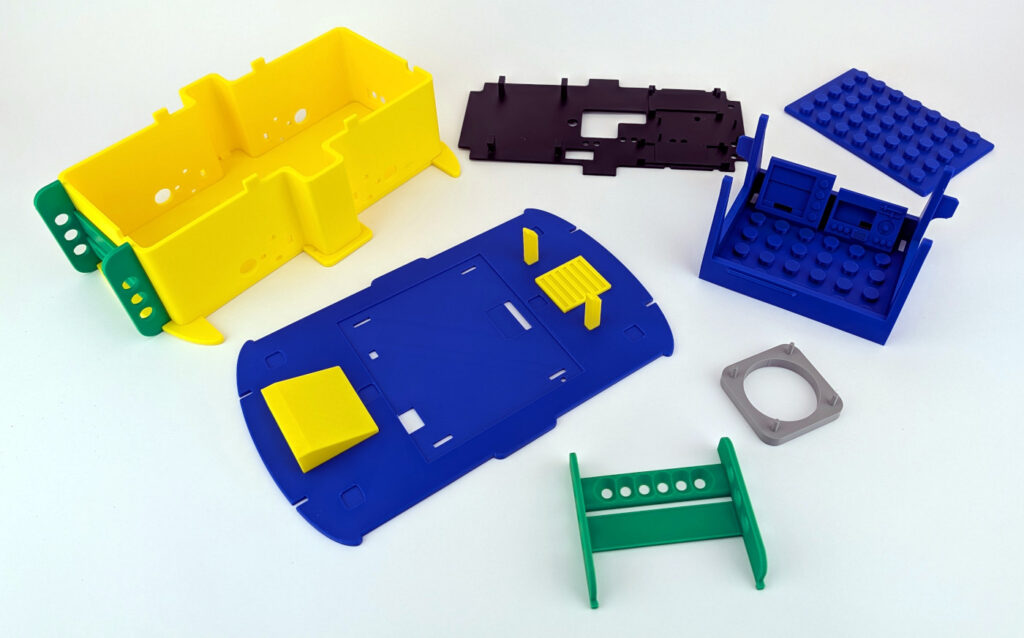
PCBWay 3D Printed Chassis
1. Surface Quality: Flawless without “Cobwebs”
One of the most common problems with home 3D printing is so-called stringing – those fine plastic threads that lie over the model like cobwebs. These are always particularly annoying when small details like the driver’s cab with its dashboard are covered by them.
-
The Result: There is no stringing at all on the yellow and blue components from PCBWay. The surfaces are extremely clean and smooth. All details are very easy to recognize and I am very satisfied.
-
No Rework: What is particularly impressive is that I didn’t have to deburr a single edge or laboriously break away support structures. The parts came out of the box virtually “ready-to-assemble”.
In the following image, in which I have not done any rework on the driver’s cab and the cockpit, you can see very clearly how clean and precise the 3D print from PCBWay is. My Bambulab X1C 3D printer did not manage it that beautifully.

PCBWay 3D Printed Chassis cockpit
2. Precision and Details
My modular chassis has some fine structures that are crucial for stability and function. Here it is important that the 3D print is very precise and not warped.
-
Sharp Edges & Details: The corners are precise, and even small indentations are cleanly worked out. The driver’s cab fits exactly onto the intended recesses and sits firmly and precisely.
-
Flat Surfaces: A critical point in 3D printing is warping (curling of the corners). Here, all surfaces are perfectly flat. This is particularly important so that the chassis does not wobble later and the motors are aligned straight in their intended mounts.
PCBWay Homepage:
- Here you will directly find the PCBWay 3D printig page: PCBWay 3D-Druck
- Here you go for the PCBWay christmas sale: PCBWay christmas 2025 sale
The following image needs to be looked at closely. The components simply fit together perfectly as I designed them. This way, all components sit in the right place and there are no open gaps or poorly fitting parts. Simply plug them together without filing or sanding and assemble the robot car.

PCBWay 3D Printed Chassis perfect fit
3. The “Marriage Test”: Motor Mount and Fitment
The moment of truth is always the installation of the hardware. If the motor mount deviates by only 0.3 mm, the screws that hold the small yellow TT motors will jam, or the screws cannot be pushed through the chassis and the motors at all.
-
Accuracy of Fit: I installed the motors directly – and they fit exactly into the intended mounts. This saves rework and, above all, looks extremely clean.
-
Direct Screwing: No redrilling or filing of the holes was necessary. The motors could be screwed tight immediately. This precision certainly saves 0.5 to 1 hour of frustrating detailed work during the assembly of the entire robot, which then also often no longer looks very nice.
Here you can see exactly what I want to show with the accuracy of fit. The holes for the M3 screws are not oval or distorted. They fit exactly and the screws can be easily pushed through the holes. This means that on the opposite side, the small TT motors also fit exactly onto the screws and mountings in the housing wall.

PCBWay 3D Printed Chassis motor mount
Conclusion on Quality:
The print quality of PCBWay is in a much higher league than what a standard home user gets out of their printer without tuning and reworking the components. For a functional robotics project where every millimeter counts, the result is absolutely convincing. Seen in this light, I can truly recommend the service from PCBWay.


Recent Comments