In this article, we will first discuss the power supply of the OpenBot and the optional components. My goal is to explain the different options so that everyone can decide for himself which way or extension he wants to use. The optional components are not absolutely necessary but in my opinion they make the handling easier and in case of the LEDs the OpenBot more of an autonomous driving robot cart.
Power supply
The power supply can be realized in different ways. The OpenBot project recommends 18650 batteries. Personally I have built robot cars with 6 x AA / Mignon batteries or with an existing PowerBank and cutted USB cable.
Note: In the following only the solution with the 3 x 18650 batteries is described, because the alternatives Power Bank or 6x AA Mignon batteries did not work properly.
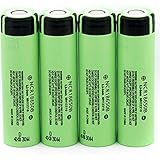
18650 Battery
Battery holder
For the three 18650 batteries a suitable holder is required. Here the following model is suitable.
Batteries
In addition, three 18650 batteries are needed to power the robot car. Since several years I have NCR18650b batteries in my possession and I am very satisfied with them. Other cheap models I bought had already malfunctioned or I could not charge them anymore.
Switch
Then a switch should be installed to disconnect the batteries from the rest of the car to prevent a continuous discharge. The best thing is to look for a small switch in the hardware store yourself if it would be cheaper than this pack here…
Voltage monitoring
For the construction of the voltage control of the 18650b batteries two resistors are needed to realize the voltage divider. A 20 kΩ and a 10kΩ resistor must be purchased.
Unfortunately I did not find any good offers on Amazon and would recommend to buy the resistors in a local electronics store like CONRAD or a box with many different resistors.
Charger
A charger is also required. I personally have been using the following model for about 3 years now. It can charge almost all types of batteries I use. Until now the charger has never caused any problems and has charged my batteries perfectly.
Conclusion: If you don’t have 18650 batteries and have to buy all components new from batteries, battery holder to charger, you will quickly lose 60,-€. Here it is worthwhile itself to look for something in the Internet which offer for one the best is.
Cardboard
Since this description does not use 3D printing, a holder for the smartphone has to be made out of cardboard. For this purpose cardboard is very well suited and an extra article in which I describe my chassis I will go into it in more detail.
List of required parts (optional)
Now the components that can be additionally installed in the project follow, such as an ultrasonic sensor for distance measurement or two sensors to measure the rotational speed of a motor on the left and a motor on the right side.
LM393 Speed Sensor Detection Speed Module for Arduino
With this LM393 sensor, the rotational speed of the motors can be measured via a photo resistor.
Two pieces are required. The following link refers to an offer for five pieces which I found good in price. Most likely the shipment will be directly from China and will take some time.
Ultrasonic Sensor
Furthermore, a HC-SR04 ultrasonic sensor can be installed in the robot car or OpenBot.
LED light on robot car rear
If the two possible orange shining LED lights are to be installed then two resistors to the two LEDs are necessary.
150 Ohm resistor
Tamiya mini plug
I always like to use the Tamiya mini plugs from the model building. With these plugs the power connections can be realized very well and I never had a loose contact. Sometimes these plugs are already available with cable.
OLED display
I have extended the program for the Arduino with a few functions and thus also with a display on an OLED display. I found this quite handy to display the most important values of the robot car.
Summary
This article with its different options was now a bit extensive but I hope understandable. Because only if you understand how exactly you want to implement your robot car or OpenBot can you get the right parts for your project. So I preferred to explain a bit more and accepted that it will be more text. The next article will be about building the robot car with its chassis.
Article Overview OpenBot robot cuto:
OpenBot – Your smartphone controls a robot car – IntroductionOpenBot – Your smartphone controls a robot car – needed parts part 1-2
OpenBot – Your smartphone controls a robot car – needed parts part 2-2
OpenBot – Your smartphone controls a robot car – constructing a chassis
OpenBot – Your smartphone controls a robot car – Wiring
OpenBot – Your smartphone controls a robot car – Flashing the Arduino firmware
OpenBot – Your smartphone controls a robot car – Android App and first test run
OpenBot – Your smartphone controls a robot car – Record training data
OpenBot – Your smartphone controls a robot car – Set up training environment
OpenBot – Your smartphone controls a robot car – train the neural network
OpenBot – Your smartphone controls a robot car – Setting up Android Studio and your Smartphone
OpenBot – Your smartphone controls a robot car – compile your own OpenBot Android app


Recent Comments