


This article describes the components I build by myself or I bought for the power train. The power train are all components the robot needs to mount the big buggy tires and to get the tires spin. The DC gear motors are very strong and that’s the reason why the power train has to be very stable. Additional to all the torque of the DC motors the payload of the robot should be high enough to mount an additional box on top of the chassis of the robot for further technical equipment.
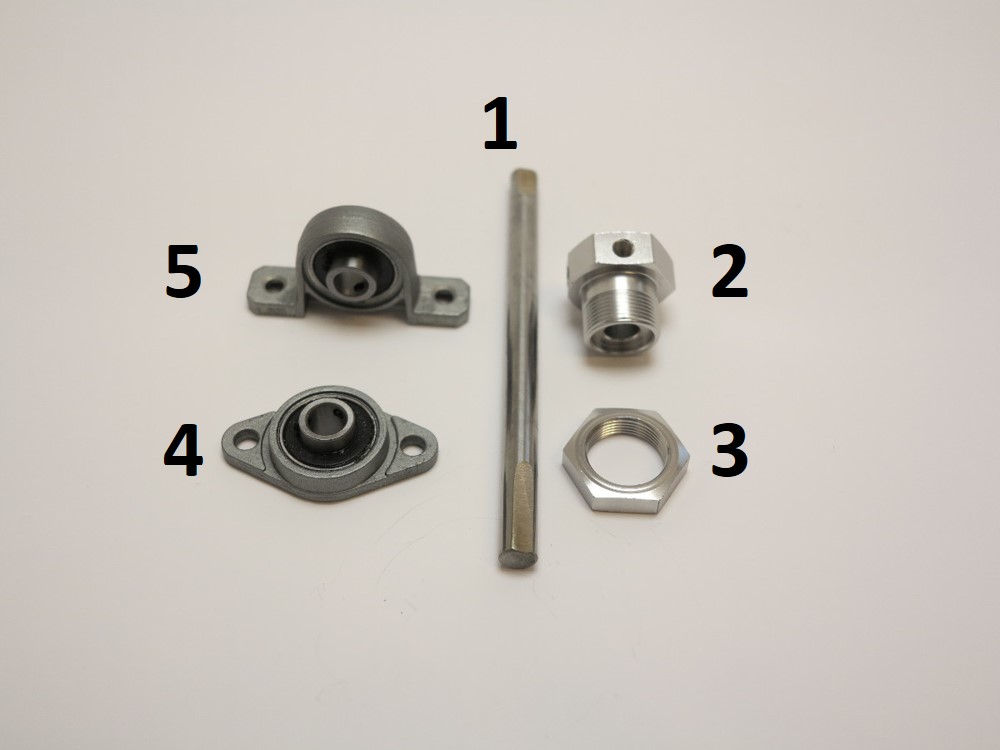
The picture below shows the main pieces of the power train I bought to get started with the design.
- Figure 1: Is an 8mm in diameter and 120mm long silver steel axel. I bought a 8mm x 500mm silver steel and cut the axle into four pieces.
- Figure 2 & 3: Are the mounts for the big buggy tiers. This is a typical mount from Reely I bought to mount tires on axles. Reely 511492C aluminium CNC hex rim hub.
- Figure 4: Is an 8mm inner diameter zinc alloy pillow block as a flange bearing. I used this type of bearings in my robot to mount the axels.
- Figure 5: Is an 8mm inner diameter pillow block with a mounted ball bearing. Because of my short 120mm axles I was not able to use this pillow block in my robot.
Big Rob power train details
The very first design of the power train looks like shown in the picture below. Because of the short axle I could only use one ball bearing in my robot. But I think this is enough.
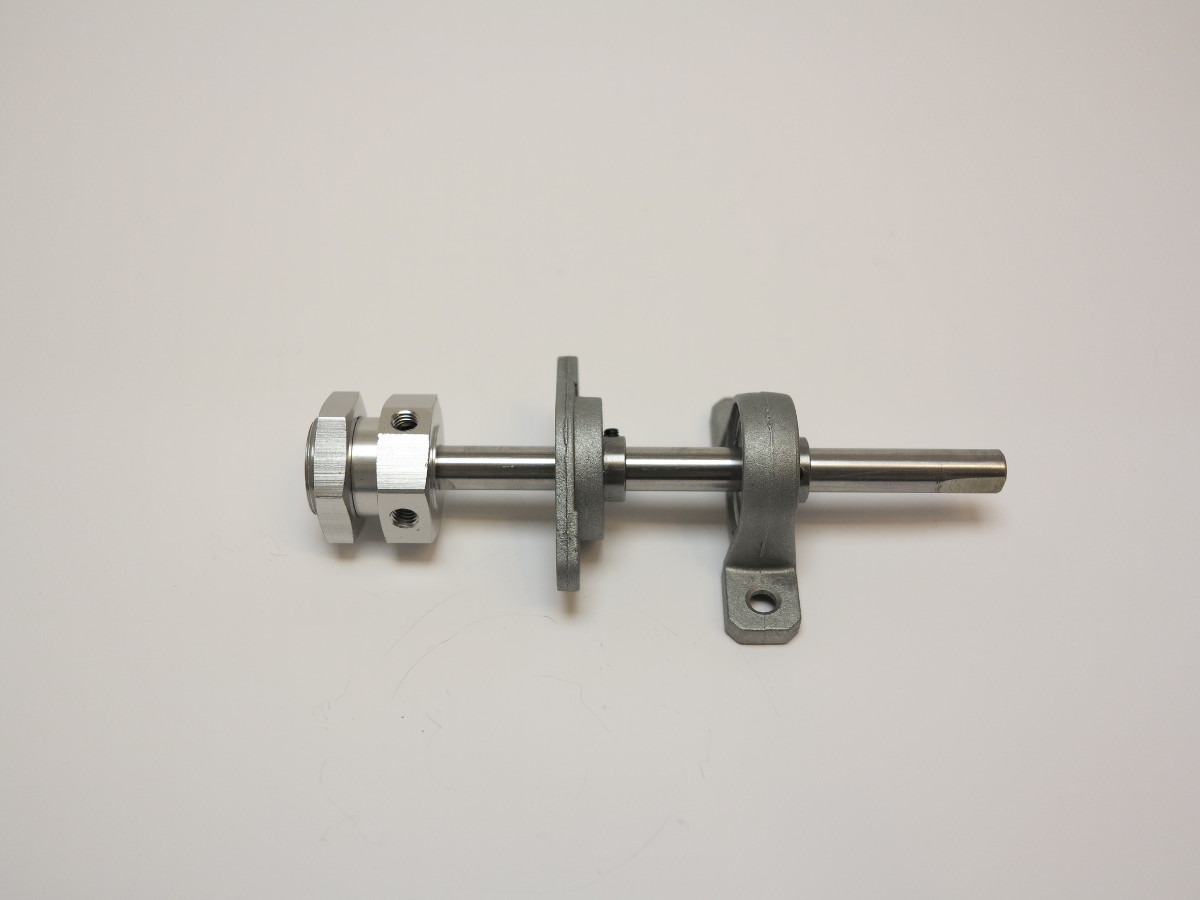
Big Rob power train details ball bearing
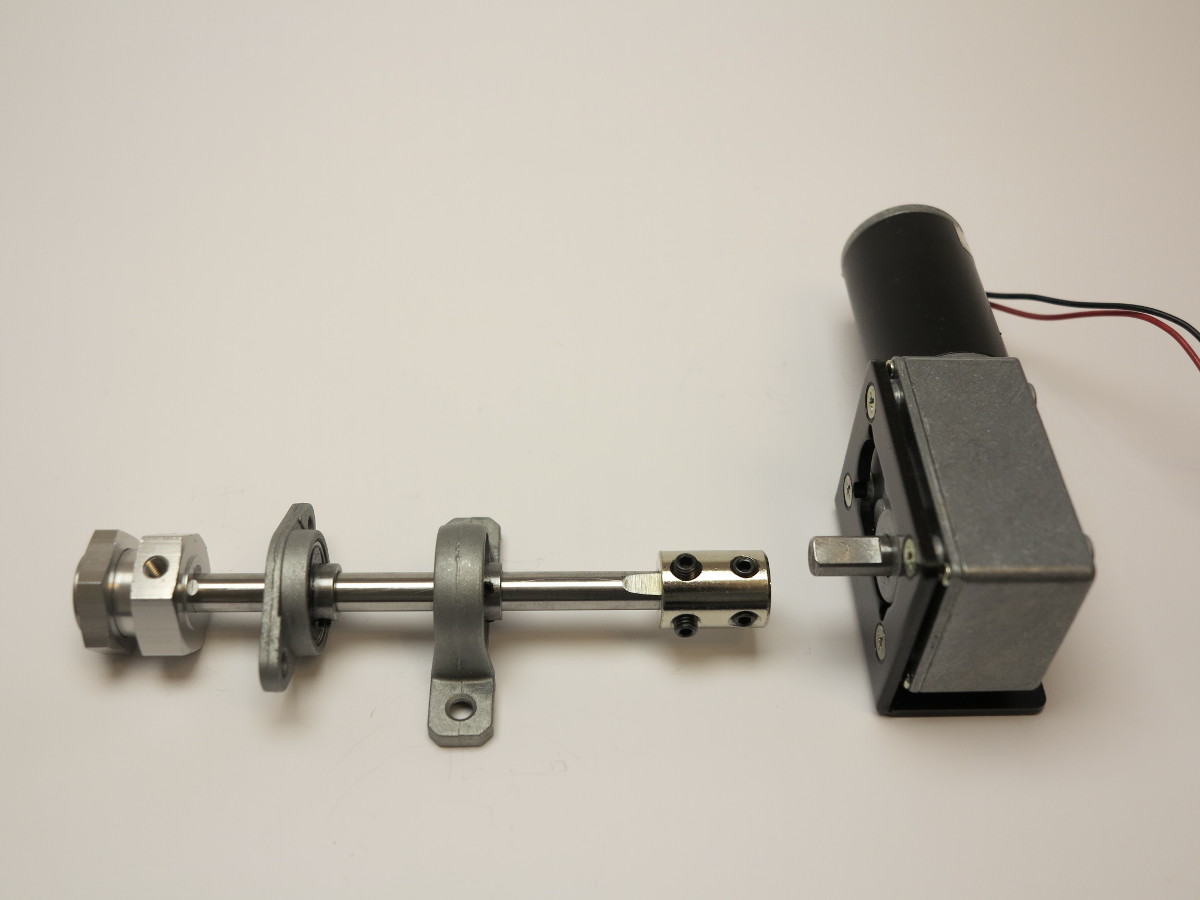
The next picture shows the power train together with the dc gear motor and an additional shaft coupling coupler to mount the axel too the dc motor drive shaft. This coupler has also an 8mm inner diameter.
The name of the DC gear motor is GW31ZY. You will find this motor with different speeds. I used a 12V version with 35 rmp and a very high torque of round about 15 kg/cm.
Big Rob power train dc gear motor
To machine the plastic of the grey box was very easy with a normal drill. I invested a few Minutes to find the best position to the mount the dc motor and to drill the holes for the power train. To mount the DC motor I used four L shape Mounting Brackets. Then I mounted the dc gear motor into the box together with the power train. Afterwards I marked the position of the ball bearing to drill the holes for the ball bearing into the box.
The next pictures shows how I mounted everything into the plastic box.

Big Rob robot 4×4 dc motors

Build your own robot car with the Raspberry Pi!
Step by step to your own robot carThis book guides you in two parts through the project phases with the aim of building an individual, autonomously driving robot car. In the first part of the book you will learn the basics of robotics and the interaction of hardware, electricity and software. You build the chassis and wire the individual components - details can be found in the appropriate, richly illustrated chapters. An introduction to software installation and programming with Scratch and Python completes the first part. You do not need any previous knowledge in robotics and programming. In the second part of the book, you will familiarize yourself with the sensors required for autonomous driving. With the acquired knowledge you can individualize and further develop your robot car as you wish. The knowledge you acquire in this book will enable you to implement your own projects with the Raspberry Pi.
This book offers you that:
- Simply get into robotics with the Rasperberry Pi without prior knowledge
- Numerous illustrations, tables, circuit diagrams
- Information boxes with useful tips also for other Raspberry Pi projects
- Project code with syntax highlighting
- Two car projects: remote-controlled robot car via WLAN and self-driving car
- Hardware tips and recommendations for suitable accessories - Extensive project material as download: Raspbian image, parts list, chassis artwork and code
- Special features: Easy and robust cabling, use of high-precision time-of-flight laser distance measurement sensors, introduction to servo motors and suitable servo controllers, control via gamepad, use of an OLED display
Ingmar Stapel studied computer engineering and is currently working internationally as IT project manager and enterprise technical architect; in addition, he has been intensively involved with Raspberry Pi and robotics for years. He likes to share this knowledge with interested people from the tinkering scene at meet-ups on robotics. On his private blogs he also writes about many current technology trends.
Component Overview
This is a list of the components I used in my robot to build the power train. I used the Amazon online shop to buy all my components because it is very easy and I could rely on the good customer service.
 (236666)")

Raspberry Pi robot-car component list:
If I could awaken you interest how to build such a robot with a Raspberry Pi computer as central controlling unit you will find a list of components on my blog to help you. The component list is an overview of electronic components or ready to assemble kits which I used by myself and which I could recommend with good conscience. I used most of the components in my own projects and checked the functionality and compatibility with a Raspberry Pi.
This is the link to the component list: component list

ZeroBorg motor controller - robot-car components
The next pictures shows the Big Rob by -12 °C driving around in the snow.
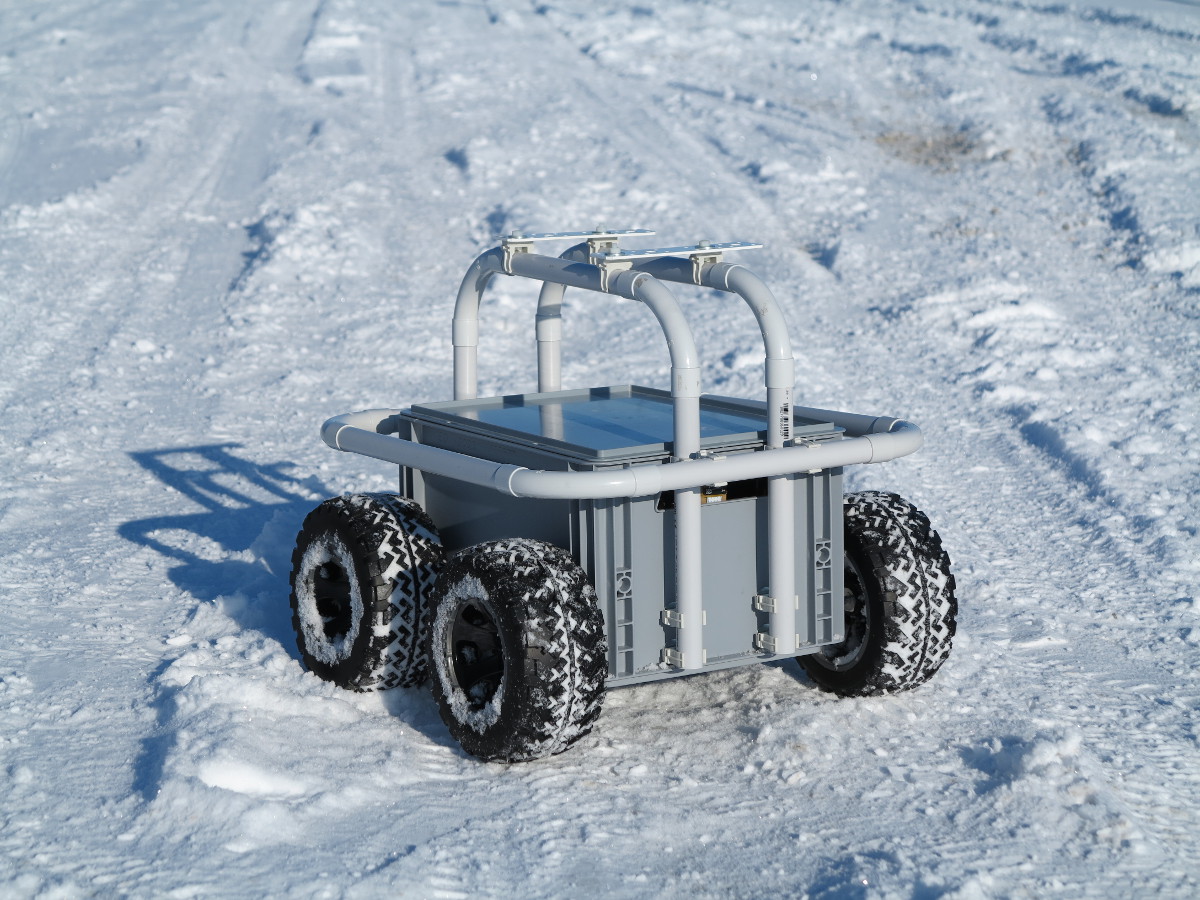
Big Rob robot – snow driving
Summary
The hardest part of this project was to find everything to build the power train. I invested many hours to search for the components and to think about the setup. With the Reely hex rim hub it was very easy to mount the big tires on an 8mm axel. The very strong 12 V DC gear motors are perfect as engines for my robot. Actual I am powering the robot with two 7.2 V power packs I switched together parallel to get 14.4 V for the DC motors.
Article list - Big Rob:
Big Rob – Raspberry Pi robotBig Rob – Raspberry Pi robot power train
Big Rob – Raspberry Pi robot motor driver BTS7960B and Python program
Big Rob – Raspberry Pi robot outdoor camera
Big Rob – Raspberry Pi robot with differential GPS
Big Rob – Raspberry Pi robot with nice teeth
Big Rob – Raspberry Pi robot Peak Power Pack power supply
Big Rob – Raspberry Pi robot videos


Recent Comments