


In the previous article you connected the ESP32-CAM module to the USB-Serial Adapter and connected the USB-Serial Adapter to your PC. In the Arduino development environment, the ESP32 module was recognized. If the ESP32-CAM module has been recognized, the sample program CameraWebServer can now be installed on the ESP32 module. With the CameraWebServer program it is then possible to transmit a live video image of the ESP32-CAM module to your PC or Smartphone via your own WIFI. However, before the ESP32 module connects to your WIFI, the access data of the WIFI to be used must be stored in the CameraWebServer program.
We will now begin with this adjustment in the CameraWebServer program. Once the access data for your local WIFI have been updated, the ESP32-CAM module should connect to your WIFI.
Now start the Arduino development environment and open the sample program CameraWebServer. You should now find it in the Arduino development environment as shown in the screenshot below.

ESP32-CAM Camera-Web-Server
When you open the program, you will see four tabs in the Arduino development environment. These tabs represent the individual subprograms of the sample program CameraWebServer. In the course of this series of articles small adjustments will be made to the individual subprograms. In the following picture the four tabs are shown and highlighted in red.
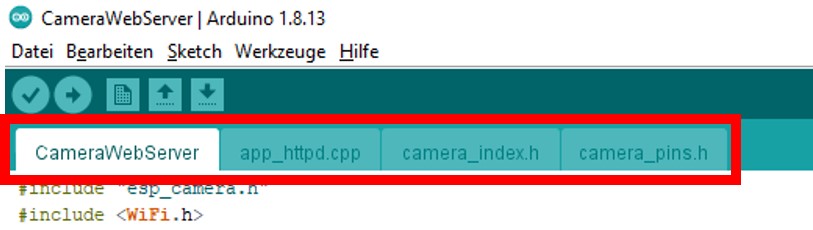
CameraWebServer tabs
Select ESP32-CAM module
First of all you have to select the appropriate ESP32-CAM module in the file CameraWebServer.ino or in the tab CameraWebServer so that the appropriate libraries can be loaded when the program is compiled. For this purpose a small change is made in the file right at the beginning. For this change a line is commented out with a # in front of it and at the beginning of line additional line the # is removed to make that line active.
The adjustment should then look as follows in the two bold lines
// Select camera model
//#define CAMERA_MODEL_WROVER_KIT
//#define CAMERA_MODEL_ESP_EYE
//#define CAMERA_MODEL_M5STACK_PSRAM
//#define CAMERA_MODEL_M5STACK_WIDE
#define CAMERA_MODEL_AI_THINKER
Update your WIFI identification
After this small adjustment, the WIFI access data are now stored in the same file CameraWebServer a few lines below. The WIFI access data must be for the WIFI to which the ESP32-CAM module is to log on.
const char* ssid = "*********";
const char* password = "*********";
If the correct SSID (SSID = the name of the WIFI) and the correct password are stored, the changes can be saved in the file CameraWebServer.ino. All necessary adjustments are done and the program can be written to the ESP32-CAM module.
Programming the ESP32-CAM module
The ESP32-CAM module is connected to the USB-Serial Adapter, which in turn is plugged into the PC. The Arduino development environment is also open, and the CameraWebServer program has been adapted so that the correct module has been selected and the W-LAN access data stored.
Now you have to select the right board in the Arduino IDE so that the program can be written to your ESP32-CAM module without errors.
Navigate to the submenu as follows: Werkzeuge -> Board -> ESP32 Arduino -> AI Thinker ESP32-CAM
The following screenshot shows the path and the selection of the right board again.
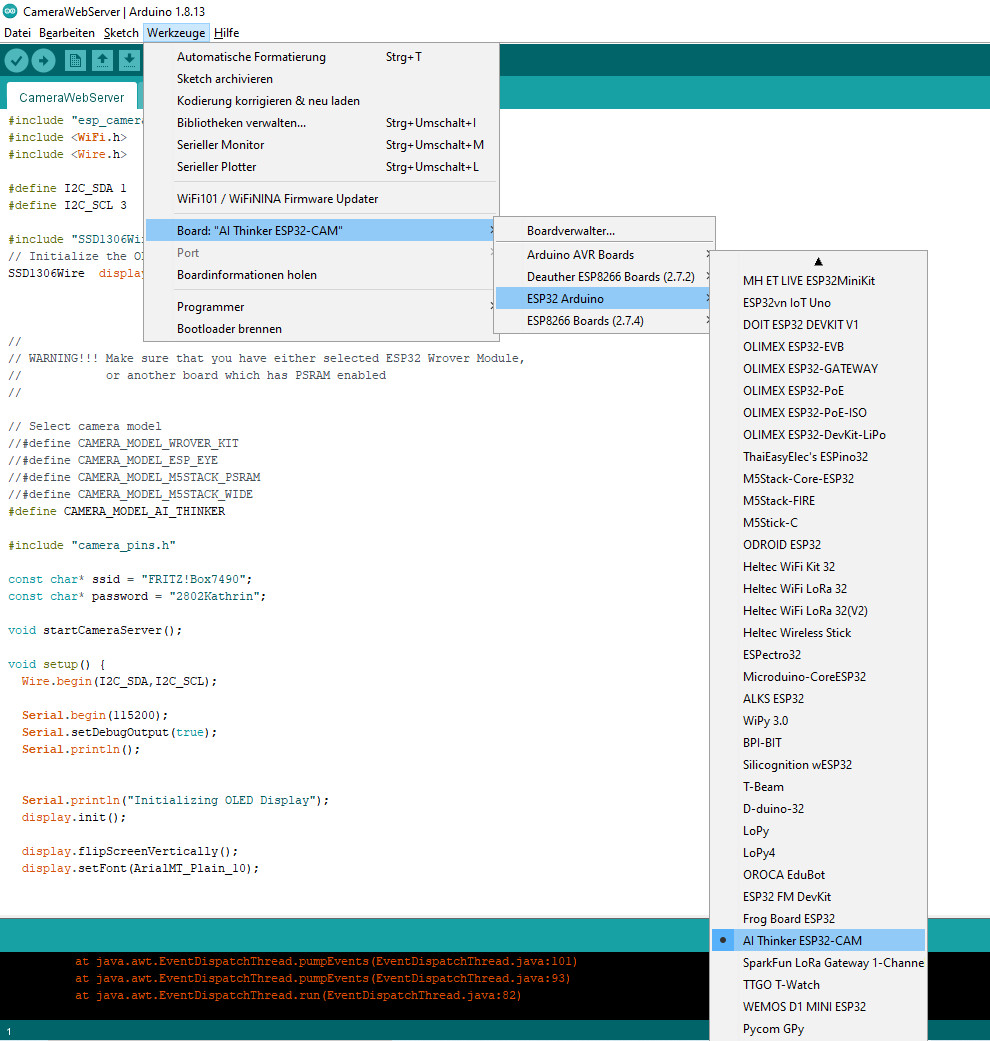
Boardverwalter AI THINKER ESP32-CAM
Now select the appropriate port with which the USB-Serial Adapter has been recognized on your PC. The Arduino development environment usually shows you the port already and you just have to select it.
The following picture shows the selection of the port.
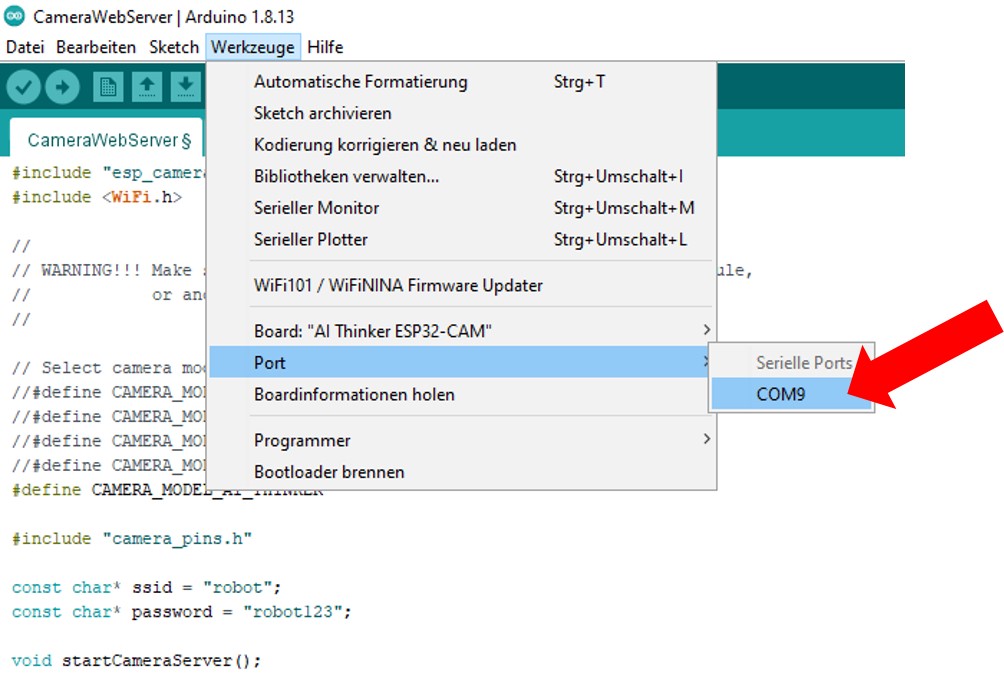
ESP32-CAM Arduino IDE Port
Now is the moment that will show if everything is wired and adjusted correctly. Now press the Upload button in the Arduino IDE and the sample program will be written to the memory of the ESP32-CAM module.
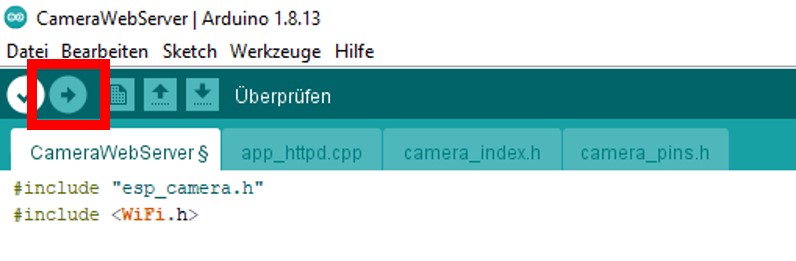
ESP32-CAM Arduino IDE Upload
If you have pressed the Upload button then compiling will take a few seconds to minutes.
You can also see the progress of the compilation in the bottom of the Arduino IDE window. Also you can see the IP address in the serial monitor when the ESP32-CAM module has connected to the WIFI. This way you don’t have to look in the router to see what IP the ESP32 has been assigned.
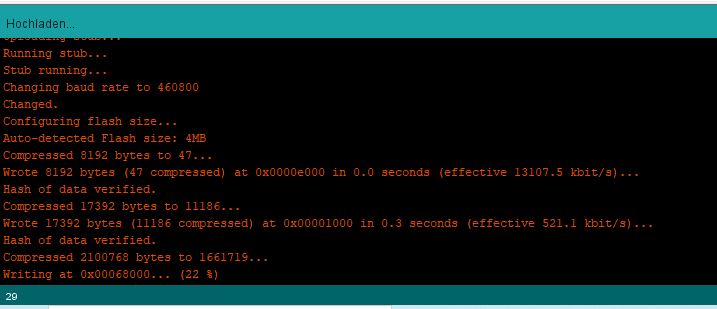
ESP32-CAM Arduino IDE Upload Status
After the upload was successful you have to remove the cable that connects pin IO0 to GND. Otherwise the ESP32 will not start up correctly.
Tip: Open the Serial Monitor of the Arduino IDE to see if your ESP32-CAM module connects to your own WIFI after uploading and rebooting. You can start the monitor via Tools -> Serial Monitor in the Arduino IDE.
Open Live Video Stream
Either you copied the IP address of the ESP32-CAM module from the Serial Monitor or you checked your router to see which IP address the module got. Now enter the IP address in your browser and you should see a web page with various configuration options. At the bottom of the page there is a button “Start Stream” which you can use to start the camera live stream.
The following picture shows the live stream that my ESP32-CAM module has transmitted.

ESP32-CAM camera live stream
From now on you should see a live stream in your browser. Now is the time to play around with the module and try out the different settings.
Summary
For really little money you now have a very simple solution to stream a live video image over your network. Of course it requires some tinkering and trying but for 5,- Euro I think it is a great project that is really fun. The next article is about activating the I2C bus and connecting an OLED display and servo controller.
Article Overview ESP32-CAM Robot Auto:
ESP32-CAM building your own robot car with live video streaming – project startESP32-CAM building your own robot car with live video streaming – Set up development environment
ESP32-CAM building your own robot car with live video streaming – USB-serial adapter wiring
ESP32-CAM building your own robot car with live video streaming – Installing the live video streaming software
ESP32-CAM building your own robot car with live video streaming – Design of the chassis
ESP32-CAM building your own robot car with live video streaming – Cabling in general
ESP32-CAM building your own robot car with live video streaming – Wiring the I²C hub
ESP32-CAM building your own robot car with live video streaming – robo car example programs
ESP32-CAM building your own robot car with live video streaming – programming the WIFI remote control
ESP32-CAM building your own robot car with live video streaming – connect external WIFI antenna


Recent Comments