


To control the L298N motor driver with the ESP32-CAM module we need the PCA9685 servo controller. The servo controller and the OLED display are connected to the I2C bus of the ESP32-CAM via the I2C hub. In the previous article we have seen how we can make the I2C bus accessible by using the two pins 1 and 3. Since we know from the previous article that the I2C bus can generally work via these two pins and the attached OLED display has given the IP address, we can continue to build the control of the robot car’s motors.
In addition the PCA9685 servo controller is now used, which is connected to the ESP32-CAM via a self-built I2C hub together with the OLED display. How to build such an I2C Hub I have already described in the following article Build your own I²C Hub.
I2C hub
Now that we have enough connection possibilities to connect our different I2C devices to the ESP32-CAM, we use the self-built I2C Hub.
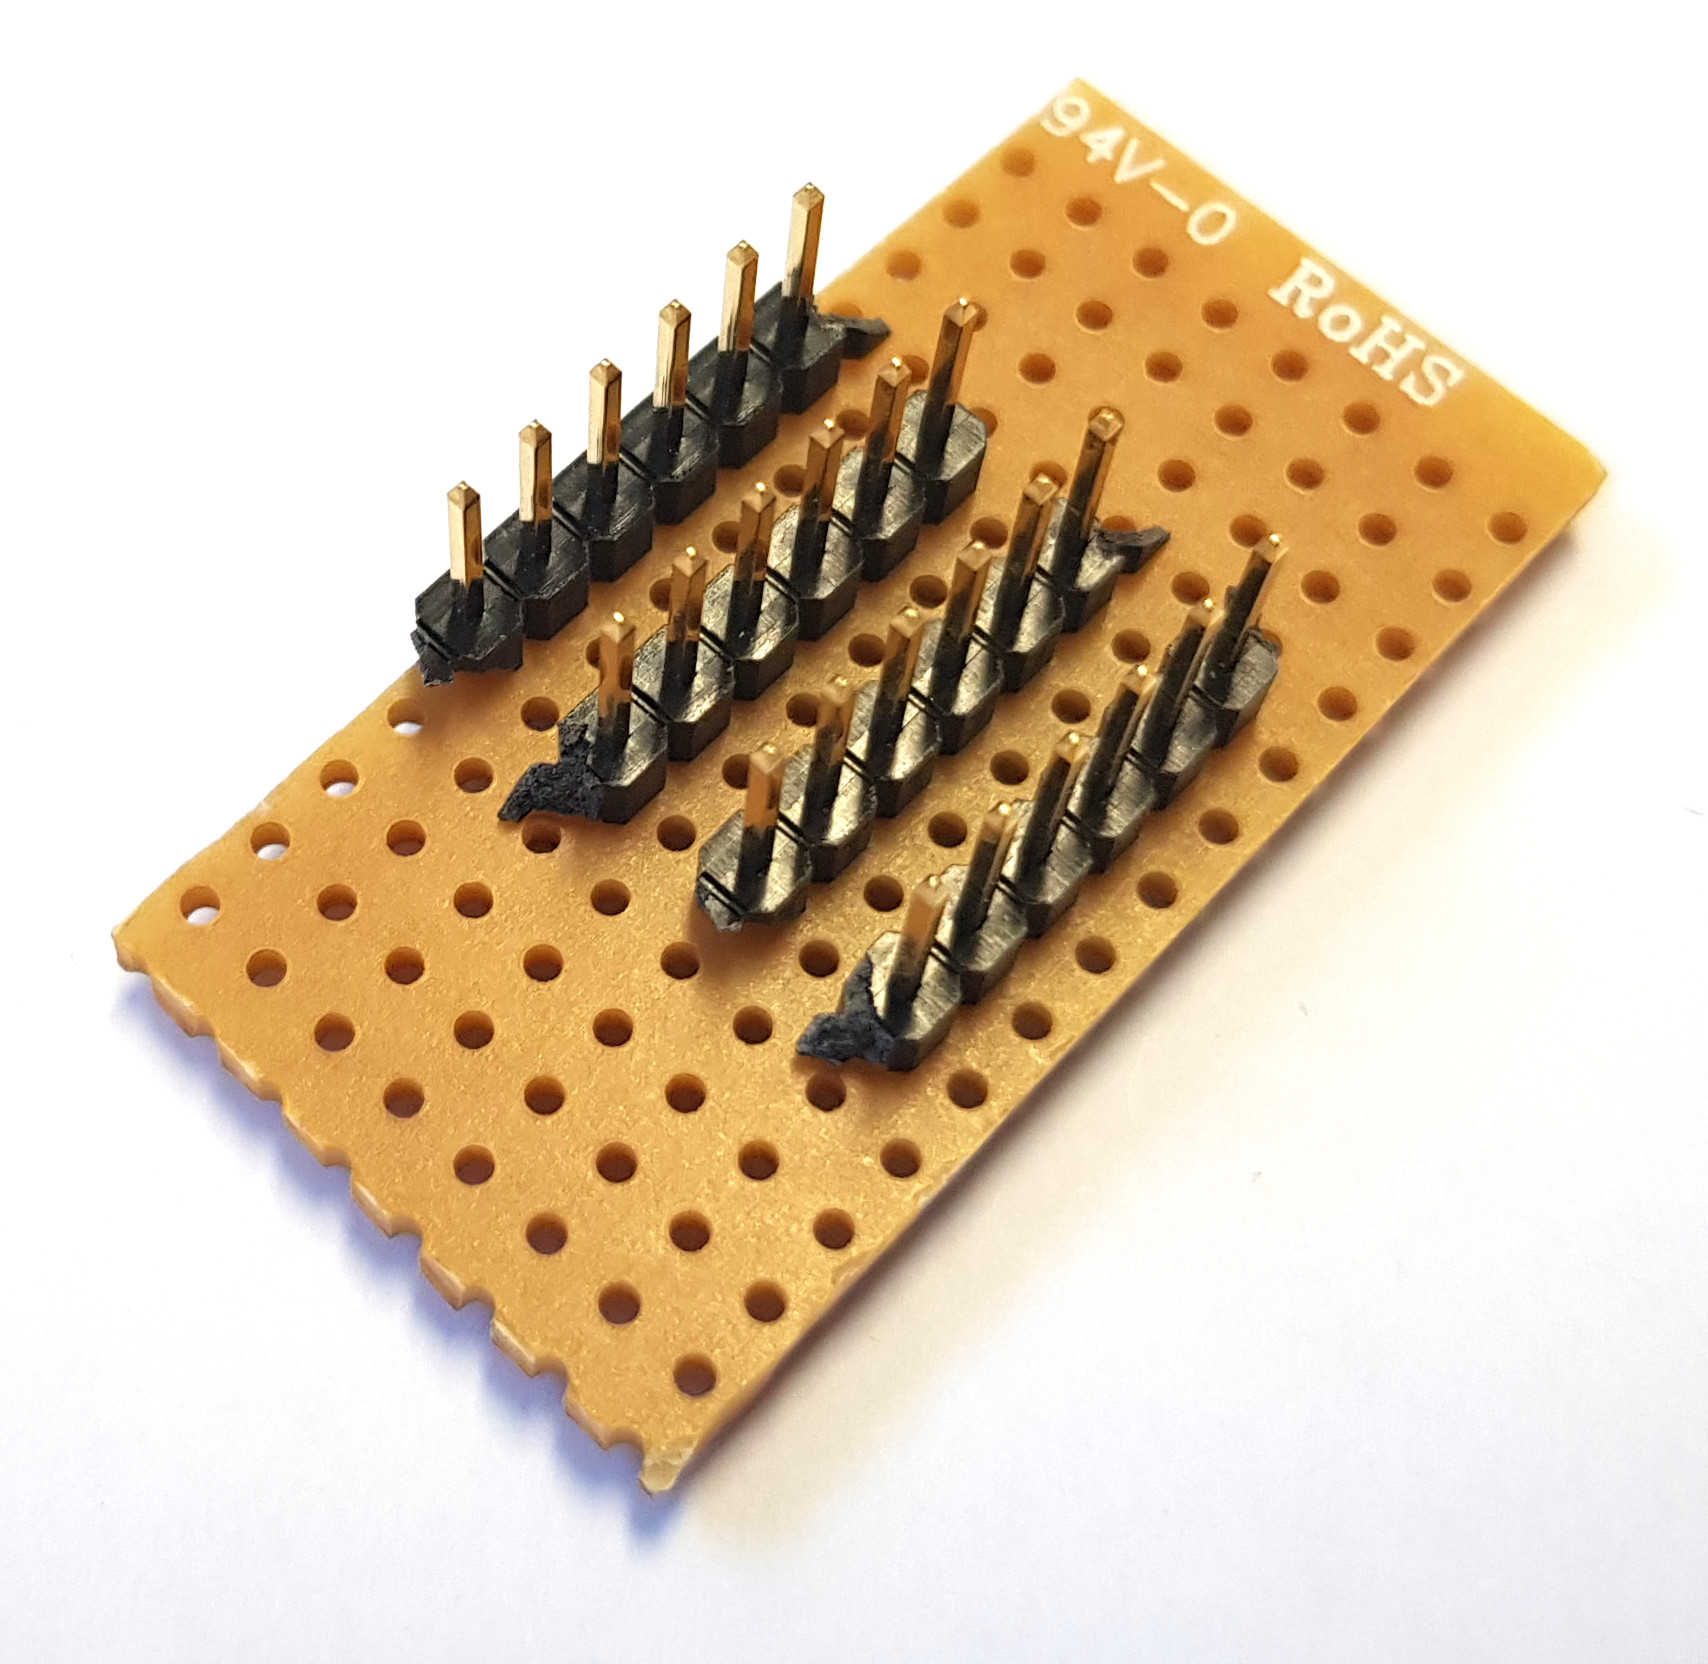
DIY I2C HUB – ready to use
Wiring of the I2C Hub
The I2C Hub is connected to the I2C Bus or the two pins 1 and 3 as well as to the 3.3V pin and GND pin of the ESP32-CAM. Depending on the size of the I2C Hub n devices can be connected. It is only important that the individual devices in buzzer do not need too much power. If this should be the case, then an extra power supply would have to be implemented here.
The following picture shows the wiring of the I2C Hub. We already know the principle from the article about the OLED display.
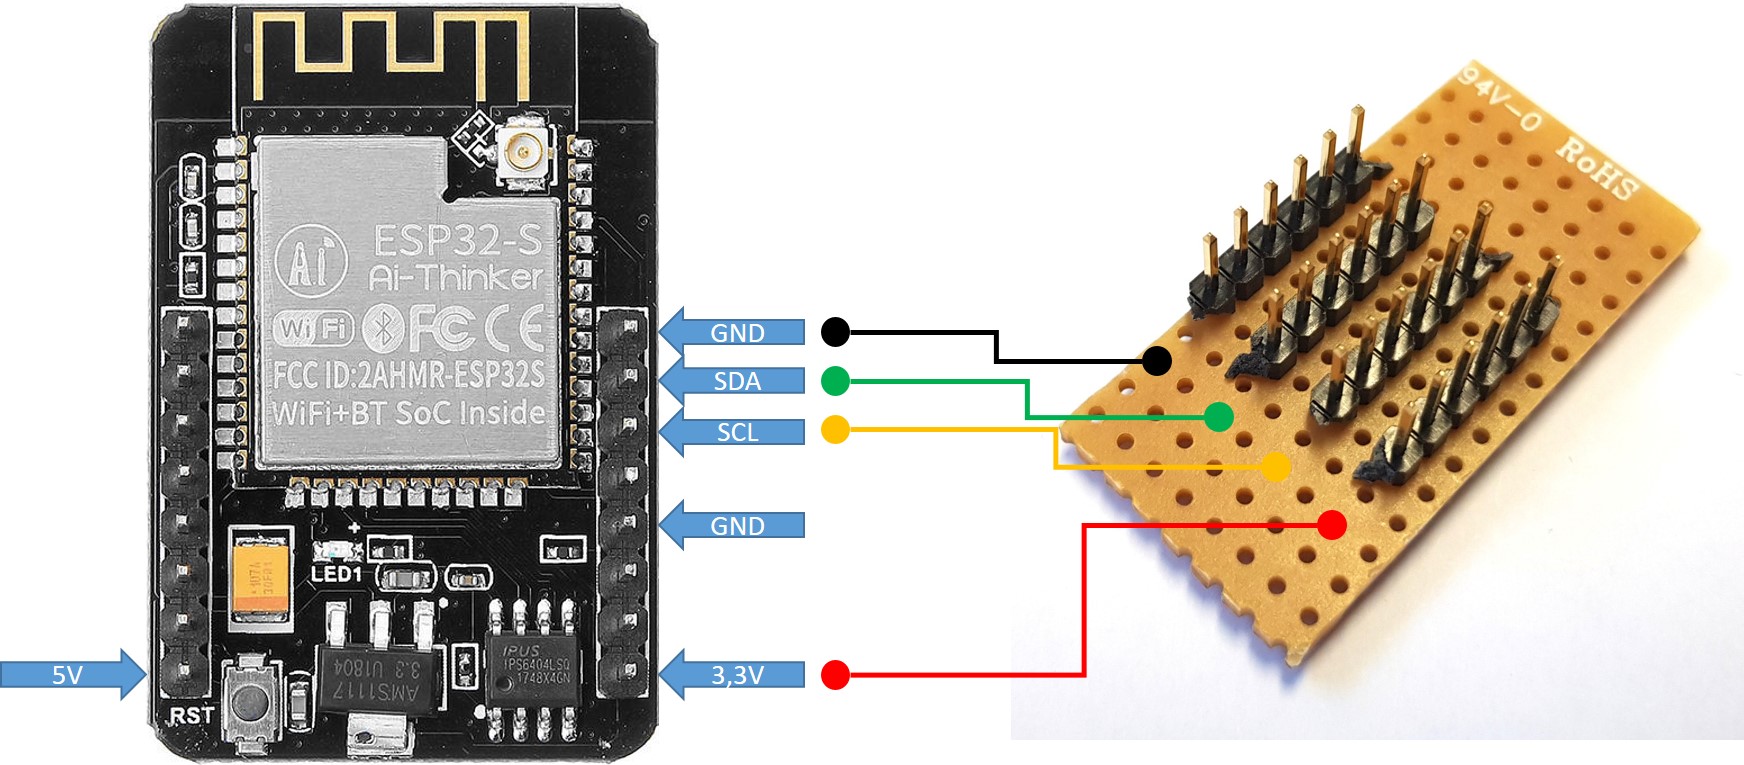
ESP32-CAM I2C Hub connection
If the I2C Hub is connected to the ESP32-CAM, you can continue with the wiring. Now the PCA9685 servo controller and the OLED display can be connected to the I2C Hub. With the following picture I show you how you should do this.
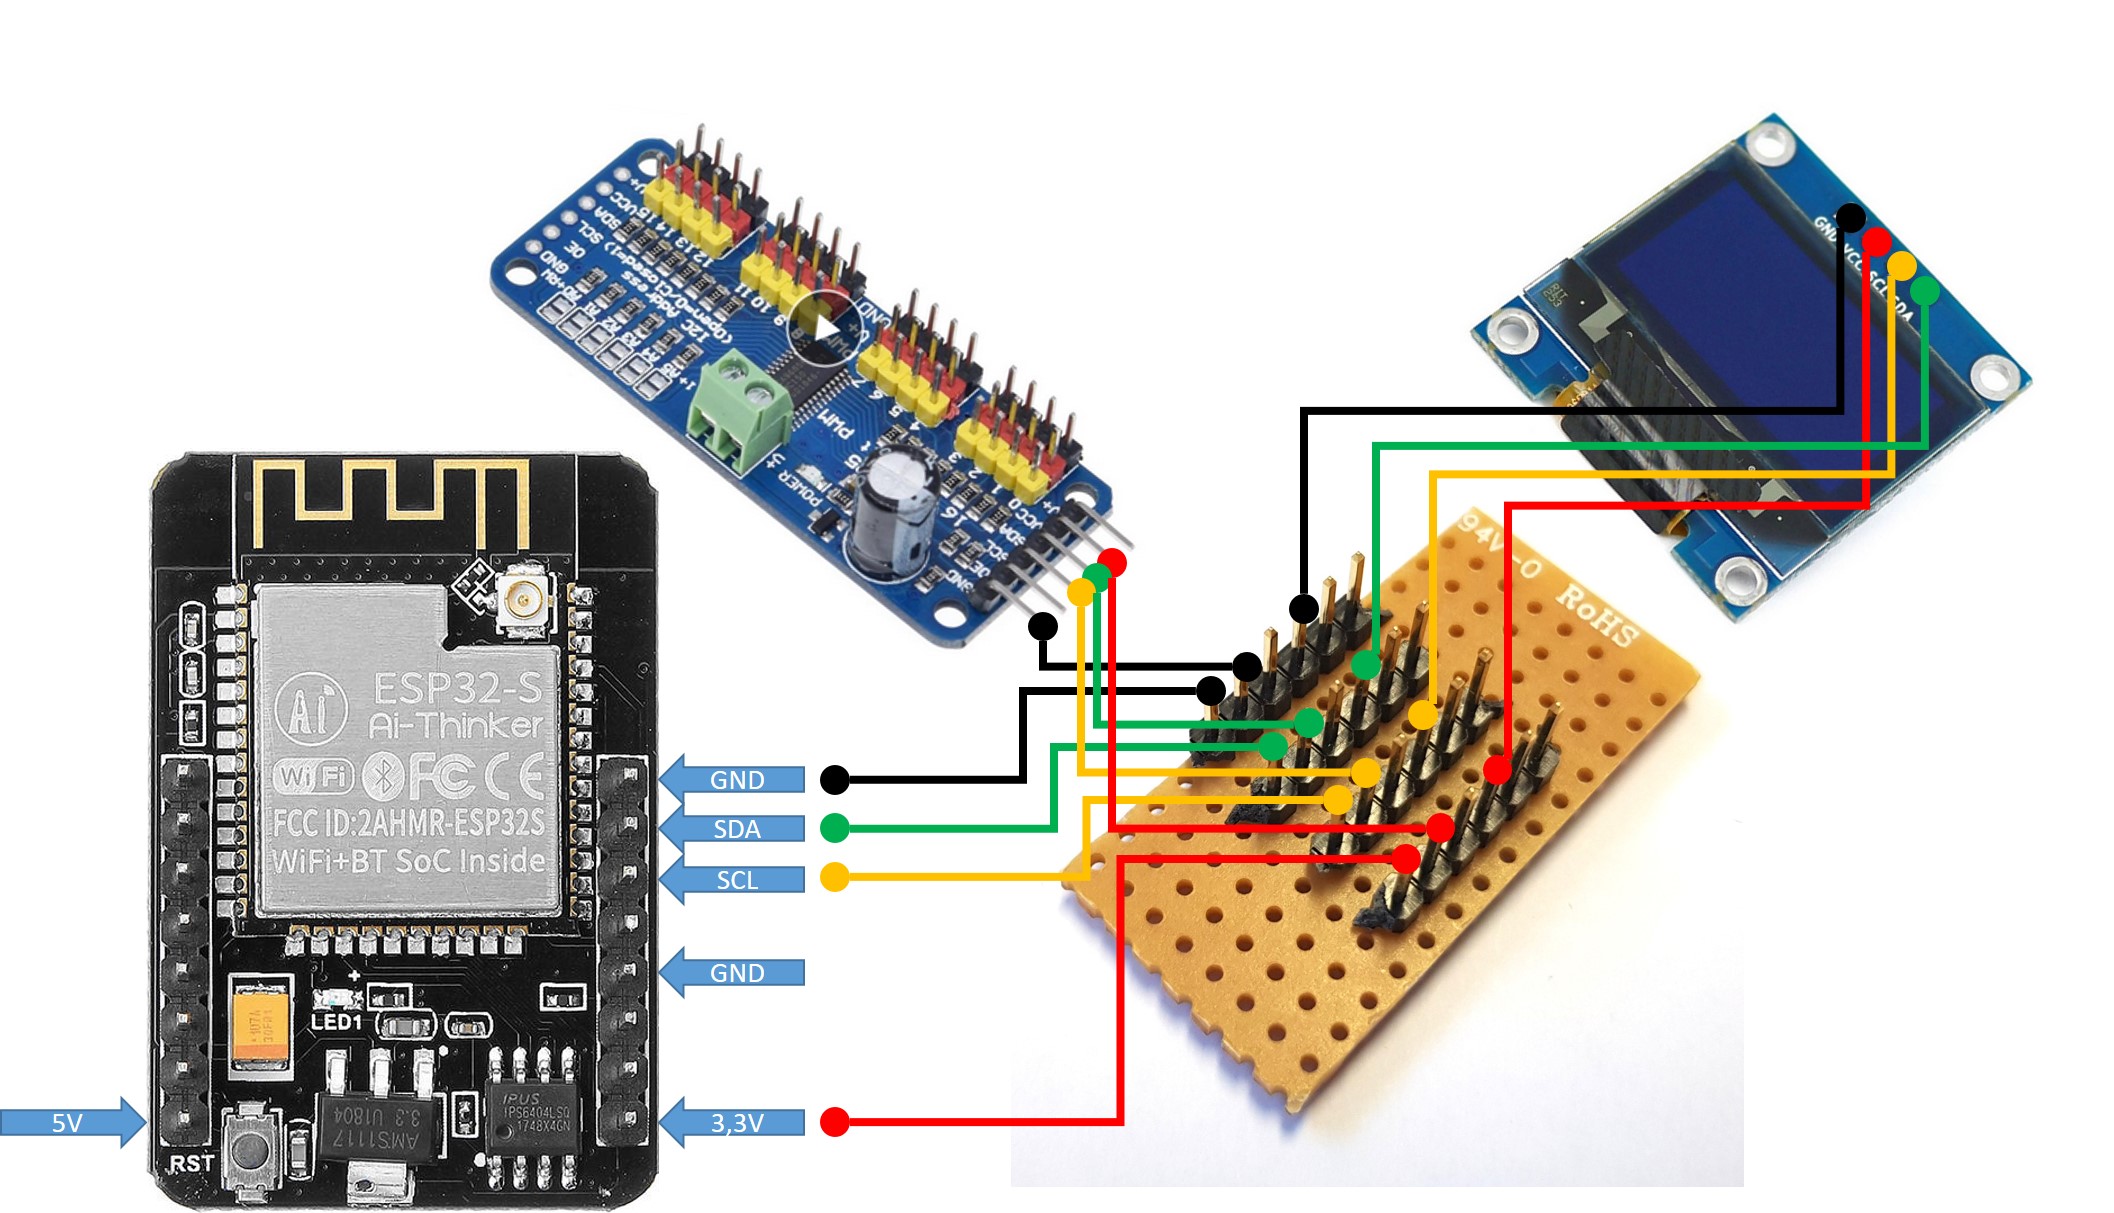
ESP32-CAM I2C-Hub connection devices
If you have set all cables and all components are connected it goes on with the description how to program the ESP32-CAM now.
How do I program the ESP32-CAM now?
Now all I2C devices are connected and wired and the two pins 1 and 3 yes are connected to the I2C Hub as SDA and SCL. To program the ESP32-CAM I simply connected the USB-Serial Adapter for RX and TX to two free pins of the I2C Hub. If now the IO0 pin is connected to one of the GND pins the ESP32-CAM can be programmed again via the Arduino IDE. The following picture shows you again the cabling I chose.
Note: When the program is written to the ESP32-CAM, the serial monitor of the Arduino IDE does not show any useful information, because the I2C signals are connected to the RX/TX pin. But for me the programming still worked without removing the cabling of the I2C hub.
As you can see on the picture, the power supply of the setup is now again done via the USB-Serial Adapter and not via the 5V or USB connector of the ESP32-CAM
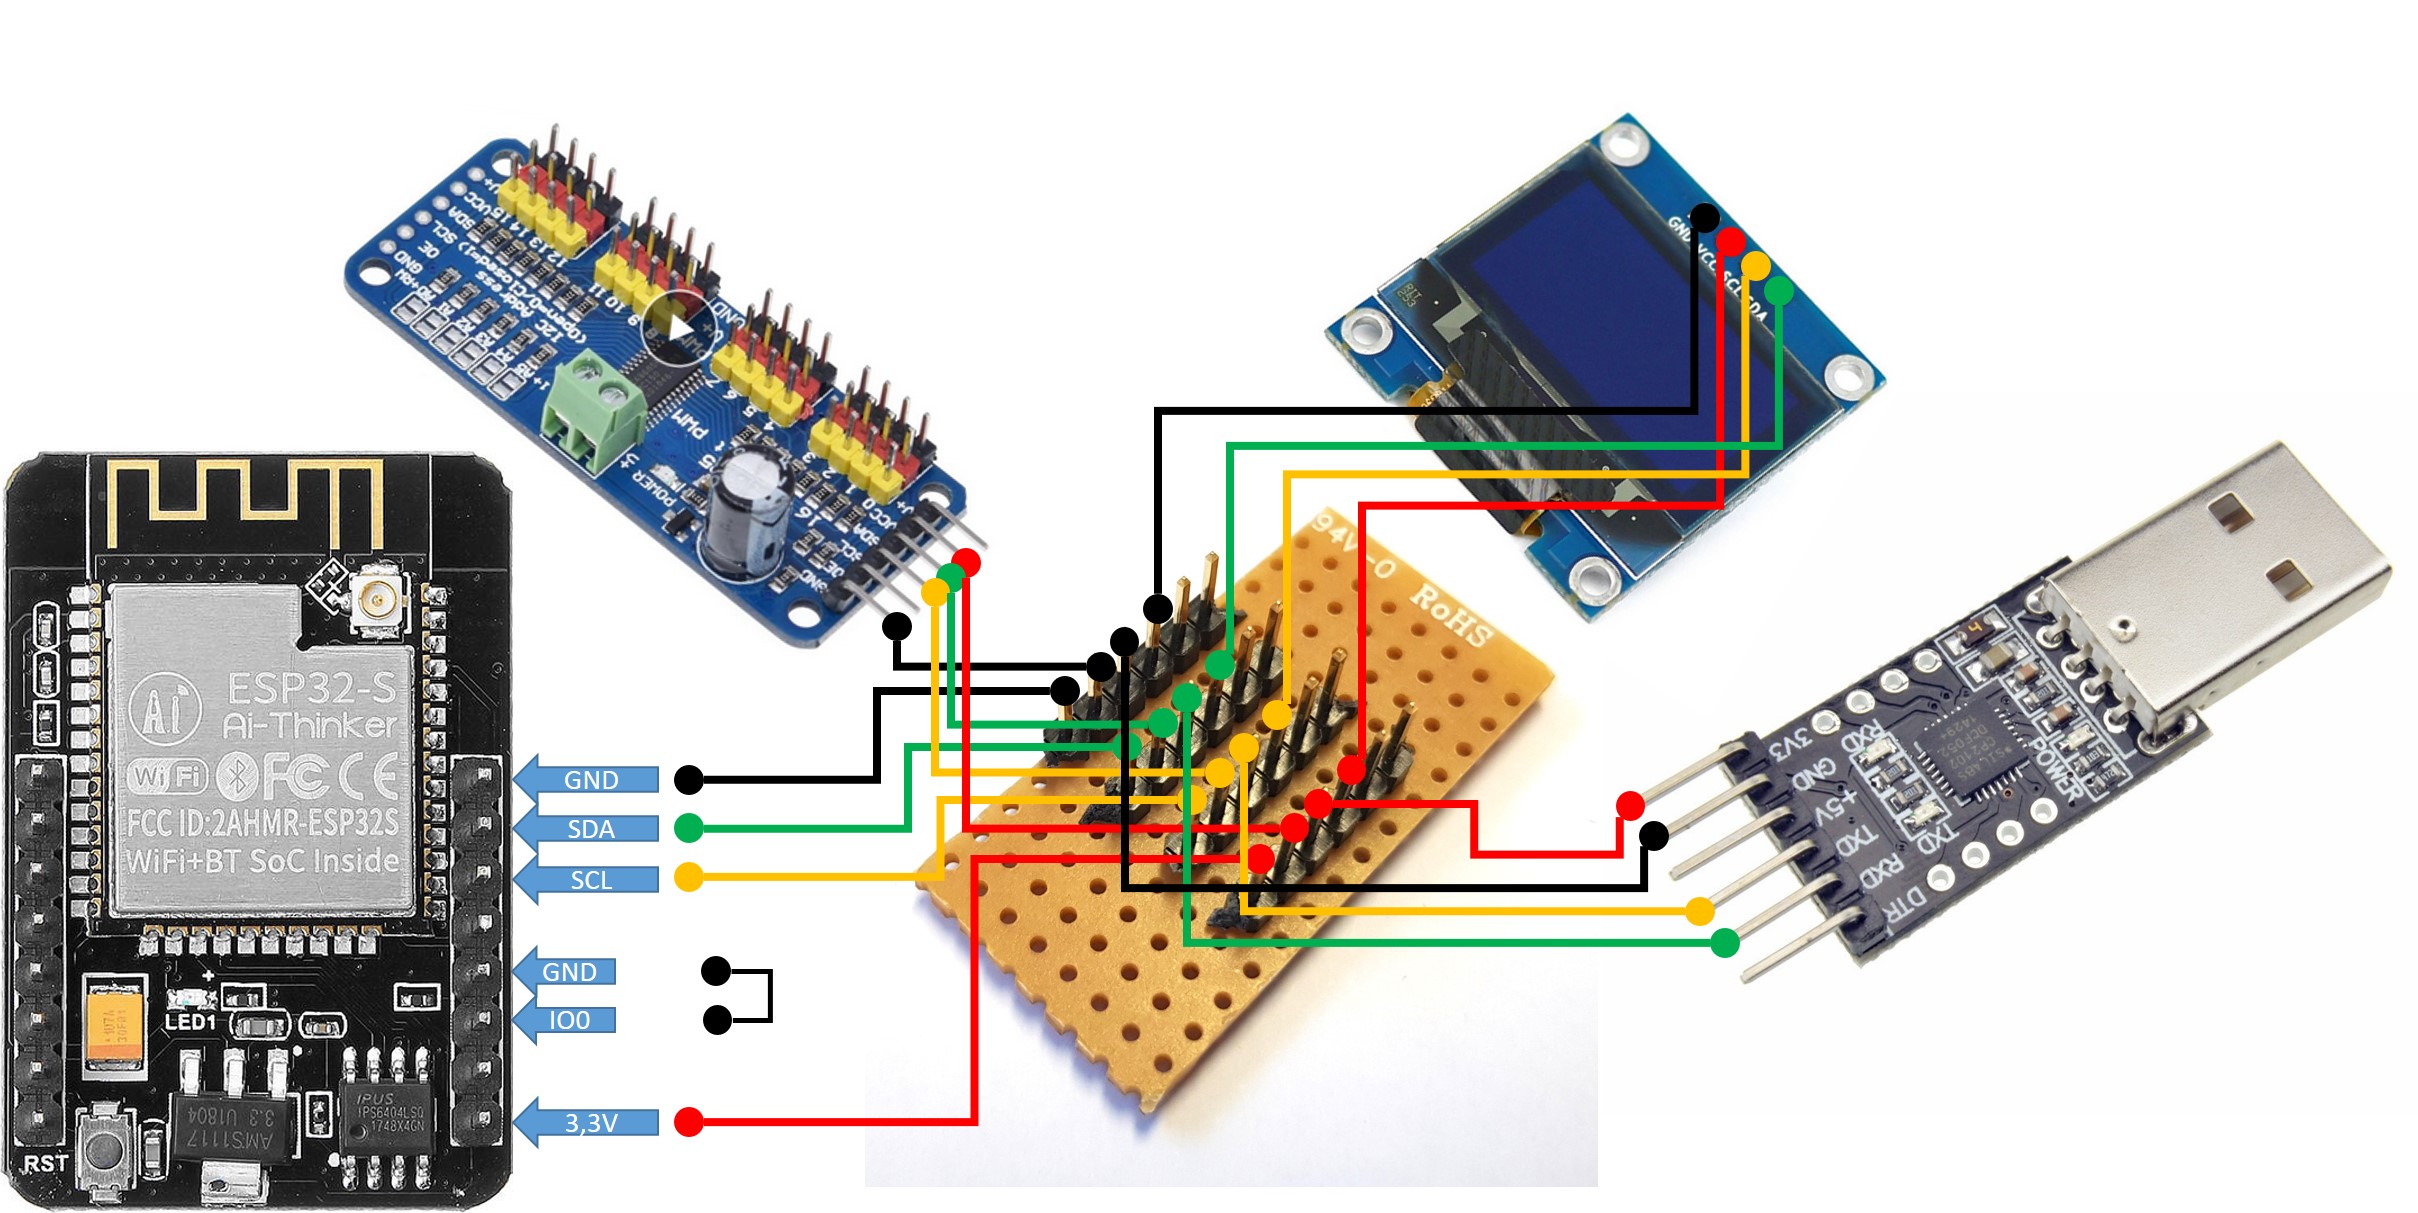
ESP32-CAM I2C-Hub connection usb serial adapter
Wired up, the robot car looks like the following picture with servo controller and OLED display
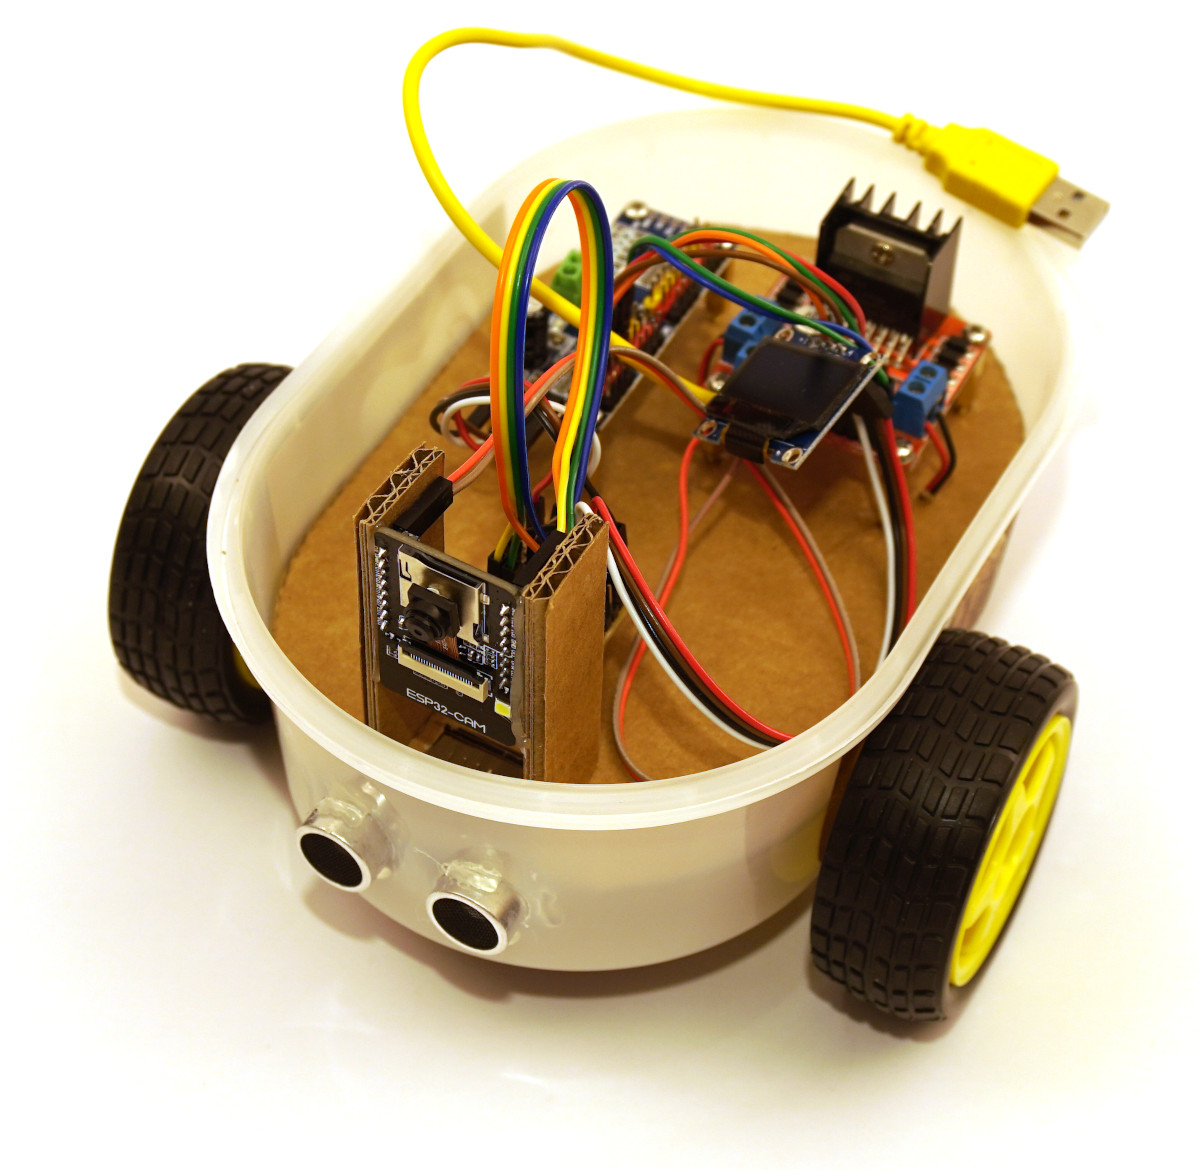
ESP32-CAM OLED display
Summary
With the construction of the I2C Hub, this article laid the foundation for connecting a large number of sensors and actuators to the ESP32-CAM. Now the servo controller and the OLED display are connected to the I2C Hub. If you have connected everything as described, then the programming of the robot car in the following article should be no problem and work.
Article Overview ESP32-CAM Robot Auto:
ESP32-CAM building your own robot car with live video streaming – project startESP32-CAM building your own robot car with live video streaming – Set up development environment
ESP32-CAM building your own robot car with live video streaming – USB-serial adapter wiring
ESP32-CAM building your own robot car with live video streaming – Installing the live video streaming software
ESP32-CAM building your own robot car with live video streaming – Design of the chassis
ESP32-CAM building your own robot car with live video streaming – Cabling in general
ESP32-CAM building your own robot car with live video streaming – Wiring the I²C hub
ESP32-CAM building your own robot car with live video streaming – robo car example programs
ESP32-CAM building your own robot car with live video streaming – programming the WIFI remote control
ESP32-CAM building your own robot car with live video streaming – connect external WIFI antenna


Recent Comments