


This instruction describes how to control a stepper motor with a Raspberry Pi. The idea is to build a Raspberry Pi robot with four stepper motors. I bought a 28BYJ-48 stepper motor which could be controlled by a ULN2003A chip. The stepper motor and the controller board with the ULN2003A chip was sold together. That makes it very easy to hook up the stepper motor with the Raspberry Pi. You could not direct connect a stepper motor with the GPIO pins of the Raspberry Pi. If you do so you will damage your Raspberry Pi. The mAh the stepper needs to turn are too high for the GPIO pins of the Raspberry Pi. They only supply a few mAh.
The picture below shows the stepper motor controller and the stepper motor itself.

Stepper motor 28BYJ-48
Components List
Raspberry Pi 3 Model B Kit
Stepper motor kit 28BYJ-48
Stepper motor Wiring
First connect the stepper motor with the motor controller. I used for this the supplied white plug. Then I connected the motor controller with the Raspberry Pi. I call this connection the logic connection because over the four wires the Raspberry Pi tells the motor controller how to control the stepper motor. You need four female-to-female jumper wires for the logic connection. The table below shows the pins from the stepper motor controller and the GPIO pins from the Raspberry Pi.
| Stepper motor controller | Raspberry Pi GPIO |
| IN1 | 6 |
| IN2 | 13 |
| IN3 | 19 |
| IN4 | 26 |
The stepper motor controller has two additional pins for GND and VCC. I used a 5V power supply and connected those two pins with the Vout of the power supply. Now you are ready to test your setup with a small Python program.
Python test program
The Python test program is a small decision maker. It will turn the stepper motor randomly clockwise or counterclockwise. The steps the stepper motor will turn are also randomly calculated for each program run.
The program is available on GitHub in my repository: Stepper-motor-28BYJ-48-Raspberry-Pi
The result is a nice decision maker as you see in the picture below.
Decision Maker
The decision maker was easy to build. I draw a circle with eight decision and put the paper on top of the stepper motor. The next picture shows the decision maker.
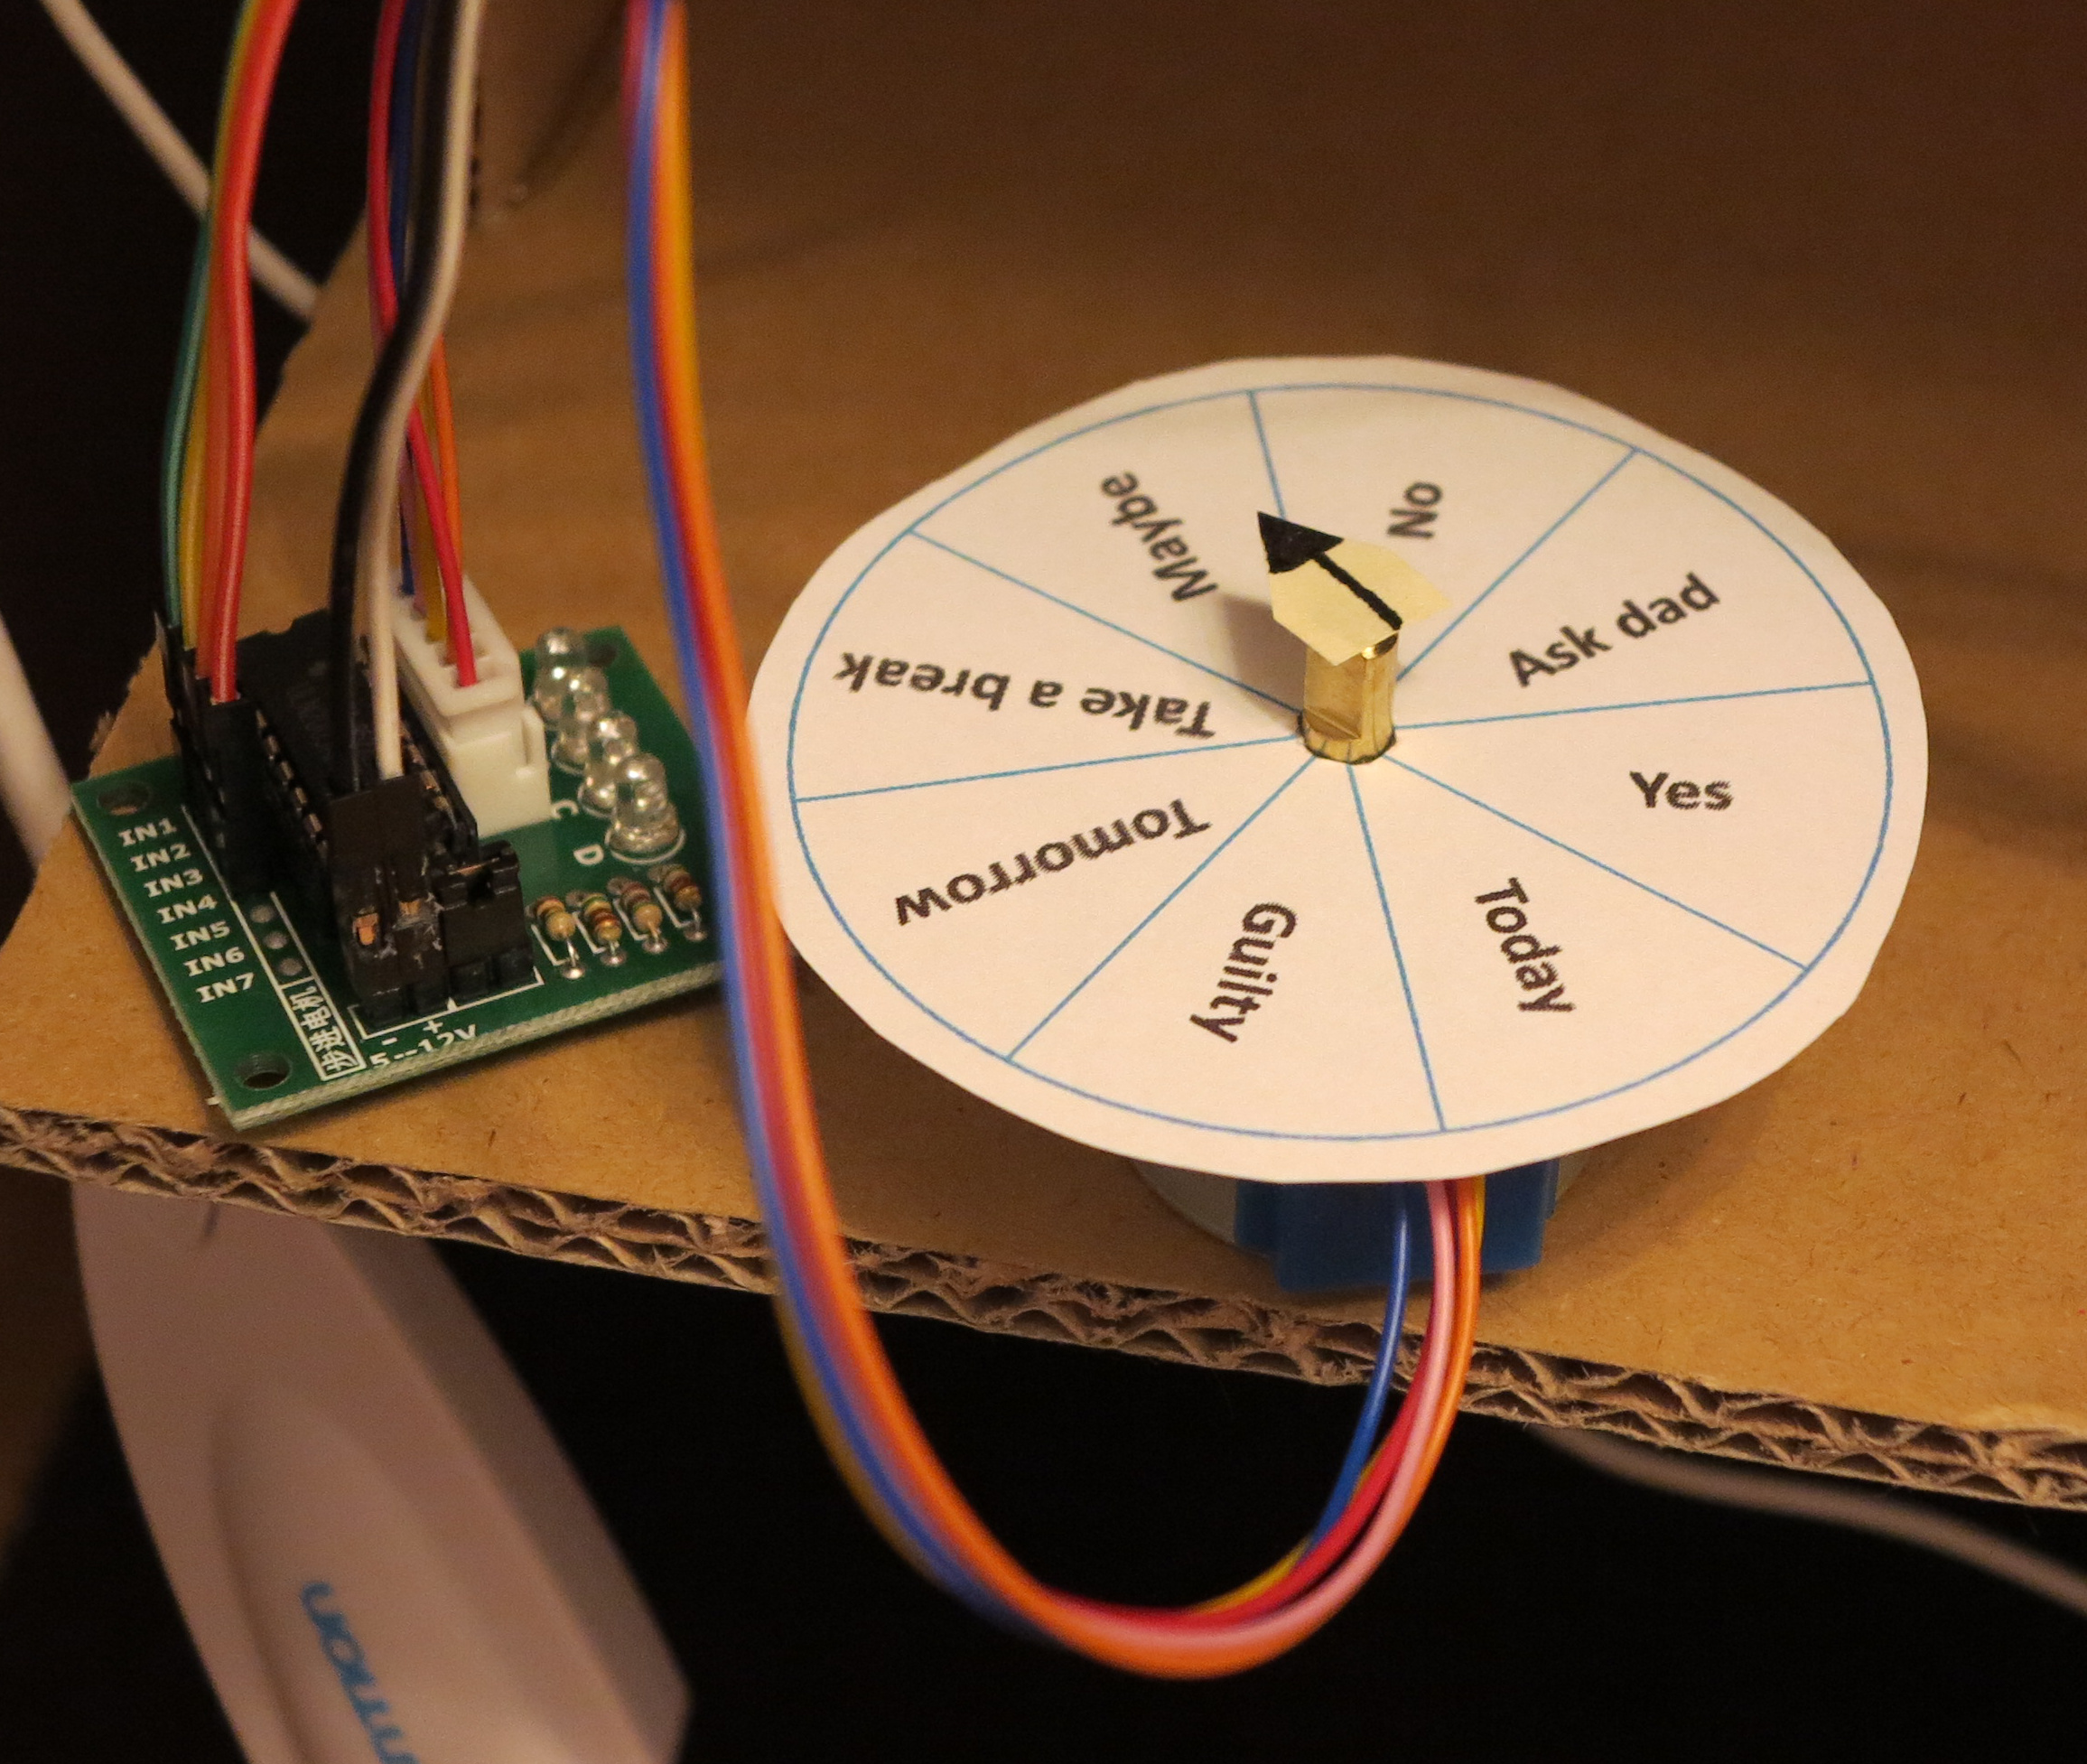
decision maker
Summary
This type of stepper motor is easy control with a Raspberry Pi. Bigger stepper motors which need more current need different motor controllers. But for a decision maker or a small robot the 28BYJ-48 stepper motor is strong enough.


Recent Comments