For my donkey cars with the Jetson Nano but also for other projects I always like to use the cheap OLED display with the SSD1306 chipset. This display can be controlled via the I²C bus. Therefore it is compatible with NVIDIA Jetson Nano, Raspberry Pi or Arduino to name a few SBC or microcontrollers. In this article I would like to discuss how you can operate the OLED display on a Jetson Nano. It is important that you connect the display via the I²C bus and not via the SPI connection.
Components list:
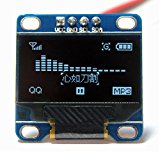
I assume that there is already a Jetson Nano but no display yet. Therefore the following link to the Amazon Web-Shop leads to exactly such a display as I will use in the further description.
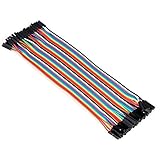
The Female to Female cables are required to connect the display to the Jetson Nano.
Connecting the OLED display
The OLED display is connected via the I²C bus of the Jetson Nano. You will need four Female 2 Female Jumper Cables. On the display the pins are usually labeled accordingly and connecting them is therefore quite easy on the display side.
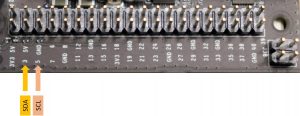
In the Jetson Nano, the I²C bus is not labelled exactly. However, NVIDIA has based the pin layout on that of the Raspberry Pi. Therefore, with the following small overview, connecting the OLED display to the Nano is no problem.
After the OLED display is connected to the Jetson Nano, the required software is installed.
Software installation
For the OLED display to work the software from Adafruit is required. You can download them from GitHub with the following command.
Command: git clone https://github.com/adafruit/Adafruit_Python_SSD1306.git
Then you change to the folder Adafruit_Python_SSD1306.
Command: cd Adafruit_Python_SSD1306
Now please execute the following command for the installation.
Command: sudo python setup.py install
After the installation is finished please install image. I noticed that this library was not always available on the Jetson Nano.
Command
The following packages can be installed optionally if errors occur when running the example program.
Command optional: sudo apt-get install libjpeg-dev zlib1g-dev
Configuring the I²C Bus
After all programs and libraries are installed, the I²C must be configured. The user e.g. nano with whom you log on to your Jetson Nano must still receive group authorisation to access the I² bus. This is exactly what the following command does to adjust the group. For <username> please use your user with which you register.
Command: sudo usermod -aG i2c <username>
Now please restart the Jetson Nano with the following command. After reboot the user you used can access the I²C bus and see the connected devices like the OLED display
Command: sudo reboot
After the restart execute the following command and you should see the OLED display with the standard I²C address.
Command: sudo i2cdetect -y -r 1
In the following picture the address 3c of the OLED display is specially highlighted. The other two addresses shown are the addresses of the PCA9685 servo controller.
Display some information on the OLED Display
The examples that Adafruit provides are not simply runnable on the Jetson Nano. Minimal adjustments must be made, such as the address of the I²C bus. But afterwards the examples adapted in this way work without any problems.
The following is a small example that is used on my donkey car with the Jetson Nano. In the example I have also printed the SWAP file assignment and the current date. The file adapted for the Jetson Nano can be downloaded from my blog as *.ZIP file via the following link.
Dowloand Python Program: Jetson nano OLED display python programm stats.py
Summary
Once you have understood the small differences in the I²C bus between the Jetson Nano and the Raspberry Pi, many programs can be adapted for the Jetson Nano and can be run afterwards. I am very satisfied with the Jetson Nano and how everything works. Support from the major suppliers is also increasing steadily, as the Jetson Nano is ideal for the field of artificial intelligence. For example, I use a Jetson Nano on one of my autonomously driving model robot cars.


This i2c article is cool. I followed it and within 10 minutes, I have a display to show Nano info.