


I wanted to control not only a donkey car with my Jetson Nano but also try out one or the other neural network / project. There is no getting around the yolo when it comes to object recognition. Therefore the following instructions explain how to install Yolo on the Jetson Nano. The project page of Yolo can be found with many helpful tips at the following URL.
Yolov3 Homepage: https://pjreddie.com/darknet/yolo/
To install Yolov3 on the Jetson Nano please first clone the following Git repository on the Nano.
Befehl: git clone https://github.com/pjreddie/darknet
Befehl: cd darknet
Edit makefile
The Makefile has to be edited before executing the command “make”. I always use the text editor nano in the terminal window.
Command: nano Makefile
In the first three lines, the 0 must be changed to a 1 in order to use the corresponding support of the Jetson Nano hardware and software. The following picture shows the Makefile I have already edited.
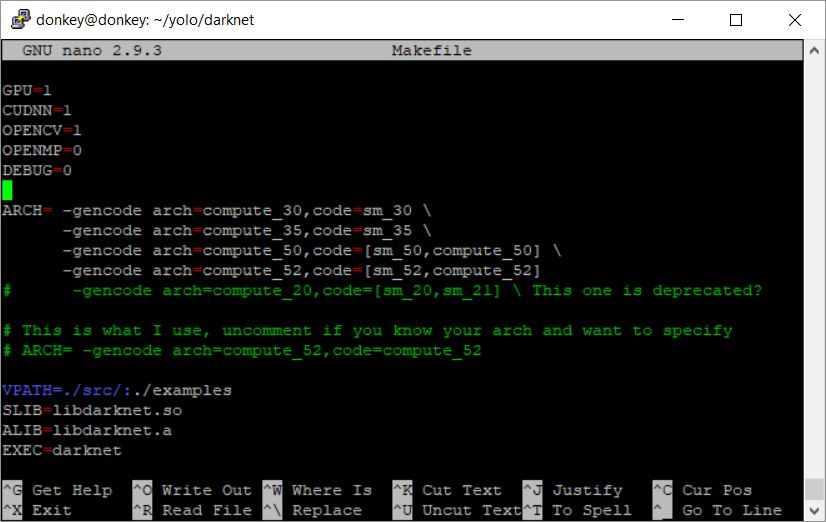
Jetson Nano Yolo Makefile
I had problems at the beginning that I got the message “NVCC not found” after starting the “make” command. This problem could be solved thanks to the following note from the NVIDIA forum. Therefore the following two commands must be executed before the “make” command can be started.
Command: export LD_LIBRARY_PATH=/usr/local/cuda/lib
Command: export PATH=$PATH:/usr/local/cuda/bin
Now the “make” command can be executed and the build process should run without errors.
Command: make
After about 40 minutes, the build process should be completed successfully. The following picture shows the corresponding message that was displayed on my Jetson Nano.
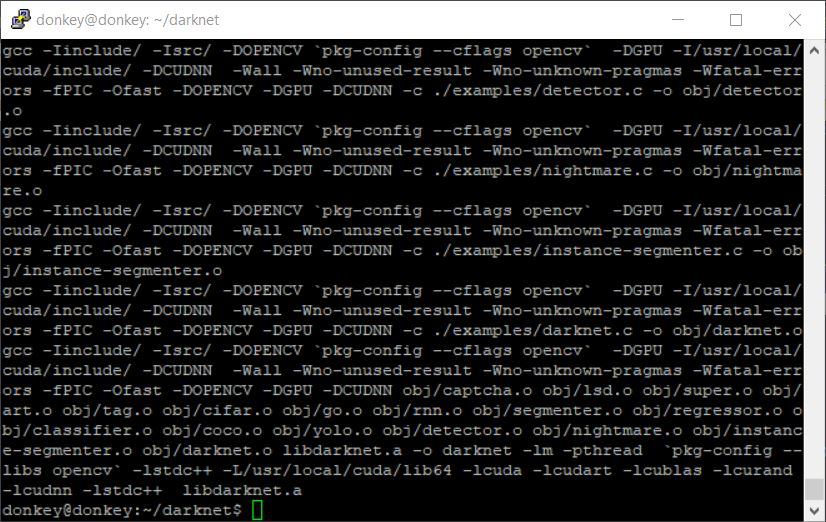
Jetson Nano Yolo build successful
Yolov3 Weights
Now you have to download the “Weight” files for the respective Yolov3 version. The full weiths file is already giving the Nano something to worry about. So I can only reach about 3.2 to 4 FPS. Also a 12GB SWAP file on the SSD hard disk where I installed everything did not lead to any improvement of the framerate.
The following command downloads the full weights file.
Command: wget https://pjreddie.com/media/files/yolov3.weights
Tiny YOLOv3 Weights
Beside the full weights file there is also a small one called tiny weights file. It can’t detect as many objects but the framerate is much higher.
The following command downloads the small / tiny weights file.
Command: wget https://pjreddie.com/media/files/yolov3-tiny.weights
Adjust Yolo configuration
Since the Jetson Nano is a rather narrow hardware environment the yolov3 configuration has to be adjusted. Please open the yolov3.cfg file. With the text editor Nano and the following command this should work.
Command: nano /darknet/cfg/yolov3.cfg
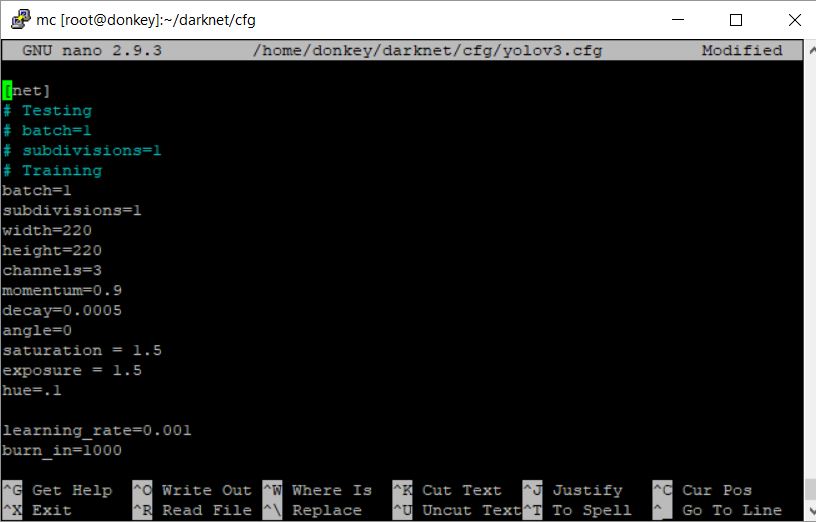
In the yolov3.cfg file the first four lines must be adjusted as shown below.
- batch=1
- subdivisions=1
- width=220
- height=220
The following picture shows the edited file.
Start Yolov3
The following command starts Yolov3. The video source is the connected Raspberry Pi CSI camera. Before the command can be executed you have to change to the yolo installation folder.
Befehl: ./darknet detector demo cfg/coco.data cfg/yolov3.cfg yolov3.weights “nvarguscamerasrc auto-exposure=1 ! video/x-raw(memory:NVMM), width=(int)1280, height=(int)720, format=(string)NV12, framerate=(fraction)60/1 ! nvvidconv flip-method=0 ! video/x-raw, width=(int)1280, height=(int)720, format=(string)BGRx ! videoconvert ! video/x-raw, format=(string)BGR ! appsink -e”
After executing the above command, Yolov3 loads a window in the terminal and opens a window with the live video of the camera after a few seconds. If you now hold objects in front of the camera, such as scissors, they are immediately recognized as such.
The following picture was taken in my office.
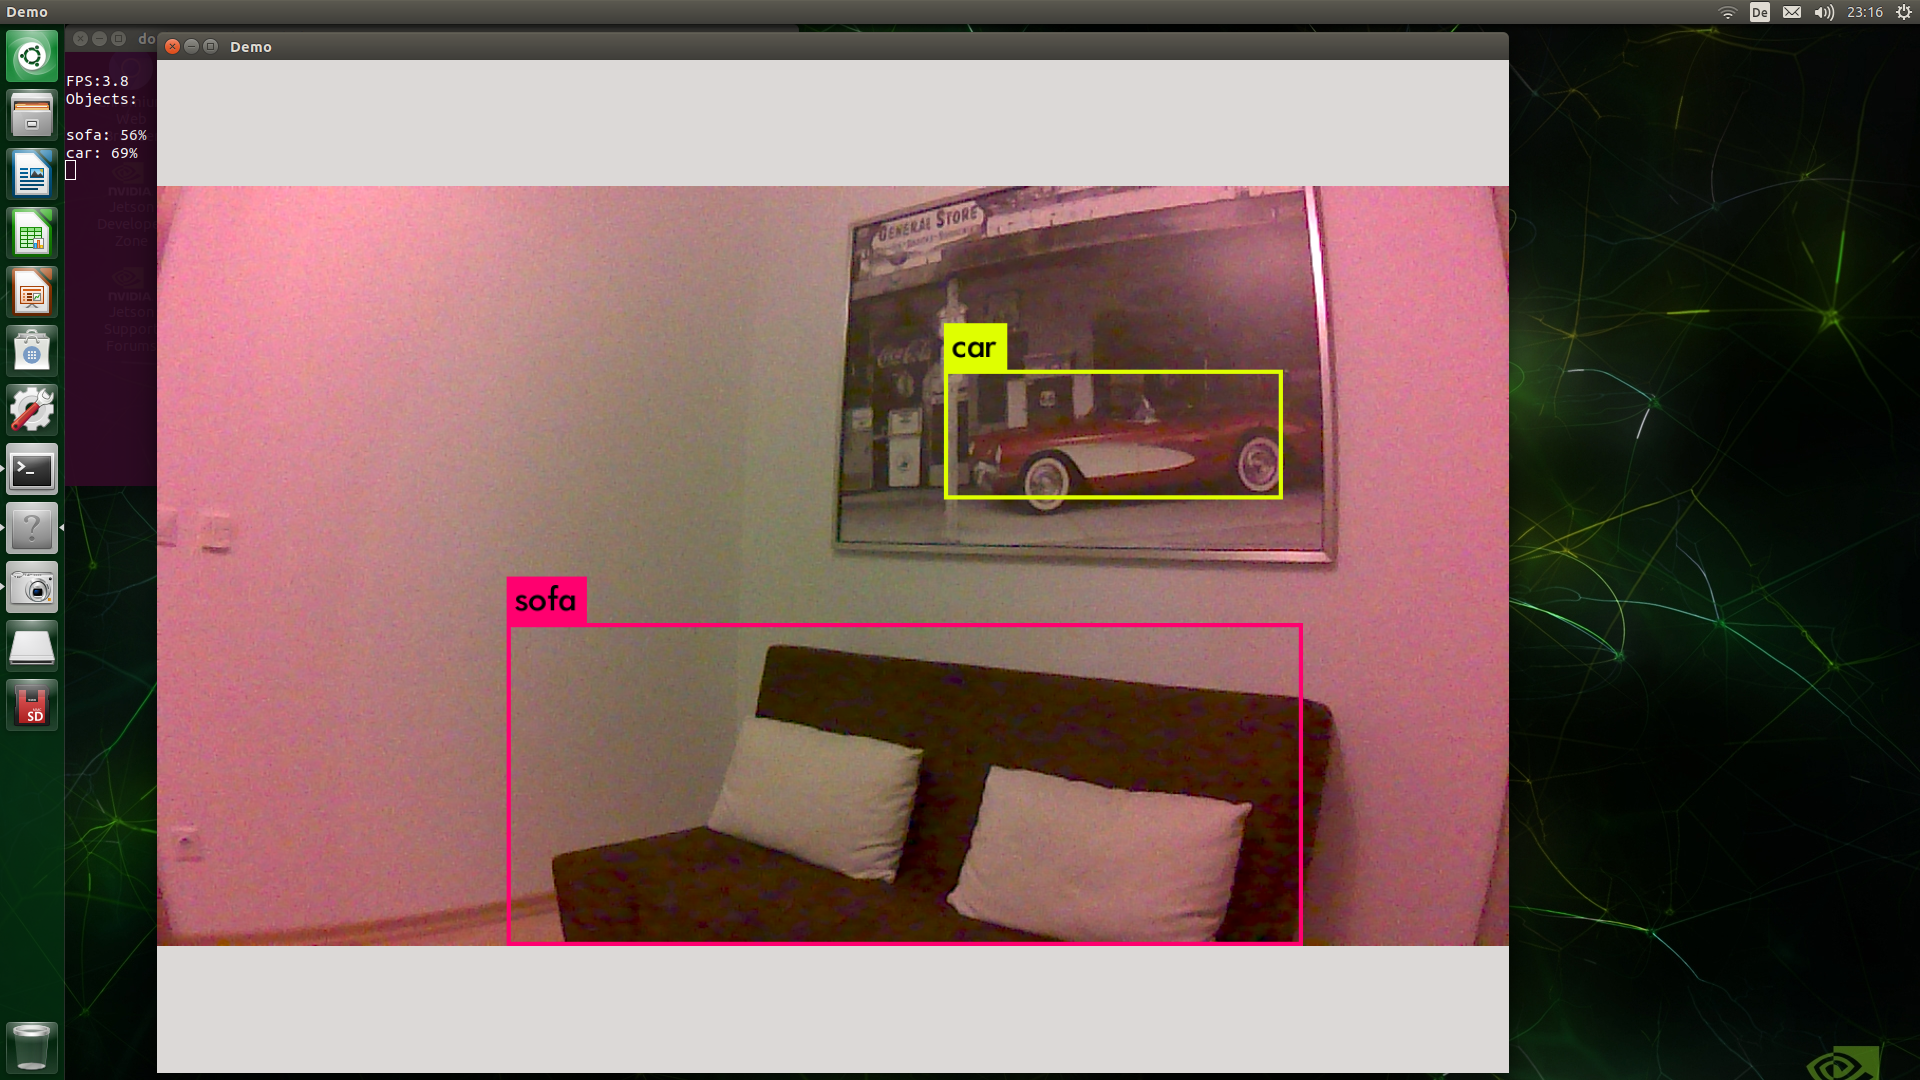
Jetson Nano object detection YOLOV3
Picture: Picture is upside down:
In case the image is upside down, it can be rotated. To do this, please search for “flip-method=0” in the call and replace the 0 with a 2. But I had to restart my Nano once to make sure that the rotation of the picture worked. The assumption is that memory was still occupied and therefore an error occurred.
Start Tiny Yolov3
Tiny Yolov3 can also be started. The call to start the network is only slightly different. The weights file must be changed to the “tiny” variant. You still have to add the “yolov3-tiny.cfg” configuration file can be adjusted like before with the yolov3.cfg file.
Command: nano /darknet/cfg/yolov3-tiny.cfg
The customized file should now look like the following.
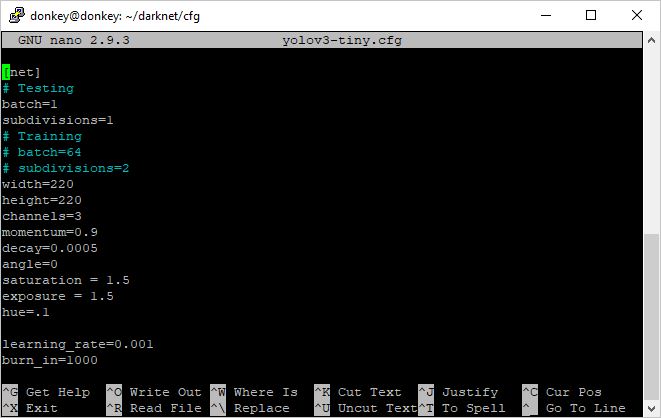
Jetson Nano Yolo tiny Konfiguration
The command then looks as follows.
Command: ./darknet detector demo cfg/coco.data cfg/yolov3-tiny.cfg yolov3-tiny.weights “nvarguscamerasrc auto-exposure=1 ! video/x-raw(memory:NVMM), width=(int)1280, height=(int)720, format=(string)NV12, framerate=(fraction)60/1 ! nvvidconv flip-method=0 ! video/x-raw, width=(int)1280, height=(int)720, format=(string)BGRx ! videoconvert ! video/x-raw, format=(string)BGR ! appsink -e”
With the Tiny Yolo version, the Jetson Nano achieves about 10 FPS to 11 FPS, but significantly fewer objects are detected.
Summary
Yolov3 and the Jetson Nano are really fun. It’s just great to see how the object recognition works and that really at a small price. It’s also great that the installation was really easy and thanks to the NVIDIA forum I could read the necessary commands and solutions and use them here for my manual. So a big thank you goes out to the NVIDIA community for their strong support of Jetson products.


Recent Comments