

Creative Robot Chassis Ideas for Your DIY Car
Building your own robot car is a lot of fun—and the best part: you can let your creativity run wild! This guide explores creative robot chassis ideas using simple materials. The chassis, i.e., the body of your small robot, can be made from a variety of materials. Here are a few cool ideas:
- Cardboard: Easy to find and simple to work with.
- Wood: Sturdy, but a bit more work to handle.
- Ice Cream Packaging: Perfect for upcycling fans.
- 3D Printing: Ideal if you have a 3D printer or know someone who can print for you.
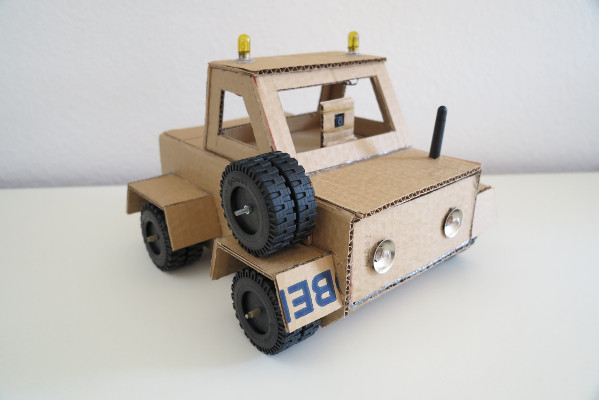
Cardboard Chassis: Simple and Quick
Cardboard is great for building your first prototypes. It’s available almost everywhere and is very easy to cut. Using a hot glue gun, you can quickly and securely assemble the parts. You can also enhance your chassis with extras like wheel wells or a mounting surface.
Tip: Cardboard chassis are perfect to start with before moving on to more complex materials like wood or 3D printing.
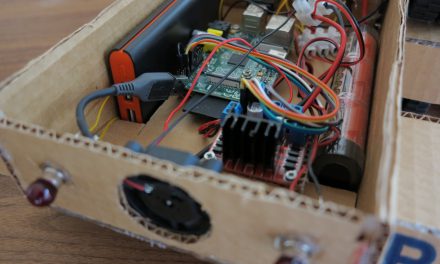
Raspberry Pi Robot Car
3D Printed Chassis: High-Tech from the 3D Printer
Do you have access to a 3D printer? Then check out the OpenBot chassis! It’s specifically designed for four standard TT geared motors, which also perfectly suit your ESP32 robot with an L298N motor driver.
If you want to customize the model, you can get creative with programs like AutoCAD Fusion 360. There’s even a matching top piece that serves as a lid. The best part: you can find the files for free on the OpenBot website.
Links:

Robot ESP32 3D Print
Wood Chassis: Sturdy and Durable
If you can work with wood at home, a wood chassis is a great option. A simple idea: cut a round disc from an old furniture back panel using a circle cutter. Attach the motors underneath and mount the electronics on top.
Note: Wood chassis are a bit more challenging. It helps if you test the setup with cardboard first.

Robot ESP32 – Logical Wiring
Ice Cream Packaging: Upcycling Made Easy
An empty ice cream container can make a great chassis for your robot car! Attach two motors and a small caster wheel at the back that can swivel in all directions. This creates a simple but effective housing.
You can decorate the top lid or leave it open so the electronics stay cooler. Sustainable and creative at the same time!

ESP8266 NodeMCU robot car WiFi kids
Pre-Made Chassis from Amazon: Convenient and Robust
If you don’t have the time or desire to build your own chassis, you can also buy a pre-made chassis on Amazon. This chassis kit is made of robust ABS and metal materials and comes with four yellow TT geared motors. It’s easy to assemble and provides a stable platform for your robot project. You can easily mount the electronic components on a piece of cardboard cut to the same size as the ABS plate.
Highlights:
- Easy Installation: All mounting parts and screws are included, making the setup child’s play.
- Precise Control: With speedometer encoders and a gear ratio of 1:48, it offers exact speed regulation.
- Flexible and Expandable: Plenty of space for additional components and upgrades.
Tip: This kit is great for beginners since you can start right away without spending a lot of time on construction.

Summary: Find Your Style
Whether you use cardboard, wood, ice cream packaging, or a 3D printer, there are many robot chassis ideas for building your robot car. For getting started with kids, cardboard is the best choice as it encourages imagination and is easy to handle. For those who want more complexity, experimenting with wood or 3D printing is a great next step.
Have fun building and tinkering!
Artikel Übersicht ESP32 Roboter Auto:
ESP32 Dev Kit C V4 – Build Your Own Robot Car – Project KickoffESP32 Dev Kit C V4 – Build Your Own Robot Car – Electronics and Components
ESP32 Dev Kit C V4 – Build Your Own Robot Car – Chassis Examples
ESP32 Dev Kit C V4 – Build Your Own Robot Car – Power Supply
ESP32 Dev Kit C V4 – Build Your Own Robot Car – Power Supply Wiring
ESP32 Dev Kit C V4 – Build Your Own Robot Car – Logical Wiring
ESP32 Dev Kit C V4 – Build Your Own Robot Car – Setting Up the Arduino Development Environment
ESP32 Dev Kit C V4 – Build Your Own Robot Car – The Robot Software


Recent Comments