


Solder on battery holder for Real Time Clock
The battery holder is quite easy to solder firmly. The sheet metal of my holders is quite thin and can be heated up very well with the soldering iron. So I first applied solder to the two little feet left and right on the underside. Then I put the battery holder on the board, pressed it with my index finger and heated one of the two feet until the solder melted and was really liquid. With my Jetson Nano there was already solder on the pads which melted and so I connected the first foot to the PCB. With the second foot I proceeded immediately.
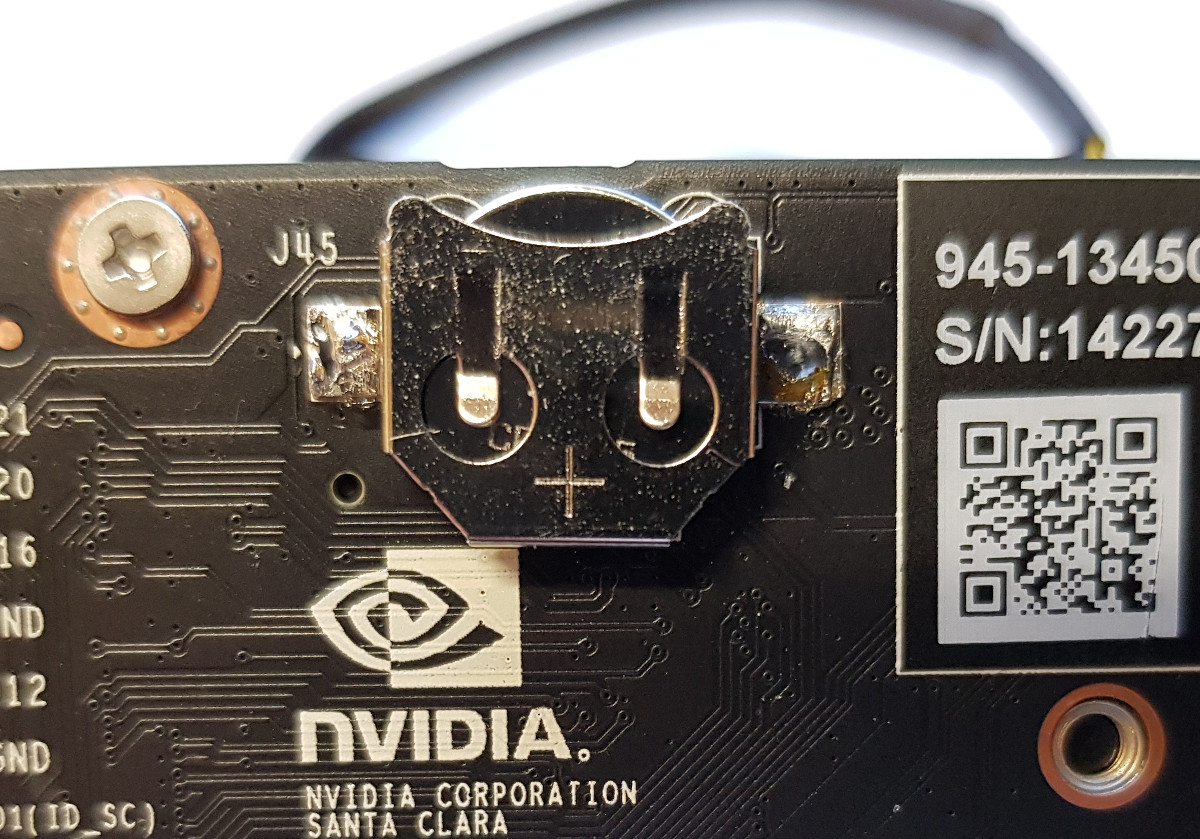
The battery holder looks soldered on as shown below.
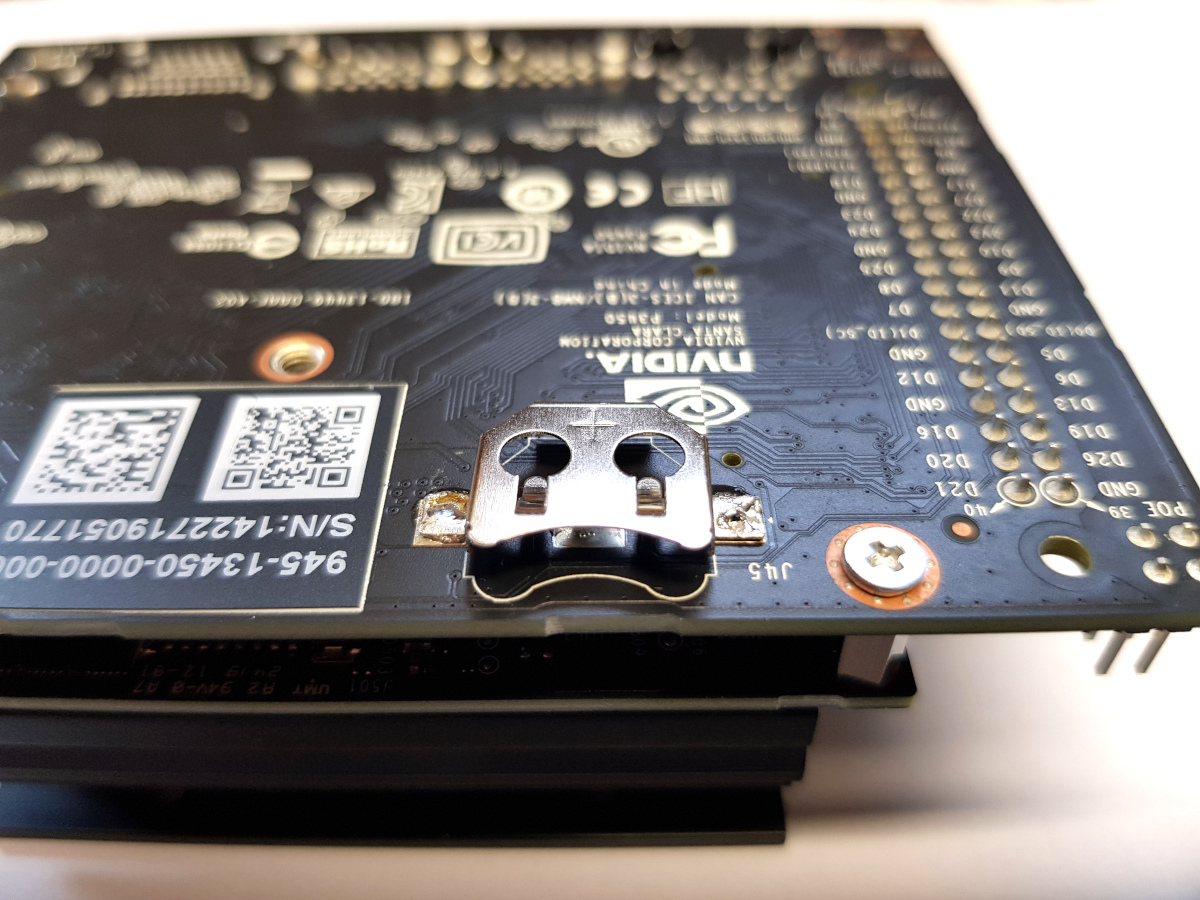
NVIDIA Jetson Nano Real Time Clock RTC Battery Socket soldered to the PCB
Now the appropriate batteries are still needed. I bought CR1225 batteries.
Note new board version
I have received messages again and again that the Jetson Nano does not keep the time even if the battery is soldered on. This is due to a new board design and a simple diode is needed or a capacitor that can be charged. If a diode of the type BAT54H is installed, a battery can be used again because then the charging current does not come back to the battery via the diode. If a super capacitor is installed, it can be charged. In this case a jumper must be soldered instead of the diode.
The following picture explains how the diode must be installed to be able to use the battery described in this article.

Jetson Nano BAT54H Diode
Insert battery and check Real Time Clock time
The CR1225 fits very well in the battery holder. The battery sits firmly and cannot slip out. You don’t have to do much more than that and the Jetson Nano can be switched on. The following picture shows my Jetson Nano from below with the battery inserted.
NVIDIA Jetson Nano Real Time Clock RTC Battery Socket CR1225
The exciting question now is, of course, whether everything works out. I have booted the Jetson Nano and have displayed the time of the RTC with the following command.
Command: timedatectl
The time of the system itself and the time of the real time clock can be seen clearly. Both clocks run synchronously with the difference that the RTC and the system time depending on the country setting, in my case for Germany 2 hours, run offset.

NVIDIA Jetson Nano Real Time Clock display
I then shut down the Jetson Nano and left it there overnight. Before the next power on I removed the USB WIFI dongle so that the operating system has no possibility to download the current time over the internet.
The result was an absolutely accurate time of my system. I am now very satisfied with this and can also convert my other Jetson Nanos. Very nice is that I did not have to make any settings on the operating system and the RTC worked directly.
Summary
Most of the time I had to spend to understand how to equip the Jetson Nano with a Real Time Clock (RTC). When I understood that the Jetson Nano is already equipped with a Real Time Clock and that the board has the connectors for a power supply of the board with a small battery I bought the appropriate brackets. I was still a bit worried about the soldering but it worked surprisingly well. So I needed about 10 minutes to solder the brackets.
I am very satisfied with the result and it is just great that I can now use the RTC of the Jetson Nano for little money. Finally my Donkey Cars don’t loose time anymore when I accompany IT trainings with the cars without internet connection or record training data for me outdoors.
Click here for the first part (NVIDIA Jetson Nano Real Time Clock (RTC) – Part 1) of my two reports.


Hello Ingmar. First of all, thanks for sharing your experience and knowledge.
I am trying to setup the RTC with a CR1225 battery, followed your steps but the RTC resets every time I reboot.
I checked the voltage between the (+) in the battery and GND in the board and it is 3.3V, so I assume the battery holder is correctly soldered to the board and the battery should provide the necessary voltage.
After updating the clock with the Internet connection I get the following output from timedatectl:
Local time: mar 2020-06-23 15:52:55 CEST
Universal time: mar 2020-06-23 13:52:55 UTC
RTC time: mar 2020-06-23 13:52:55
Time zone: Europe/Madrid (CEST, +0200)
System clock synchronized: yes
systemd-timesyncd.service active: yes
RTC in local TZ: no
I think it is OK, but when I shutdown the system, wait for 5 minutes (current time is 15:58:00) and boot without Internet connection, I get the following output from timedatectl:
Local time: mar 2020-06-23 15:54:07 CEST
Universal time: mar 2020-06-23 13:54:07 UTC
RTC time: sáb 2000-01-01 01:01:19
Time zone: Europe/Madrid (CEST, +0200)
System clock synchronized: no
systemd-timesyncd.service active: yes
RTC in local TZ: no
As you can realize, RTC time has reset to year 2000.
Do you have any idea on what am I doing wrong? Thanks in advance
System description:
Jetson Nano Developer Kit 945-13450-0000-100
L4T 32.3.1. Ubuntu 18.04
Hi Pau,
That sounds very strange. I started my Jetson Nano which was laying around for 2 weeks with no internet connectivity and the date and time are correct.
Do you have a picture for me from the battery holder and the battery you are using? Maybe the minus pole of the battery has no connection to the board. Try to put a little bit solder on the – pole or just for testing a tiny piece of aluminum foil beneath the battery.
Best,
Maker
Hi,
Thanks for the soliyion,
I have the same problem, when I unplug the power cable and restart the system, RTC time begins from 2000-01-01 01:00:00.
Hi Mahdi,
I hopefully know the answer why it is not working. But I need to check your board first. Please send me a picture from your jetson nano board showing the battery clip and the area around that clip. I think a new revision of that board a diode is missing which needs to be soldered on the board. But I only have three of the first versions of the jetson nano boards and with those boards it is working.
Please be so kind and take picture of the area around the battery.
Best,
Maker
Thanks for reply,
https://drive.google.com/file/d/1flYUuDNPUjpuT3-UIDDNXIXn1bu6XLbx/view?usp=sharing
This is an image from my jetson nano b01 and it is a little different from yours.
Sorry about the picture, I dont know much about electronic.
https://drive.google.com/file/d/1u8wGAM-tABj8T99XyOooiiR0n6W9-M0S/view?usp=sharing
This is a better picture to read texts on the board.
Sorry Maker,
Do you have any idea?