


The idea was to build a robot for outdoor usage and to design a face for the bot. The robot uses a Raspberry Pi Computer as brain for controlling the DC motors and servo for the teeth. The technical design of the bot is modular. This design concepts makes it possible to add for example some boxes on top of the bot. This additional boxes could be used as cases for additional electronic components like a NVIDIA Jetson TX1 board, sensors or just for transportation.
But this post is about the teeth I built for my robot as a show case. The teeth are just for fun. I built the teeth the way that I could mount them easily on the front of the robot-car or remove them. The next chapter is about how I built the mouth and teeth I built. I hope this little guide will help you to design and make your own teeth.
Custom Build Robots Big Rob teeth
I cut pieces out of a plastic pipe which I used as teeth for my robot. With a hot glue gun I stuck them on a plastic strip which is used as the lower/upper jaw. Then I bought a white spray can to color the teeth and the jaw bright white.
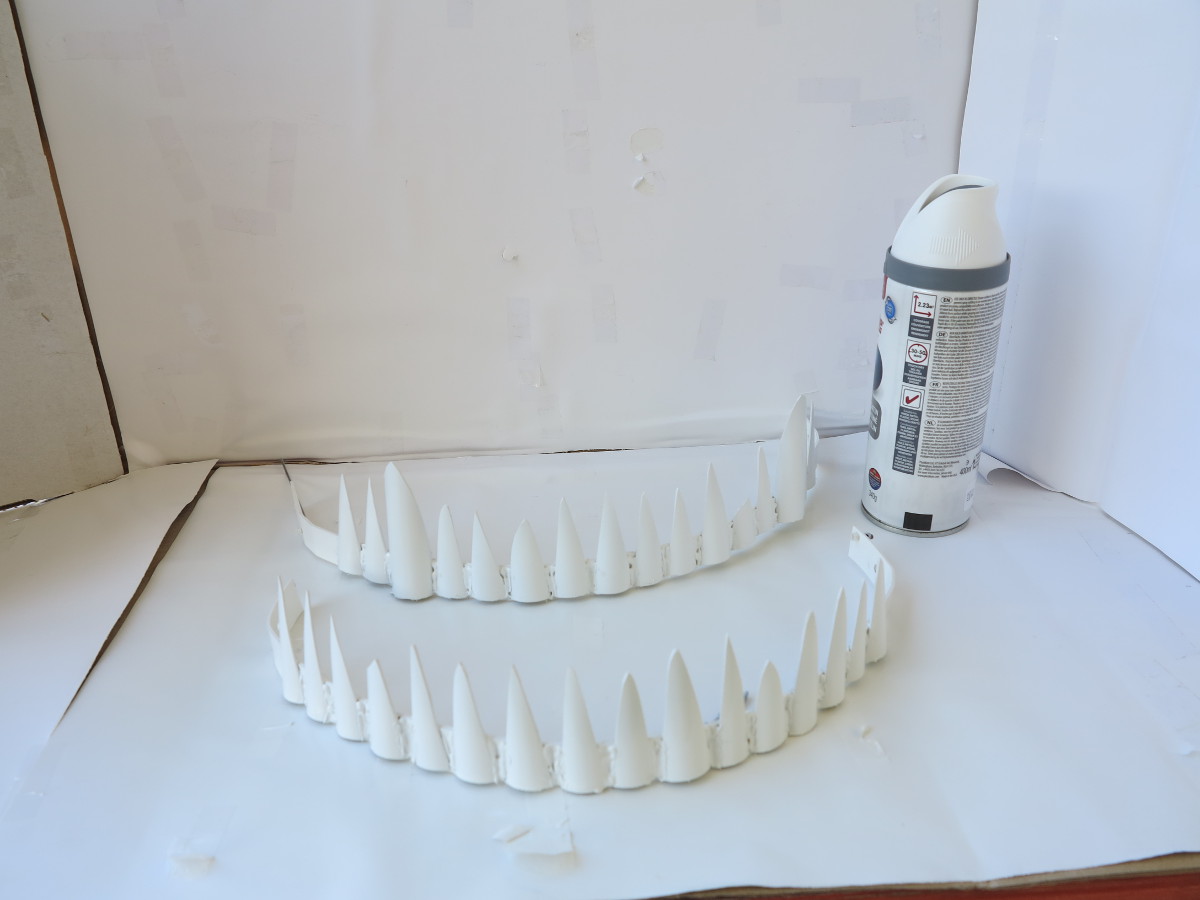
Custom Build Robots Big Rob teeth white
After a few hours of waiting to get the paint dry I used red color. I used the red paint for the gum. Hopefully this will let the robot look angry at the end.
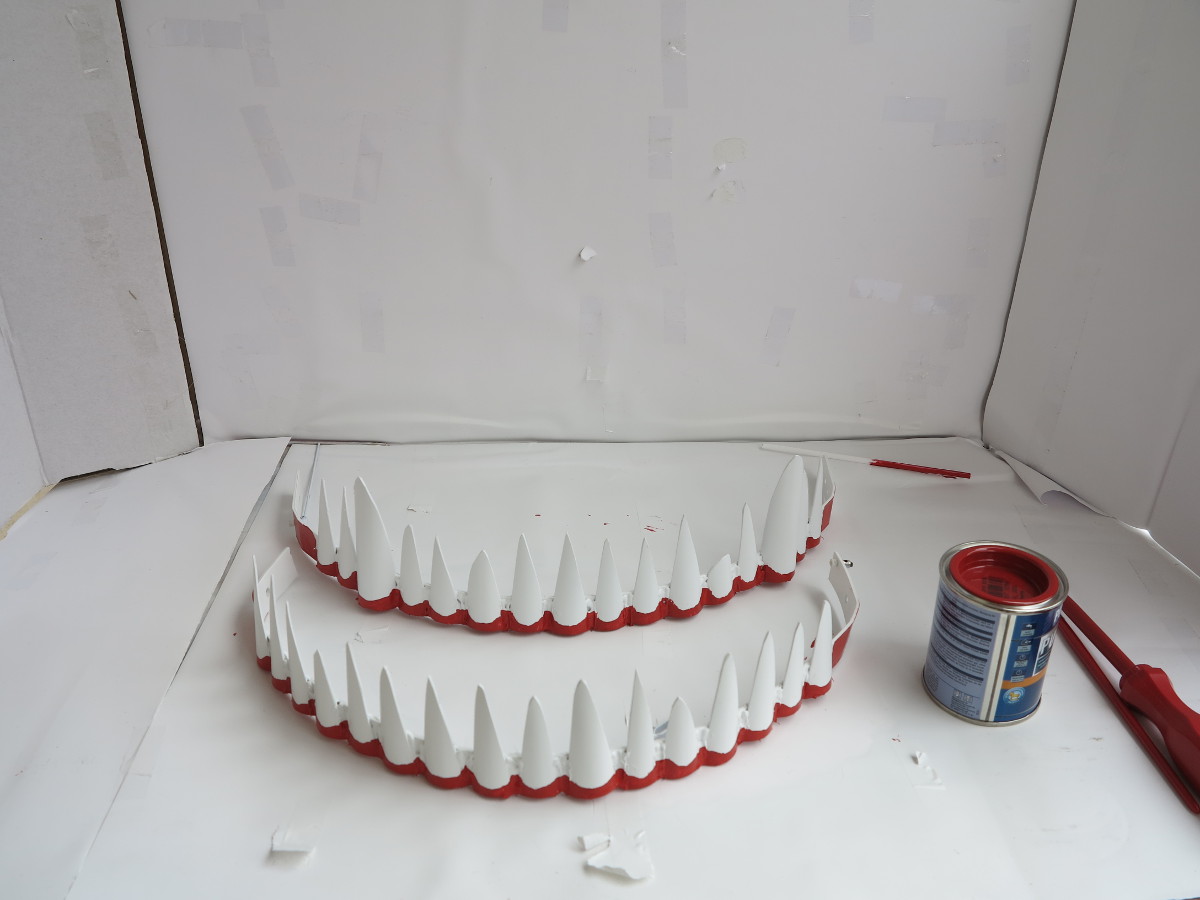
Custom Build Robots Big Rob teeth red
The next picture shows how I build the lips of the Big Rob. I used pipe insulation which I bought in the construction market for a few bugs. The usage of this insulation is very easy and you can cut it with a normal scissor.
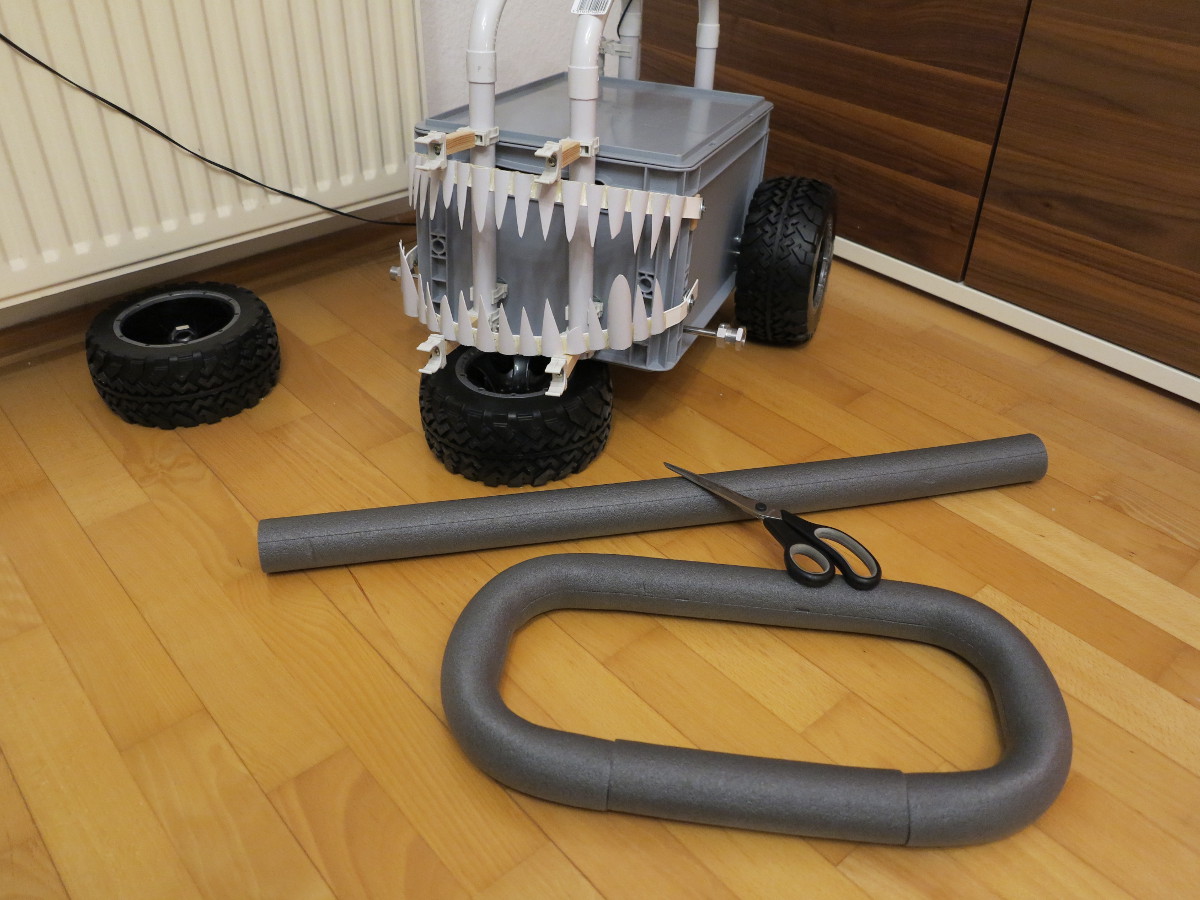
Custom Build Robots Big Rob teeth and lips

Build your own robot car with the Raspberry Pi!
Step by step to your own robot carThis book guides you in two parts through the project phases with the aim of building an individual, autonomously driving robot car. In the first part of the book you will learn the basics of robotics and the interaction of hardware, electricity and software. You build the chassis and wire the individual components - details can be found in the appropriate, richly illustrated chapters. An introduction to software installation and programming with Scratch and Python completes the first part. You do not need any previous knowledge in robotics and programming. In the second part of the book, you will familiarize yourself with the sensors required for autonomous driving. With the acquired knowledge you can individualize and further develop your robot car as you wish. The knowledge you acquire in this book will enable you to implement your own projects with the Raspberry Pi.
This book offers you that:
- Simply get into robotics with the Rasperberry Pi without prior knowledge
- Numerous illustrations, tables, circuit diagrams
- Information boxes with useful tips also for other Raspberry Pi projects
- Project code with syntax highlighting
- Two car projects: remote-controlled robot car via WLAN and self-driving car
- Hardware tips and recommendations for suitable accessories - Extensive project material as download: Raspbian image, parts list, chassis artwork and code
- Special features: Easy and robust cabling, use of high-precision time-of-flight laser distance measurement sensors, introduction to servo motors and suitable servo controllers, control via gamepad, use of an OLED display
Ingmar Stapel studied computer engineering and is currently working internationally as IT project manager and enterprise technical architect; in addition, he has been intensively involved with Raspberry Pi and robotics for years. He likes to share this knowledge with interested people from the tinkering scene at meet-ups on robotics. On his private blogs he also writes about many current technology trends.
Painting the mouth
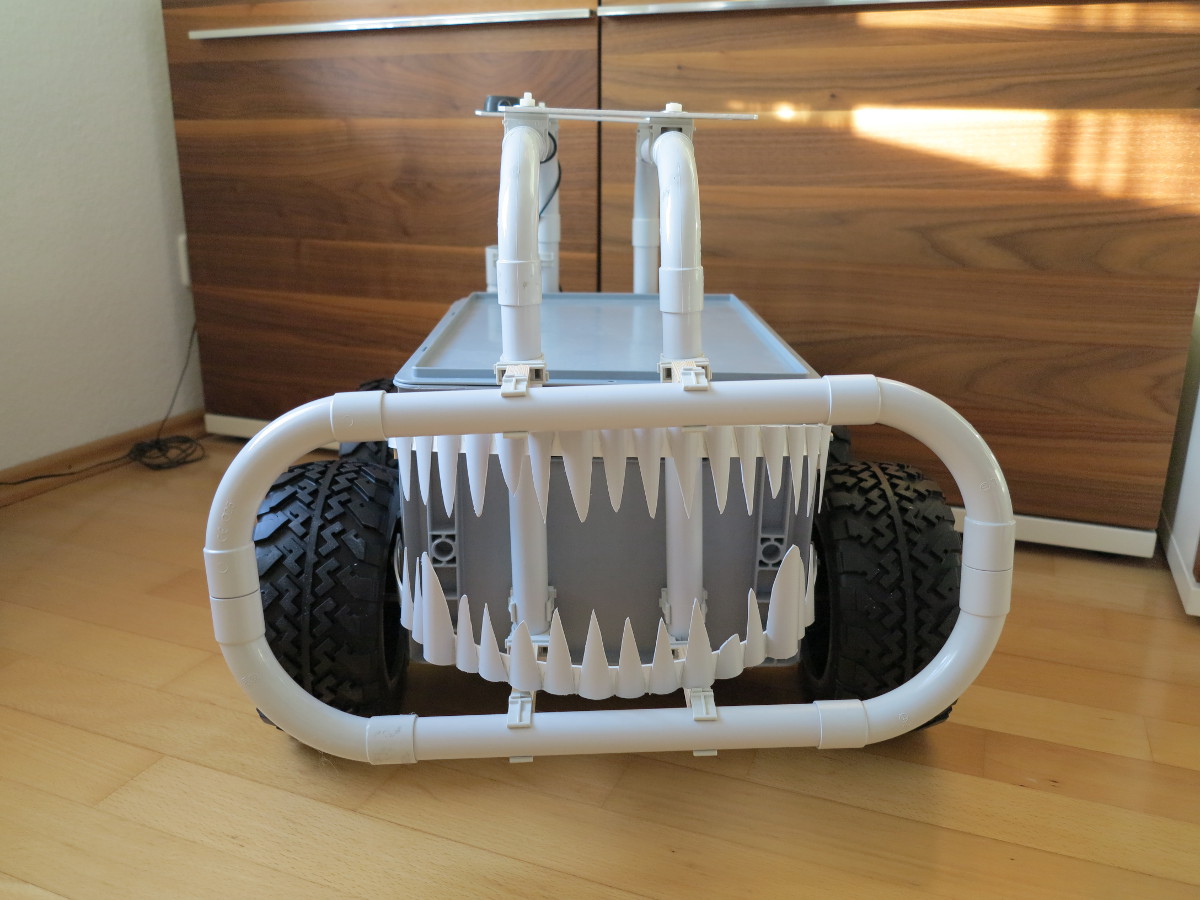
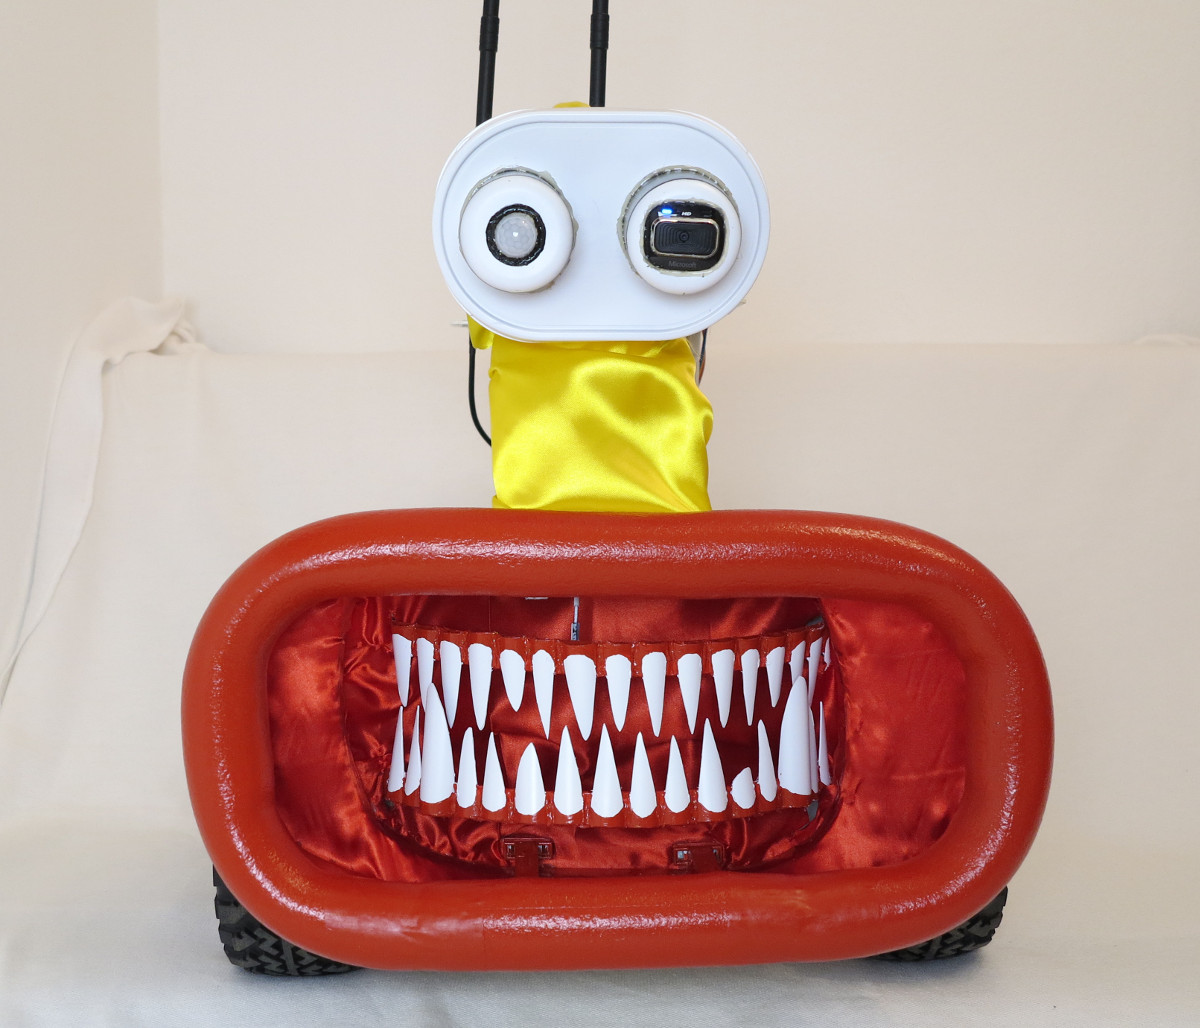
Now everything is painted red or white and I put all the pieces together. I used some red silk for the mouth to make is also red. The teeth start to chatter if I run a small Python program which controls a servo motor. I am not really happy with the big eye I build for my robot. So I thought about a new face design for the Big Rob which looks more like a bot.

Custom Build Robots Big Rob ready to bit
The idea of the new face design was to use a normal web cam for one eye and an IR motion detector for the other eye. The head is just an empty ice cream box which was painted white. I still thinking about some eyebrows but I am not sure what I could use for that.
Raspberry Pi robot Big Rob shining teeth
This is the latest picture of the Big Rob with the installed differential GPS system. With the GPS system the bot is able to navigate very precise in our yard. This makes a lot of fun to let the bot automatically drive around.

Raspberry Pi robot – Big Rob differential GPS
Raspberry Pi – Big Rob video:
The video shows the bot with his teeth in my office sitting on the guest bed. With the servo motor the teeth are chattering very well ,-)

Article list - Big Rob:
Big Rob – Raspberry Pi robotBig Rob – Raspberry Pi robot power train
Big Rob – Raspberry Pi robot motor driver BTS7960B and Python program
Big Rob – Raspberry Pi robot outdoor camera
Big Rob – Raspberry Pi robot with differential GPS
Big Rob – Raspberry Pi robot with nice teeth
Big Rob – Raspberry Pi robot Peak Power Pack power supply
Big Rob – Raspberry Pi robot videos


Recent Comments