

In the previous two papers, the ESP8266 NodeMCU and all other electronic components were installed in the robot car and wired together. The robot car is not yet moving and in order for it to drive, the necessary program has to be uploaded to ESP8266. Since even such a small robot car is quite complex, we will approach the programming step by step. That means, we first install the development environment, also called IDE, and then we test the individual components in the robot car with small programs. Testing for function means that the motors rotate and that also in the right direction. Afterwards we put the small programs together in a big one and let the robot car drive through the apartment independently.
But before it can start at all, the development environment has to be installed first.
Install Arduino Development Environment
We use the Arduino development environment which can be downloaded for free. For this development environment, there are many instructions and how tos on the internet available. The development environment not only supports the various Arduino devices but it is also possible to set up support for e.g. the ESP8266 chip.
Hint: I have used the ARDUINO 1.8.12 version for Windows 8.1 or Windows 10 for this manual.
On the following website the Arduino development environment can be downloaded.
Download: Arduino IDE (Please press the “Just download” button if no donation should be made)
Set up NodeMCU package
After installing the IDE please start the development environment. Open now via “File” and further on “Preferences” the menu in which boards of partners of the IDE can be added. Here we have to configure the support for the ESP8266 chip.
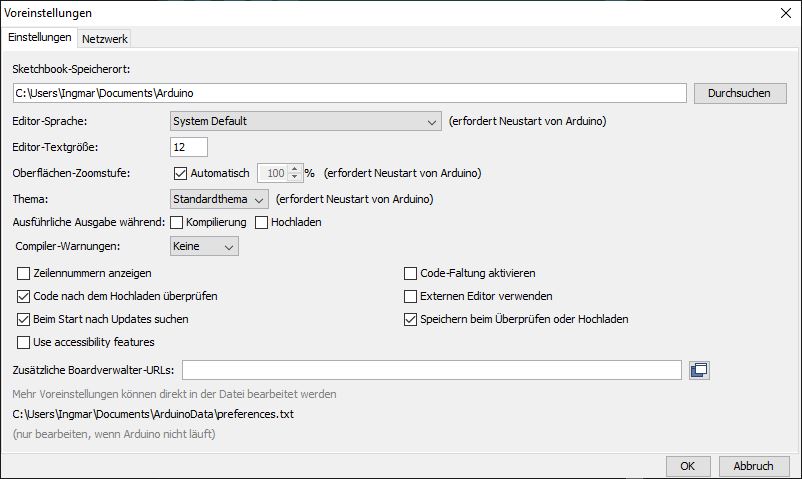
Arduino IDE Boardverwalter URLs
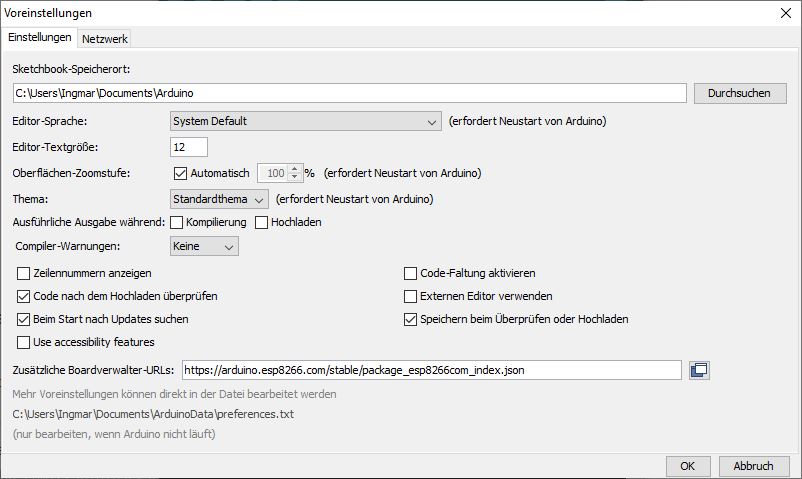
Please use the “Tools” menu to switch to the “Additional Board Administrator URLs” menu item, because this is the URL that refers to the json file that provides us with the package for the ESP8266. Only with this entry, the necessary packages are loaded which allow us to select the ESP8266 NodeMCU in the development environment and then program the ESP8266 chip.
URL: https://arduino.esp8266.com/stable/package_esp8266com_index.json
Now when the URL is entered the menu should look like this. You can also enter multiple URLs here if they are separated by a comma.
Arduino IDE Boardverwalter ESP8266 URL
Then press the OK button and that’s it in this menu. In the following section, support for ESP8266 is loaded.
Download NodeMCU package
To ensure that the ESP8266 NodeMCU is recognized by the Arduino development environment, it is important to select the correct board via the menu of the DIE. To do this, please click on “Tools” in the menu above, then on “Board: “Arduino Uno” and then on “Board Management”.
Now simply search for ESP and the previously configured ESP NodeMCU package should appear as an entry. Now press the install button and install the components. This is about 44MB which will be downloaded now. After installing the package, there are several ESP8266 boards available for which software can now be written.
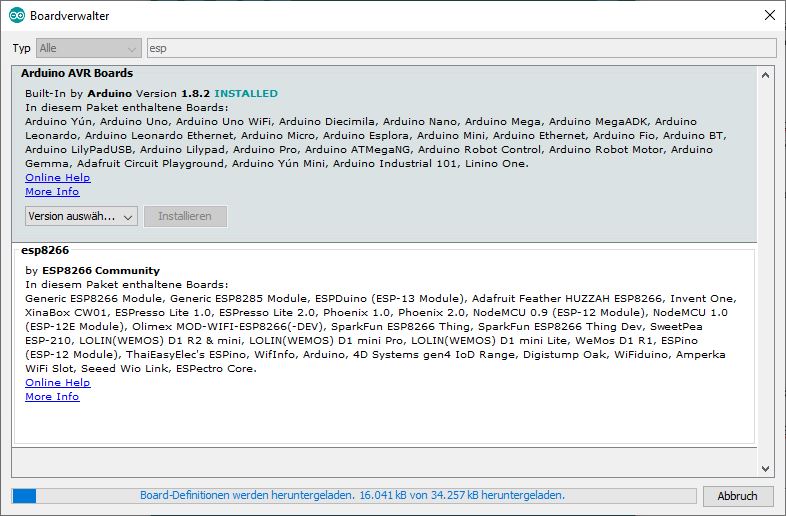
Arduino IDE Boards management installieren laeuft
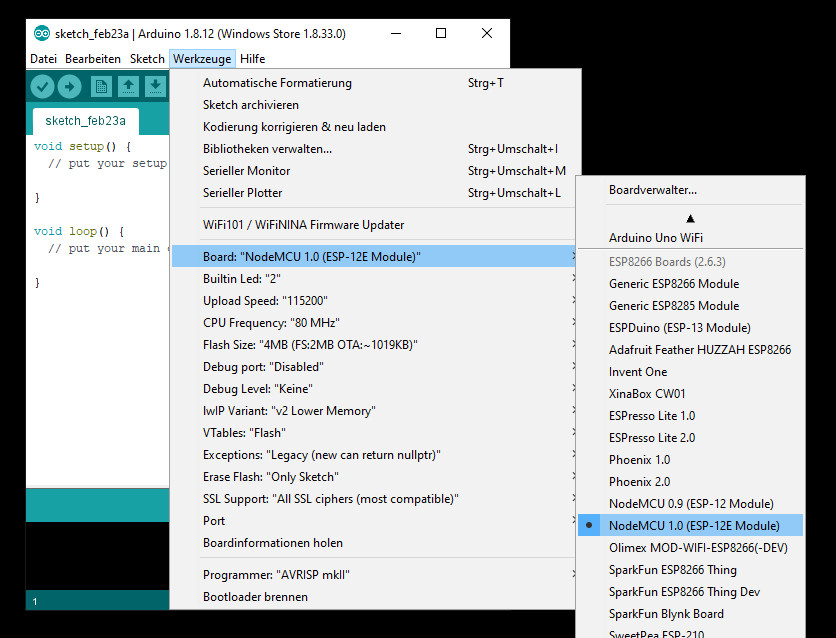
After installing the ESP8266 support, it is possible to select the correct model e.g. ESP8266 NodeMCU model. As shown in the following figure, the model “NodeMCU 1.0 (ESP-12E Module)” is selected. This model is installed in our robot car.
Arduino IDE Boards management Board waehlen
After the correct model has been selected, the development environment should now be closed once. Now the ESP8266 NodeMCU board is connected to the Windows PC via a USB cable and then the development environment is started again. The board should be recognized. Now it is important to check the settings like speed etc. as shown in the following picture. Here it is very important to choose the correct port under which the NodeMCU board was recognized at the USB port of the PC. This port changes whenever the ESP8266 NodeMCU is connected to another USB port on the PC.
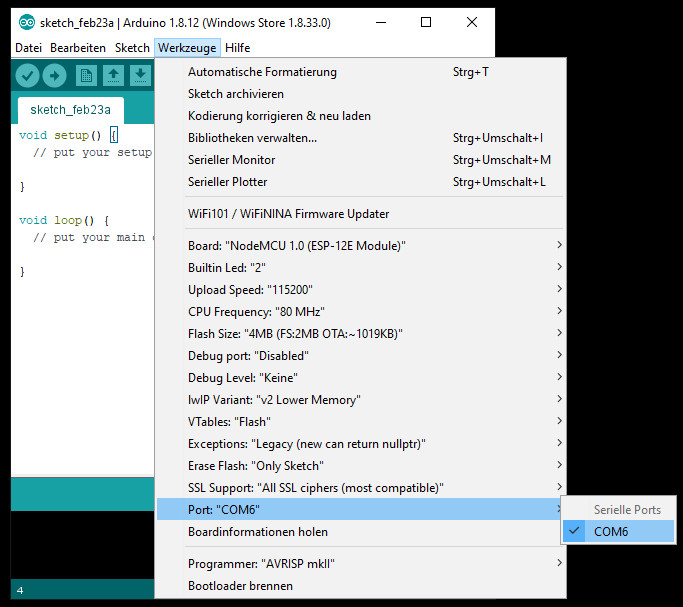
Arduino IDE Boards management Board Port waehlen
From now on it is possible to use and program the ESP8266 NodeMCU. As it makes no sense to start with the full program for the autonomous control of the robot car right away, we will now approach the programming step by step. This is the only way to find out if everything is wired correctly and to understand step by step how everything works.
But before we start with the programming, we first have to install the appropriate libraries to recognize the electronic components like the ultrasonic sensor.
Install libraries
To install additional libraries, the “Library Manager” must be started. To do this, click on the “Manage libraries” menu item in the Arduino IDE via the “Tools” menu. There please search for the following entry “Adafruit Unified Sensor”. Please install this library by clicking on the button Install now.
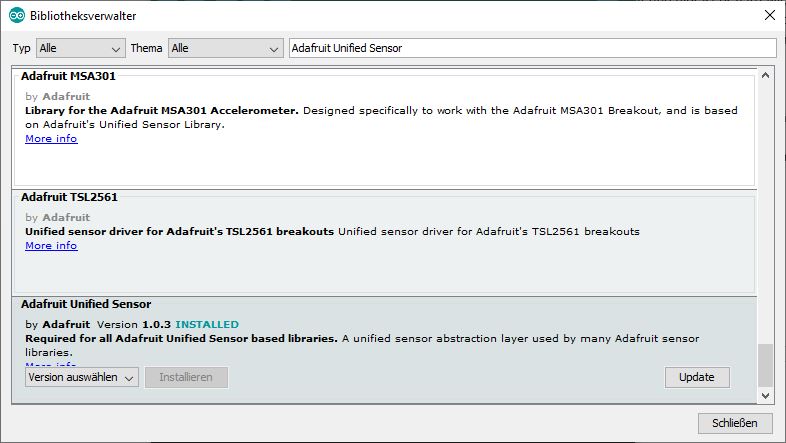
Arduino IDE Bibliothek Adafruit Unified Sensor
Furthermore the library “Adafruit PWM Servo” must be installed. Please proceed exactly the same way as with the “Adafruit Unified Sensor” library and install it so that we can program the PCA9685 chip of the servo controller.
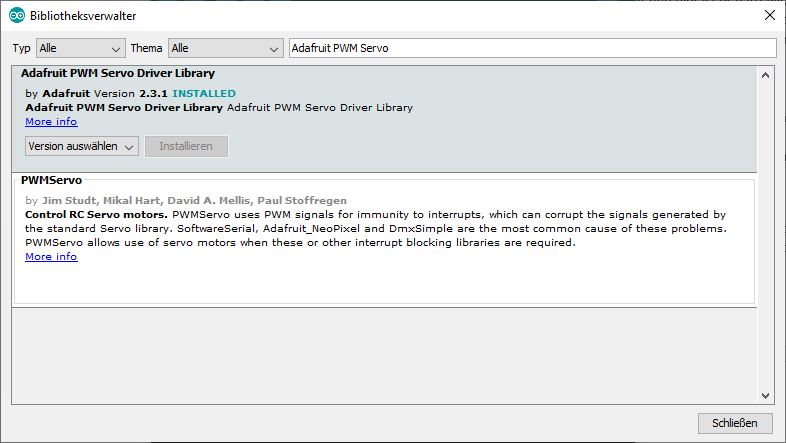
Arduino IDE Bibliothek Adafruit PWM Servo
From now on all necessary libraries are installed and the little robot car with its ultrasonic sensor and servo controller can be programmed.
Summary
The development environment was set up on the PC and the necessary libraries were installed as described. These are important for programming the control of the robot car. Now the ESP8266 NodeMCU can be programmed to rotate the motors and read the ultrasonic sensor. This means that we can now bring our robot car to life and drive it through the apartment.
Article Overview ESP8266 NodeMCU Robot Car:
Building robots with the ESP8266 development board – IntroductionBuilding robots with the ESP8266 development board – Power supply
Building robots with the ESP8266 development board – Components
Building robots with the ESP8266 development board – chassis
Building robots with the ESP8266 development board – Wiring Part 1
Building robots with the ESP8266 development board – Wiring Part 2
Building robots with the ESP8266 development board – Setting up the Arduino development environment
Building robots with the ESP8266 development board – Ultrasonic sensor and motor control
Building robots with the ESP8266 development board – WIFI remote control
Building robots with the ESP8266 development board – servo motor control
Building robots with the ESP8266 development board – OLED display
Building robots with the ESP8266 development board – Magnetometer
Building robots with the ESP8266 development board – GPS receiver introduction
Article Outlook:
Building robots with the ESP8266 development board - GyroscopeBuilding robots with the ESP8266 development board - GPS waypoints
Building robots with the ESP8266 development board - Solar cell


Recent Comments