

I decided to use a Raspberry Pi Computer to control the SainSmart desktop robotic arm. The robotic arm is initially designed for an Adruino but I thought it must be possible to use a Raspberry Pi computer to control the robotic arm as well. To control the six servo motors I have to use a servo controller. I decided to buy the PCA9685 servo controller I already used in other projects to control DC-motors and servo motors as well.
The following pictures shows that I used a Raspberry Pi 3 Model B and a PCA9685 servo controller.
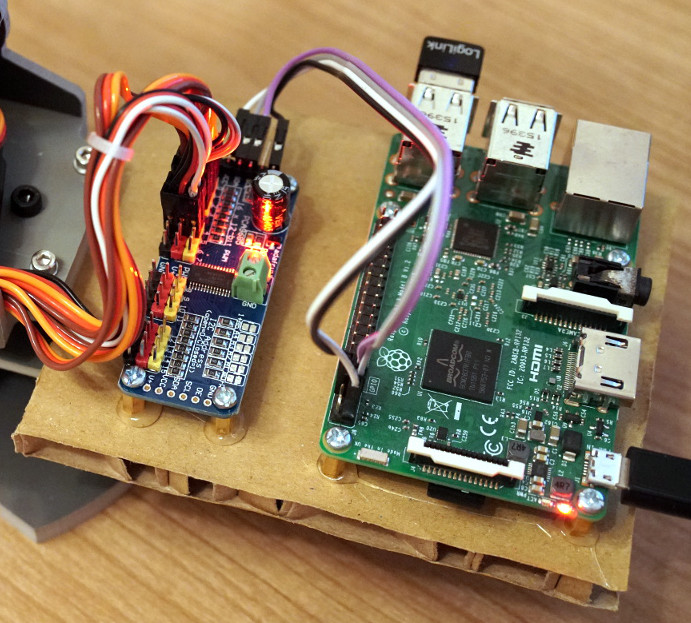
SainSmart 6 Achsen Desktop Roboter Arm PCA9685 Servo Kontroller
Logic wiring of the robotic kit
To connect the servo controller with the Raspberry Pi is easy. You only need four wires to connect the PCA9685 with the Raspberry Pi computer. With this four wires the connection is establish between the Raspberry Pi and the servo controller which enables the Python program to control the robotic arm.
The PCA9685 servo controller uses the I2C bus for communication. The I2C bus is available on the Raspberry Pi with the pins SDA/SCL.
Note: The Raspberry Pi works with a voltage of 3.3 V and only with 3.3 V on the GPIO Pins and SDA/SCL Pins. This is the reason why the PCA9685 is also connected to 3.3 V and not to 5 V which is typical for this controller. If you connect the Raspberry Pi pins with 5.0 V you will damage the Rapsberry Pi computer.
The next table shows which pins are used on Raspberry Pi side and which pins are used on the serco controller side.
| Raspberry Pi | Servo Kontroller |
| 3,3 V | 5 V |
| SCL | SCL |
| SDA | SDA |
| GND | GND |
The following picture shows who the power supply is connected to the servo controller. How the one servo motor is connected to the PCA9685 controller and how the servo controller itself is connected via the I2C bus to the Raspberry Pi computer (3.3 V).
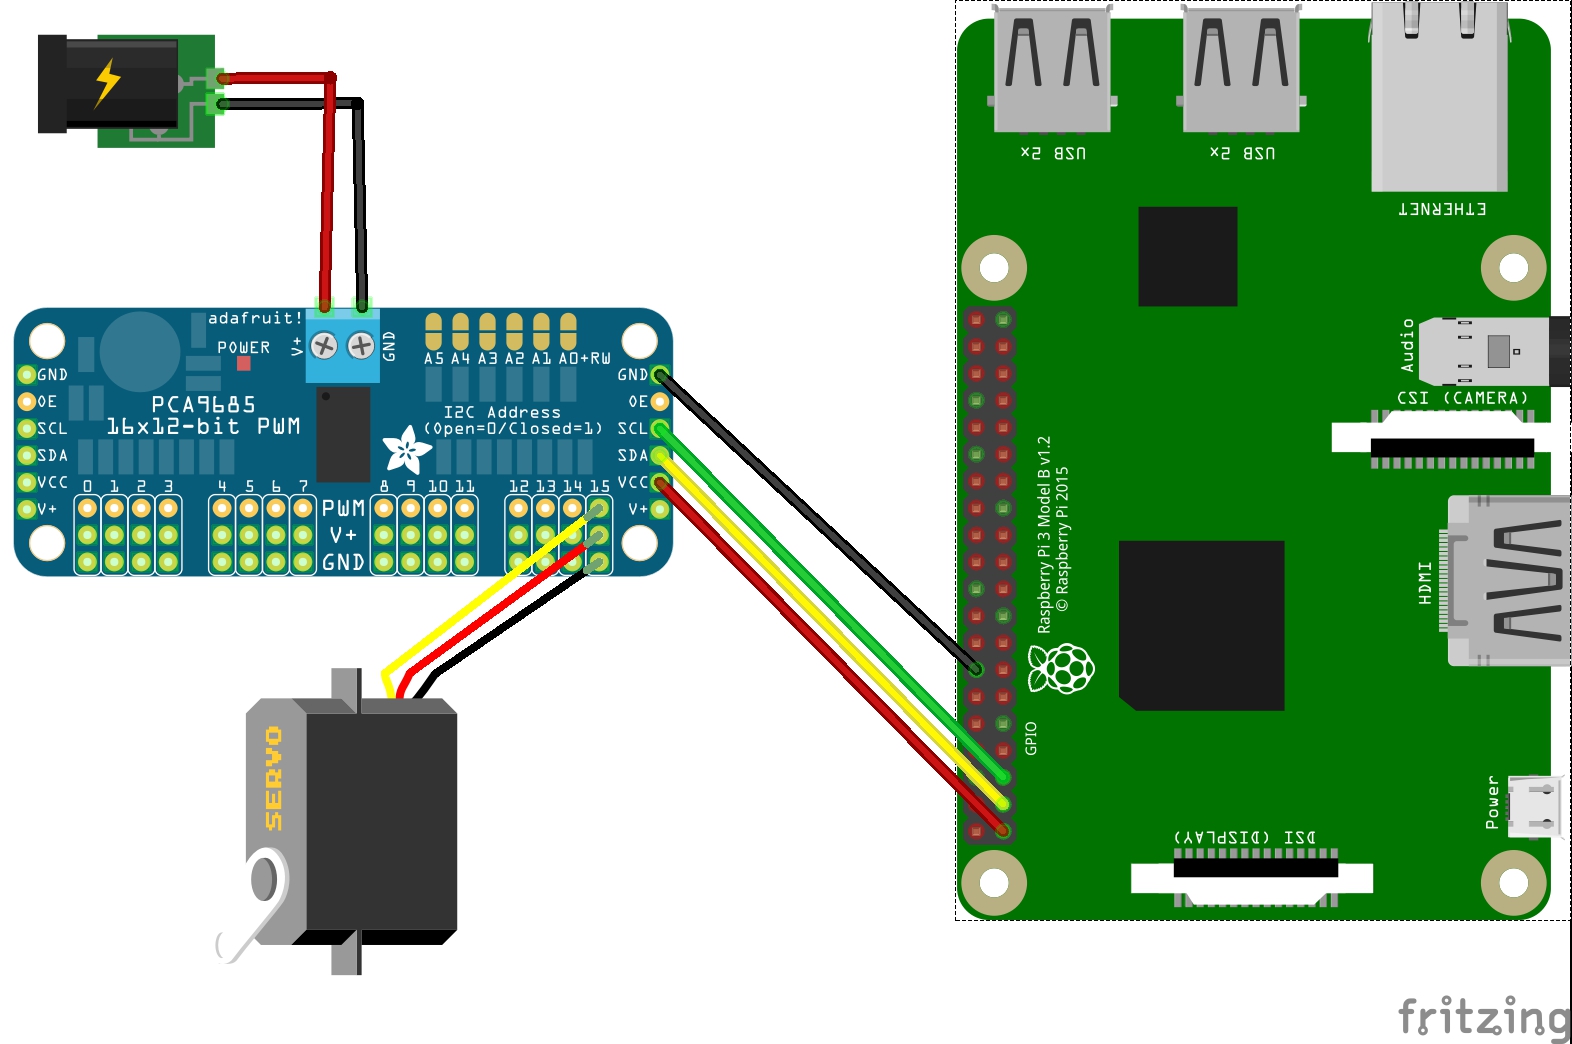
SainSmart 6 Achsen Desktop Roboter Arm – Verkabelung
Wiring of the power supply
The six robotic arm servo motors need 5 V for operation. But as explained above it is very important to connect only electronic components to the Raspberry Pi which are using 3.3 V. The terminal in the middle of the servo controller is connected to a power supply with 5 V to supply sufficient voltage to the 5 V servo motors. This high voltage part of the servo controller is separated from the logic part which works with 3.3 V as well. The Raspberry Pi is only connected to this logic part with 3.3 V.
| Raspberry Pi | Servo Kontroller |
| – | 5 V (Kabelklemme) |
| – | GND |
Summary
If you are carefully with the different voltages of 3,3 V and 5 V the wiring is very easy. I used a power bank to supply 5 V to the servo motors via a USB cable I which I cut of the micro-USB connecter. The Raspberry Pi is also connected to the power bank via micro-USB cable. The PCA9685 servo controller is ideal for this robotic arm. The Raspberry Pi in this combination has enough power to control the robotic arm and to do some more stuff like live video streaming.
Article list - SainSmart 6-Axis Desktop Robotic Arm:
SainSmart 6-Axis Desktop Robotic Arm – Raspberry PiSainSmart 6-Axis Desktop Robotic Arm – Raspberry Pi wiring
SainSmart 6-Axis Desktop Robotic Arm - Raspberry Pi software installation
SainSmart 6-Axis Desktop Robotic Arm – Raspberry Pi web interface test


Great article!
Are you able to clarify what Power Bank you’re using? I can’t find one with enough amps to power all 6 servos.