

The robot arm is build with six servo motors which are controlled independent from each other. This is the first time I have designed a web interface to control a robotic arm and I used six sliders to control the position of each servo motor. With this solution it is possible to use the web interface from each device supporting HTML to remote control the robot arm. I tried to use the web interface with my old Samsung Galaxy S5 and as well with my desktop PC and it worked perfectly.
The web interface designe looks like the screenshot below.

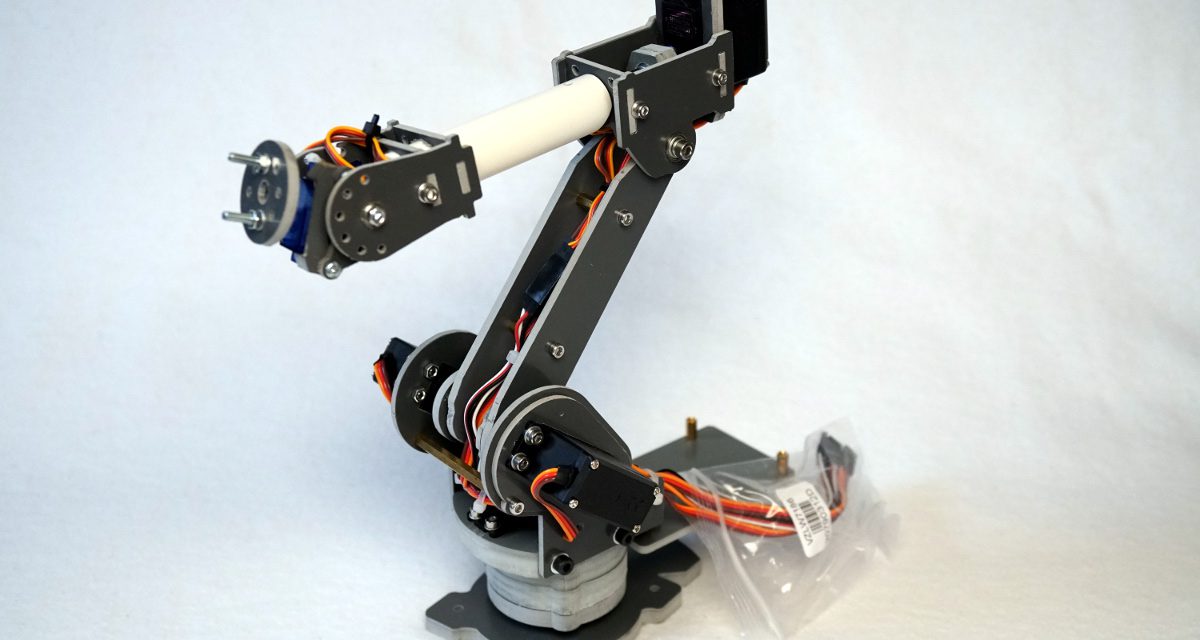
SainSmart 6 Achsen Desktop Roboter Arm – Raspberry Pi web interface
I am sure this robot arm is perfect for teachers to teach the children the basics in robotics. It is not so easy to control this robot arm with his six servo motors and this makes it very interesting for schools. The Raspberry Pi is easy to program and this makes the project a success which is very important if for childrens.
Software
The program to control the robot arm is written in Python. The web site / the web interface is hosted and published by the Flask web server directly on the Raspberry Pi. With a browser you are able to load and display the web site. The Flask web server supports the Raspberry Pi GPIO interface and that the reason why you could control the robot arm with a PCA9685 servo controller wiht a simple Pyhton program.
The Python program is available on GitHub:
GitHub: 6-Axis Desktop Robotic Arm Raspberry Pi
The program was developed by many copy & past actions. If you would like to optimize the program an ID for each servo could improve the code and reduce the redunt lines of code.
If you would like to buy the robotic arm the following affiliate link will load the Amazon web shop.
Video
The video shows the first text of my robotic arm in action. To control the robot arm I used my PC and loaded the web interface in a browser.

Summary
Most of the time to develop the Python program to control the robot arm I used to program the HTML sliders and to interact with them inside my Python program. The Python code was developed very fast compared to the part with the slieders. To control the robotic arm over the web site maked a lot of fun.
Article list - SainSmart 6-Axis Desktop Robotic Arm:
SainSmart 6-Axis Desktop Robotic Arm – Raspberry PiSainSmart 6-Axis Desktop Robotic Arm – Raspberry Pi wiring
SainSmart 6-Axis Desktop Robotic Arm - Raspberry Pi software installation
SainSmart 6-Axis Desktop Robotic Arm – Raspberry Pi web interface test


Ingmar,
Thank you for sharing your work on Raspberry Pi 3 and the 6 axis arm. May I ask if you can share the full folder structure. I am learning Python, and currently not able to have the arm move using your work. The error received is:
>>> %cd /home/pi/6_Axis
>>> %Run robot-control.py
Traceback (most recent call last):
File “/home/pi/6_Axis/robot-control.py”, line 11, in
PCA9685_pwm = Adafruit_PCA9685.PCA9685()
File “/home/pi/6_Axis/Adafruit_PCA9685/PCA9685.py”, line 72, in __init__
import Adafruit_GPIO.I2C as I2C
ImportError: No module named ‘Adafruit_GPIO’
Ingmar,
Thank you again for sharing your nice work! After a few more hours of playing around, I was able to confirm you’re good work and that the issue was mine. I did not correctly configure the i2c interface ( off vs on), and the Adafruit PCA9685 setup was not correctly completed by me. Thanks again for your sharing of you nice work, you’re efforts brought a smile to my face to see all 6 axis move with the web application.
Joe
Thanks for the great post. This is a cool gadget to play and learn.
I would like to know if it is possible to save a home position for all the servo motors. So for my project I can start with home position and control movement from the home position
Hi Guru,
to set a home position you only have to program a function which sets the home position / start position of all your servo motors.
Best regards,
Maker
Hey Ingmar, sag mal hast du dich schon mit dem Greifarm auseinander gesetzt?
Hallo Stephan,
ja, das habe ich.
Viele Grüße,
Maker