


Today I finished my floppy disc robot with mecanum wheels. This bot is a homage to the floppy disc beams the floppy disc into the new century. Actual the robot is powered by four DC motors and a Raspberry Pi 3. A single L298N H-Bridge is used as motor driver. This is the reason why the robot could not strafe – moving from side to side yet. But when I got the ZeroBorg motor driver I will replace the L298N H-Bridge by the ZeroBorg. With the ZeroBorg motor driver it is possible to control up to four DC motors separately. This is perfect for my mecanum wheeled robot.
ZeroBorg on Kickstarter: ZeroBorg
Maybe I will also replace the Raspberry Pi 3 with a Raspberry Pi Zero to show the power of the small Zero in action by controlling my robot. The Raspberry Pi Zero is incredible powerful for the money you have to pay for it.
The picture below shows the robot.

I implemented a web interface to control the robot via keyboard and to see what the robot sees. I am using mjpg-streamer to stream the live video out of the robot. This works very well and very fast. With the live video stream it is easy to drive around without visual contact to the robot.
Raspberry Pi robot-car component list:
If I could awaken you interest how to build such a robot with a Raspberry Pi computer as central controlling unit you will find a list of components on my blog to help you. The component list is an overview of electronic components or ready to assemble kits which I used by myself and which I could recommend with good conscience. I used most of the components in my own projects and checked the functionality and compatibility with a Raspberry Pi.
This is the link to the component list: component list

ZeroBorg motor controller - robot-car components
Robot with Mecanum wheels
With the mecanum wheels it is possible to drive omnidirectional driving manoeuvres with the robot. It looks really funny to strafe with the robot. I was asked where I bought the mecanum wheels.
You always need a pair of Right /Bearing Rollers and Left /Bearing Rollers on each side of your robot. Otherwise the wheels do not make sense and the robot is not able to drive omnidirectional.
The picture below shows the mecanum wheels and on top of each wheel the mounting hub.

Chassis
I searched for a nice and easy to build chassis for my bot. I found an old disc box on a junkyard and decided to give it a try. It took a few mounth to get all the parts together and to find DC motors which fit into the plastic box.
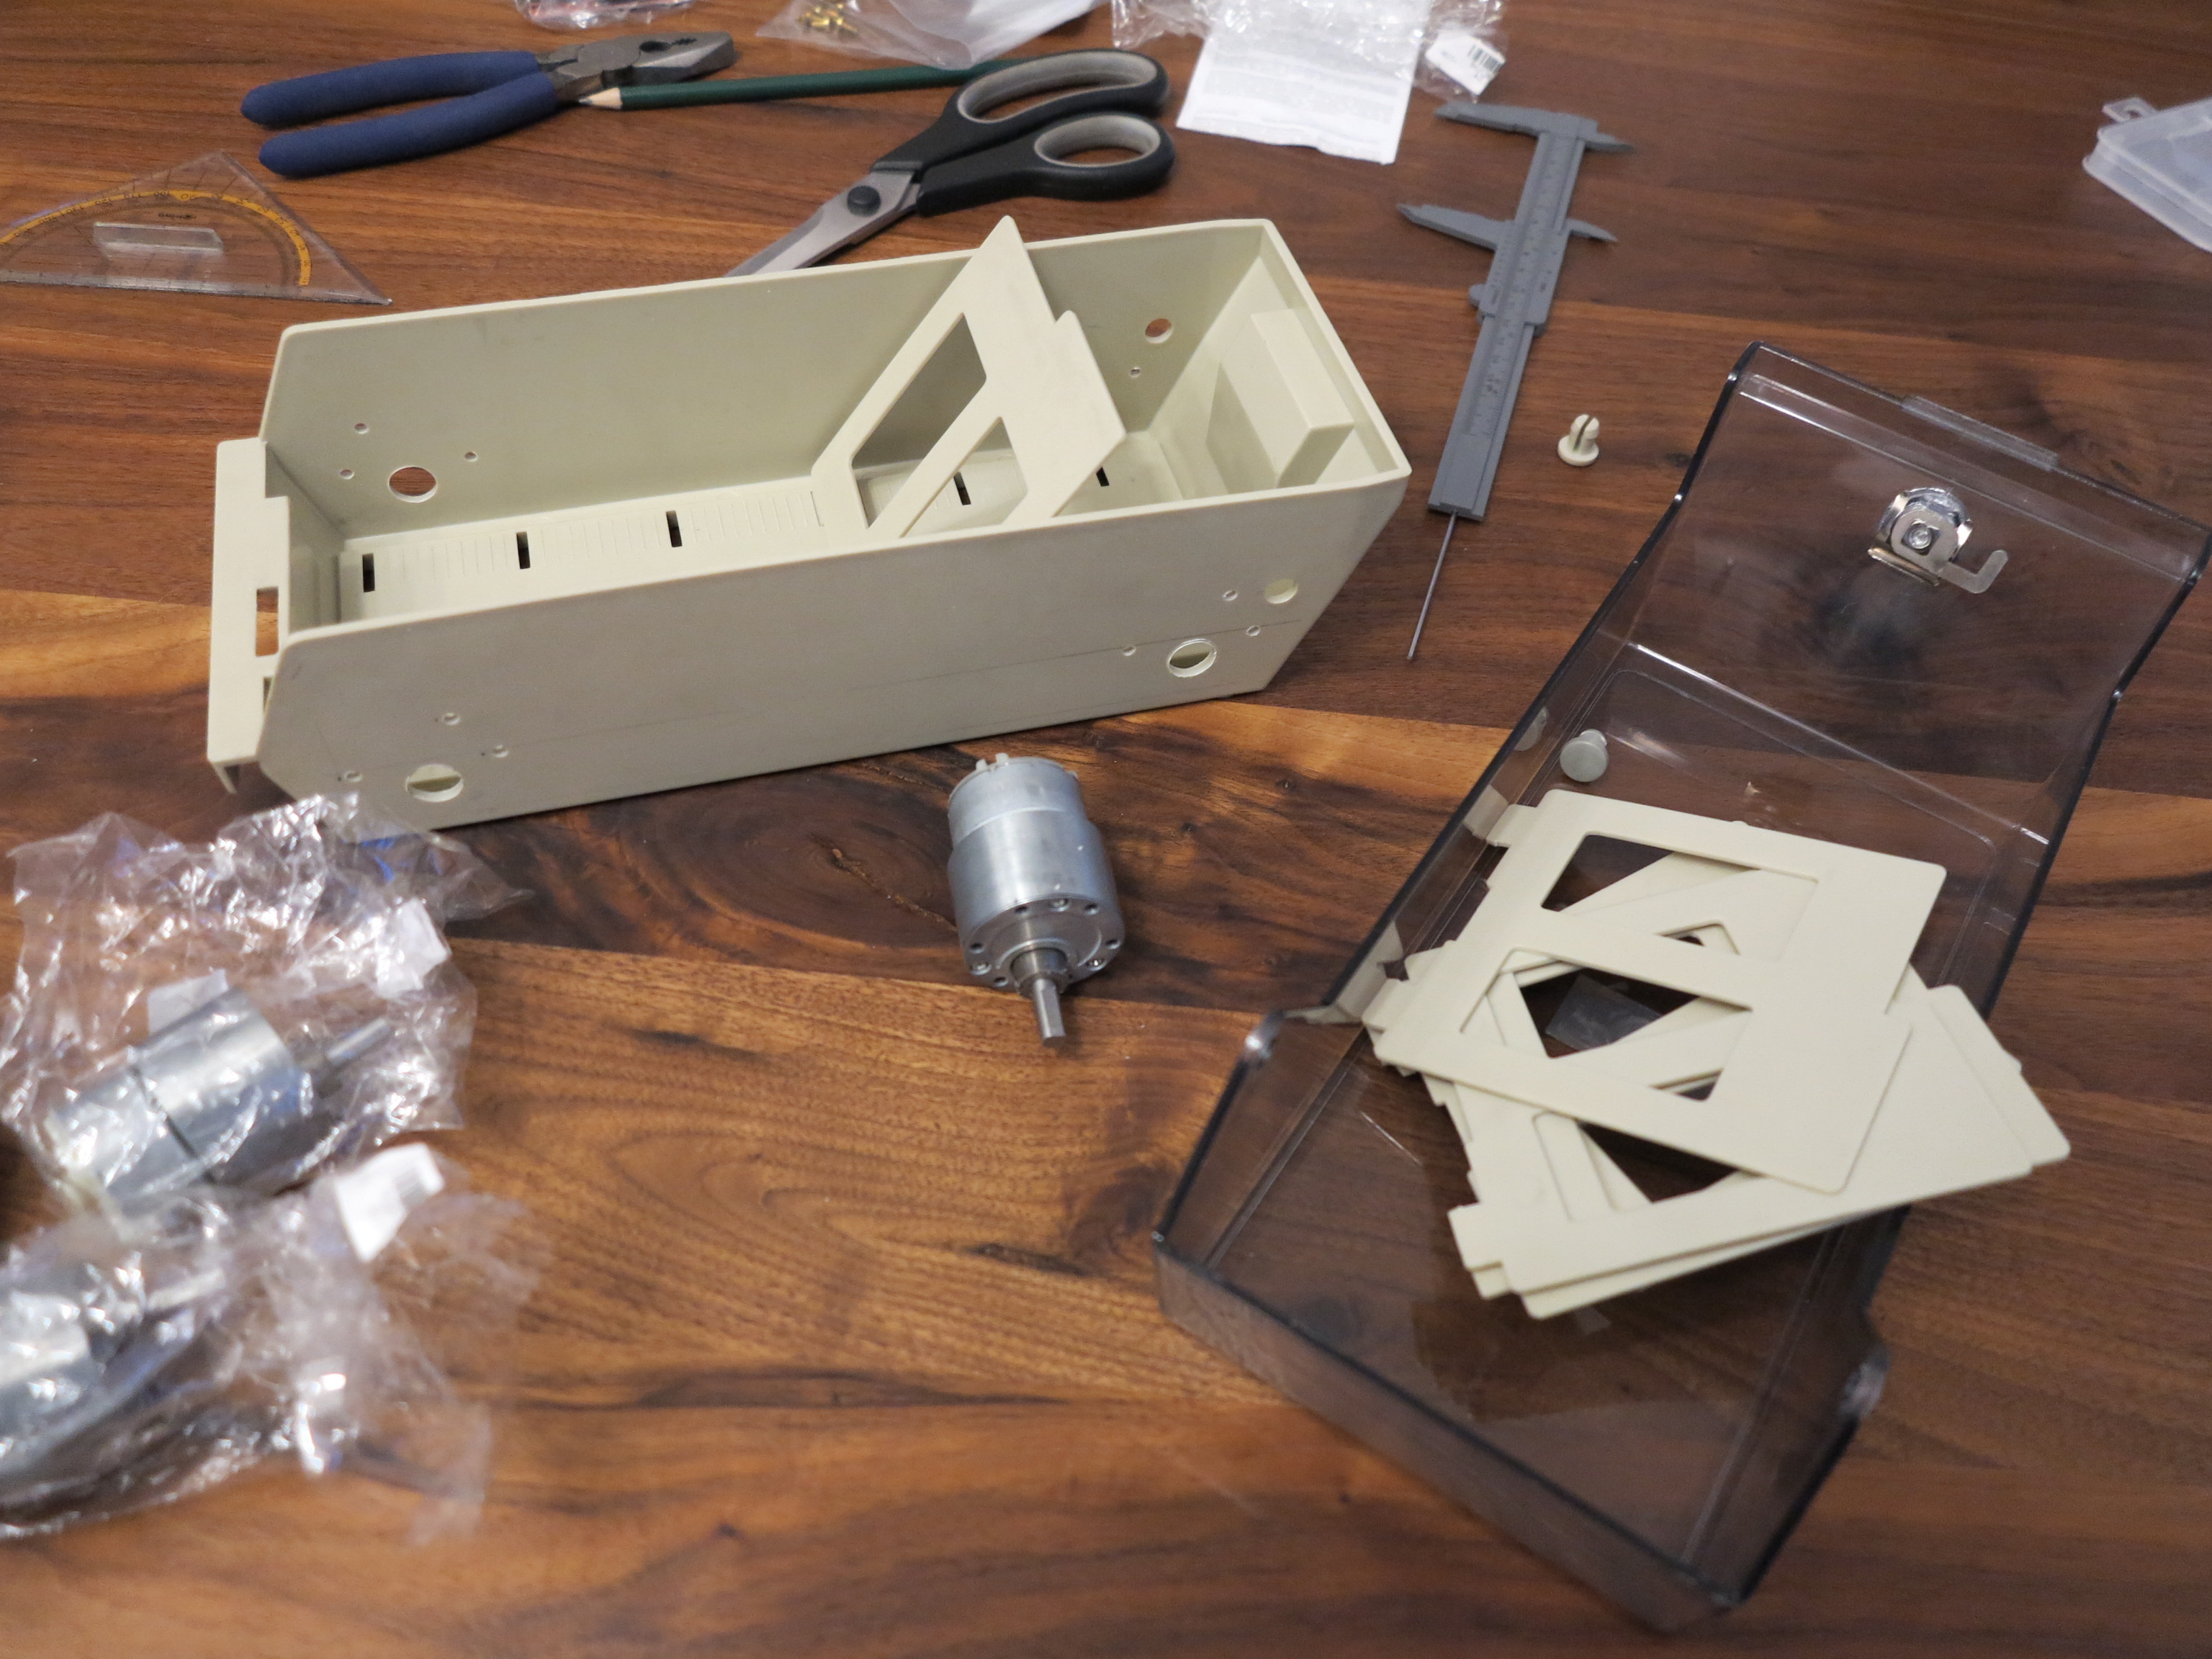
After drilling a bunch of holes into the plastic box for the DC motors. I was able to screw the four 12V DC motors into the box. With the gearbox the DC motors are very strong. The box is pretty stable and easy to work on. With the cover I am now able to drive around outside in the garden.
DC motors
I bought the following four DC motors for my robot. They are cheap, not too big and they have enough torque for my little robot and the mecanum wheels.
Specification:
Rated voltage: 12V DC
Voltage range: 3V-18V
Voltage 3V, there is still considerable torque, can not handle with hand
No-load speed: 70 rev / min
No-load current: <=0.1 A
Resist twisting: 7 kg / cm
Reduction ratio: 1:90
Stall torque: 7 kg/cm
Stall current: 1.2 A
Dimension:
Diameter: 37mm
Length (excluding shaft): 52mm
Shaft length: 21mm
Total length: 73mm
Shaft diameter: 6mm
I am using two 7.2V rc accus connected in series to get 14.2V. The picture below shows the four DC motors mounted into the plastic box.
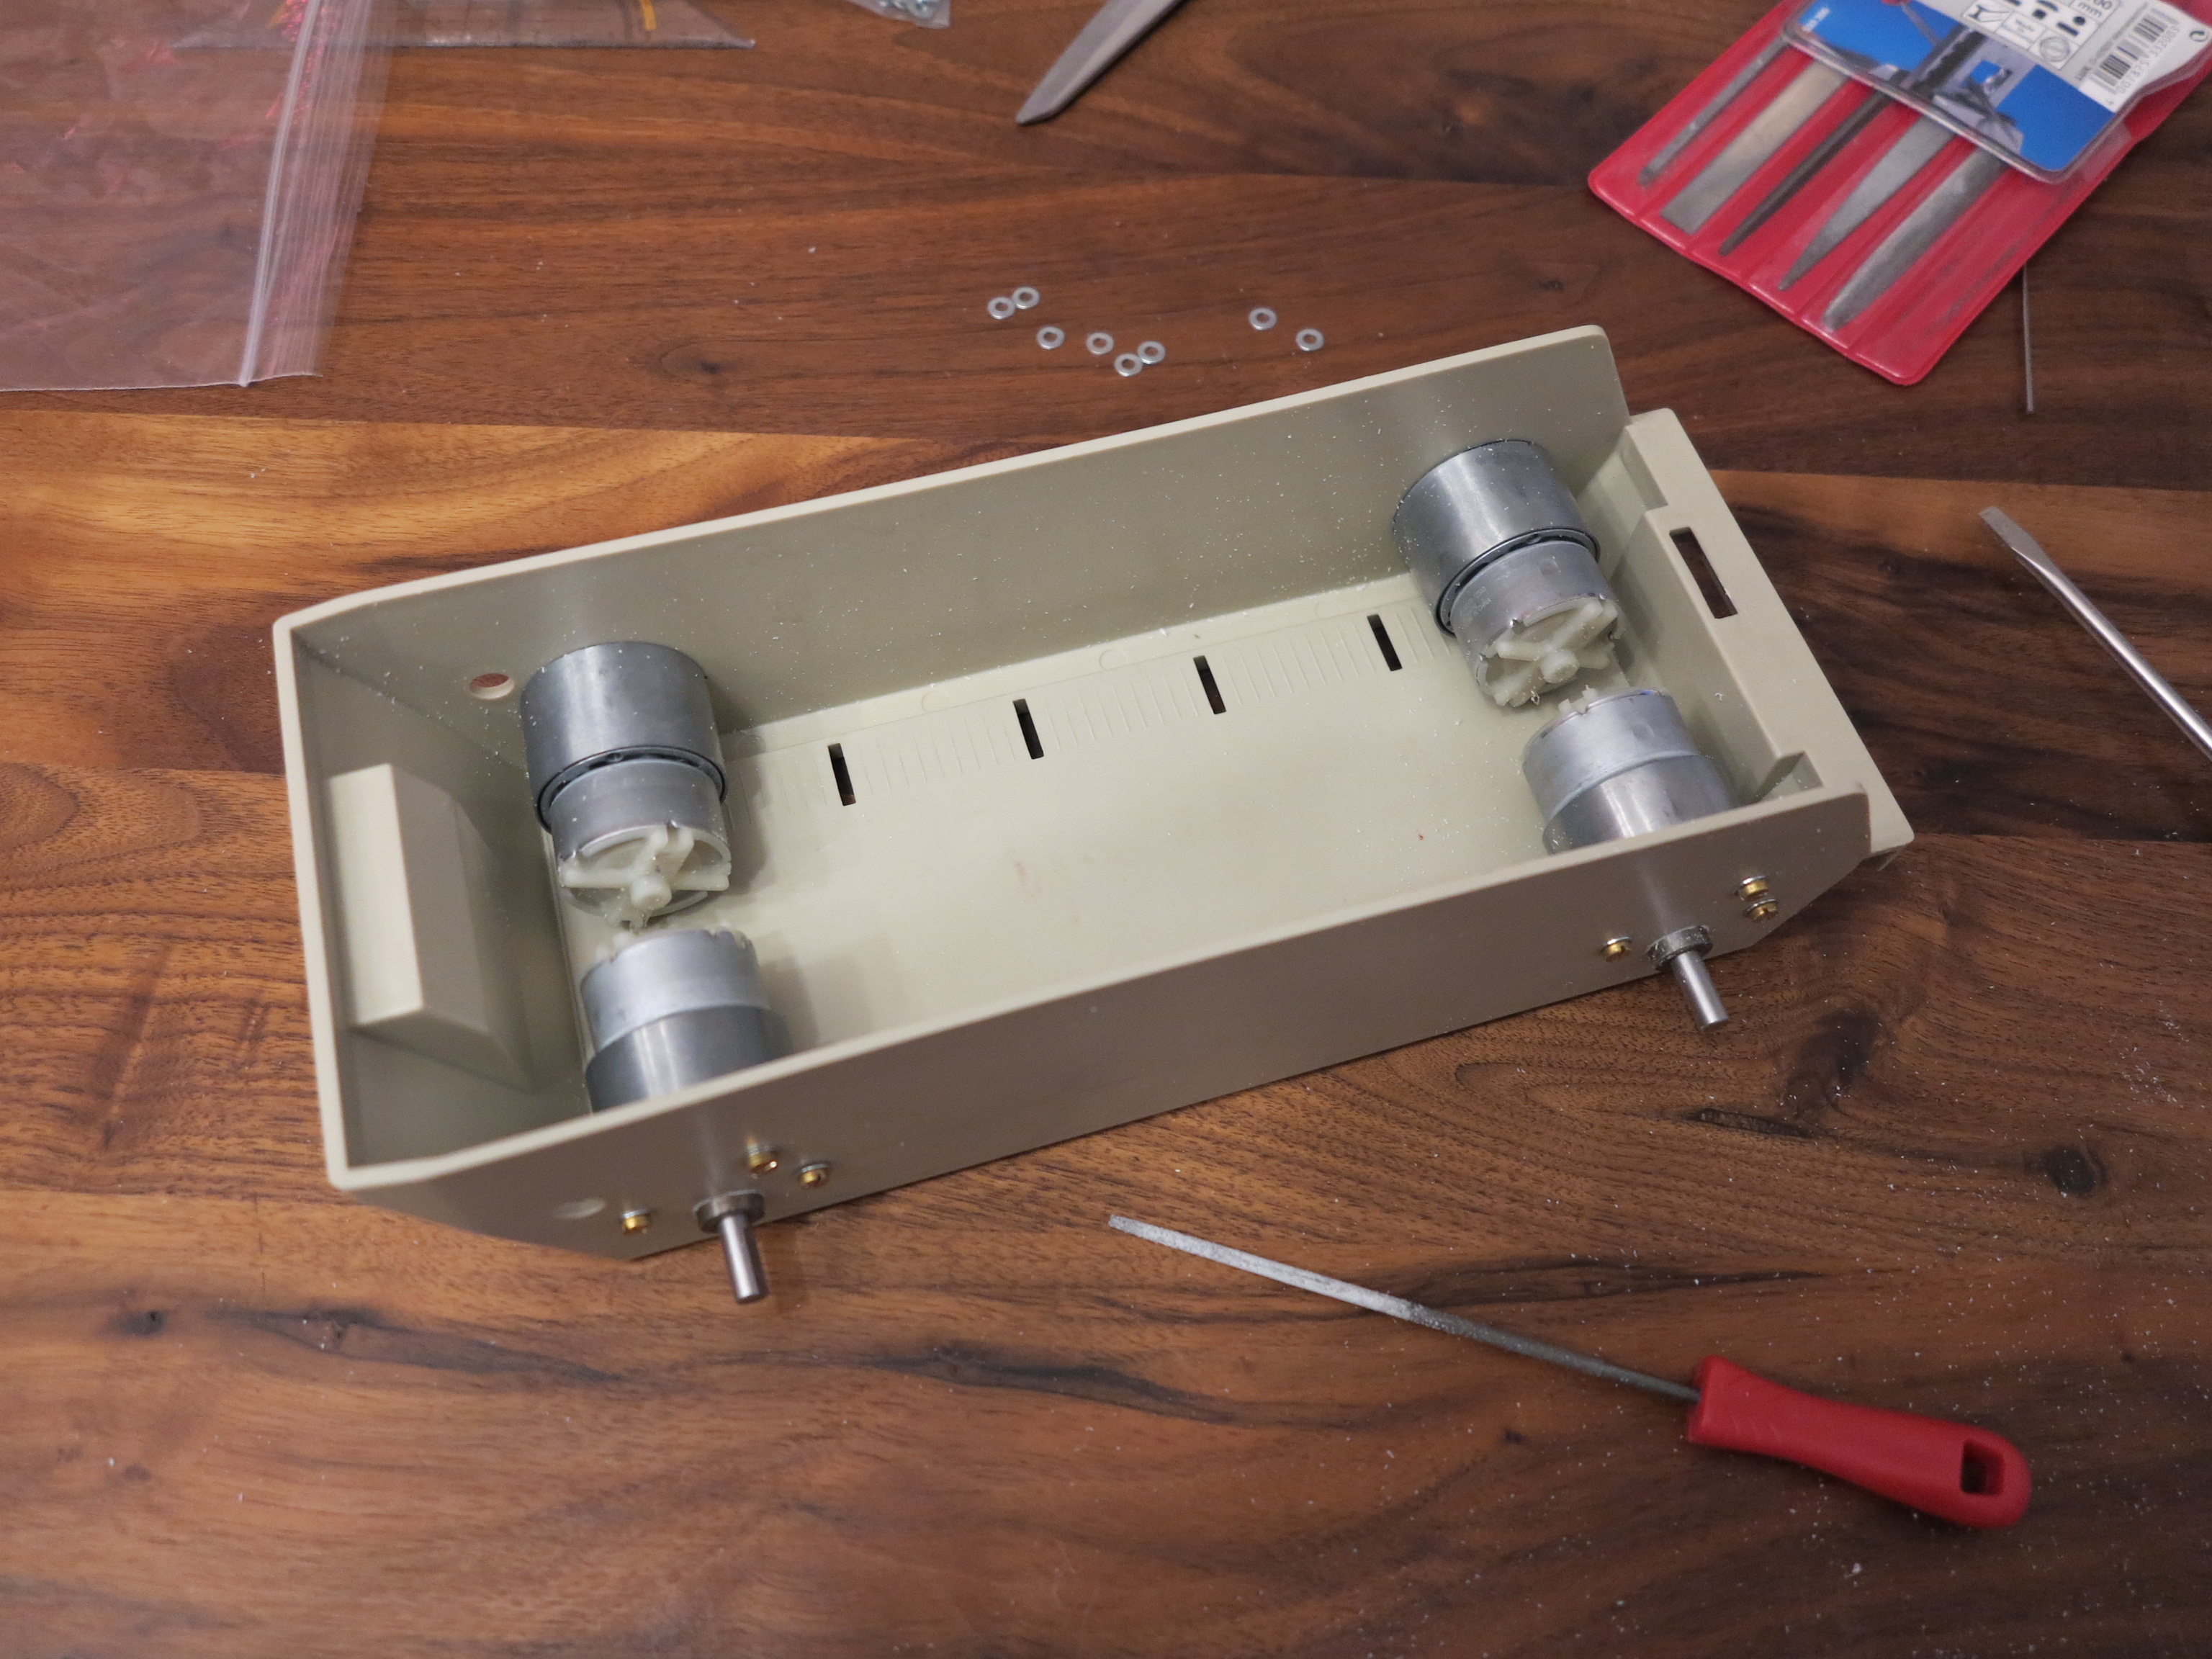
Then I had to mount the mecanum wheels with the mounting hub onto the axis of each DC motor. This was done very fast and at the end I got a very nice four wheel bot which is one of the coolest I ever build. The old disc box made the bot unique.
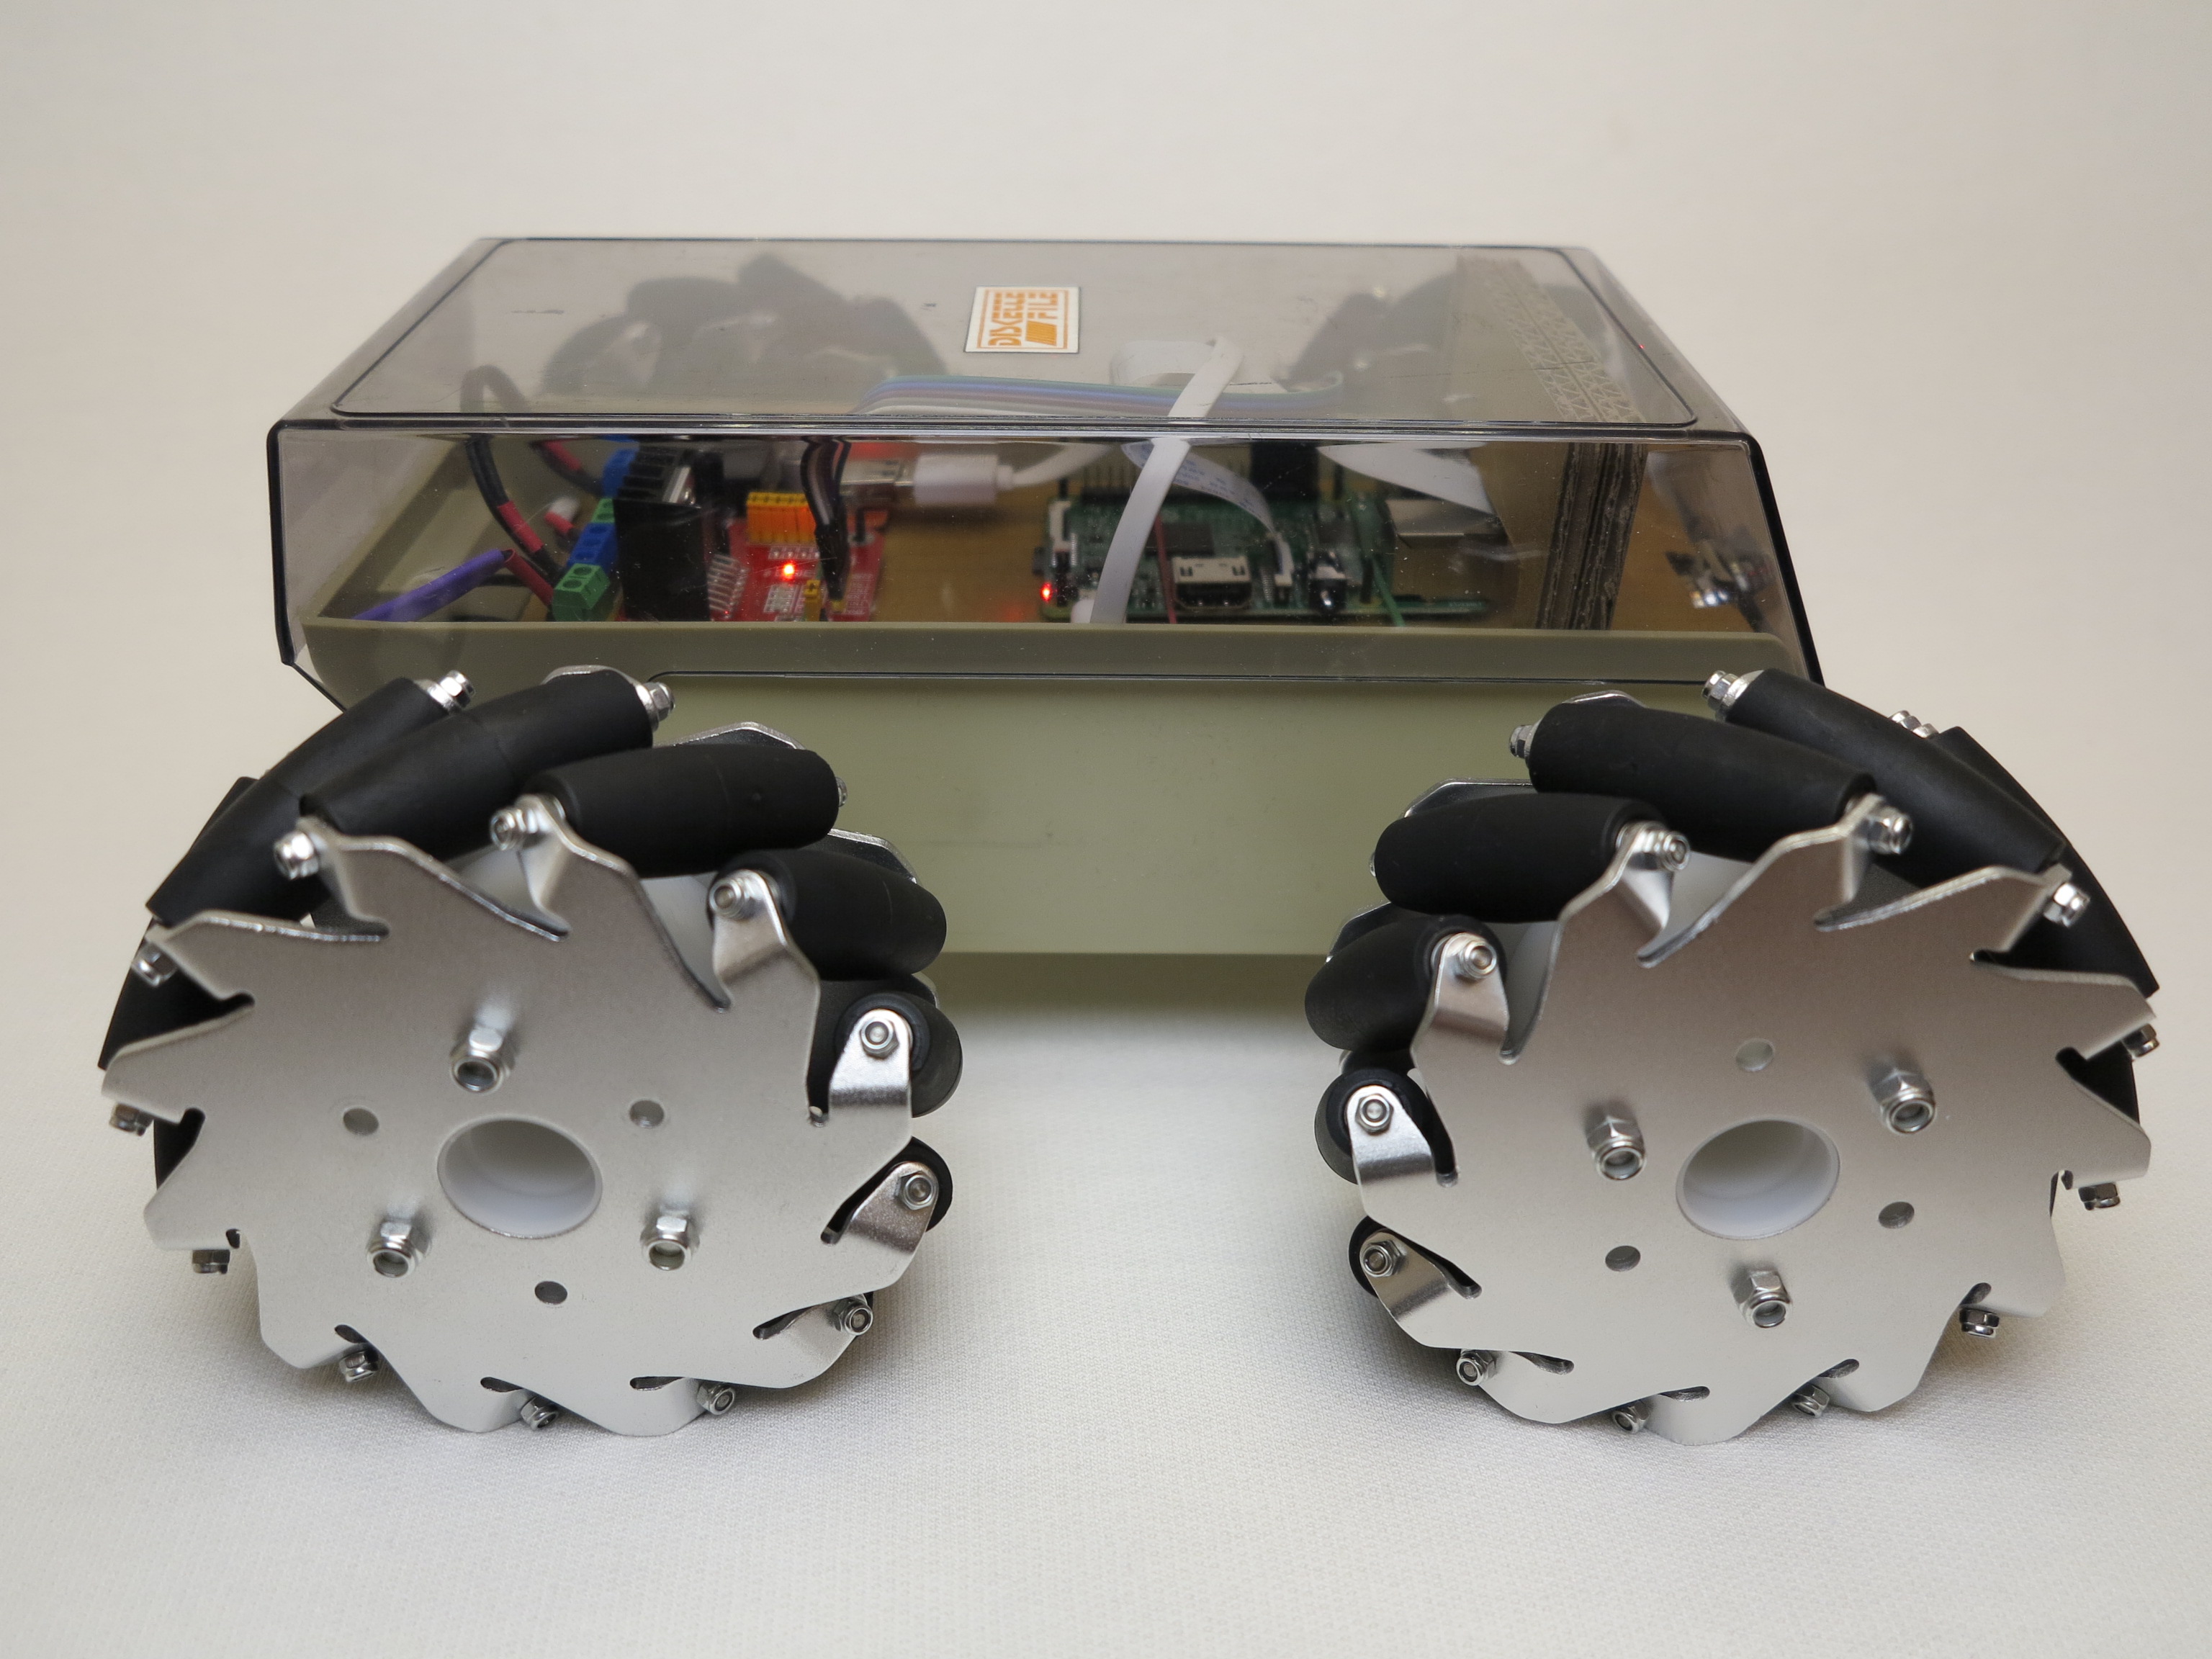
The picture below shows the finished bot with all electronic components form the right side. The box has sufficent space and looks very cool.
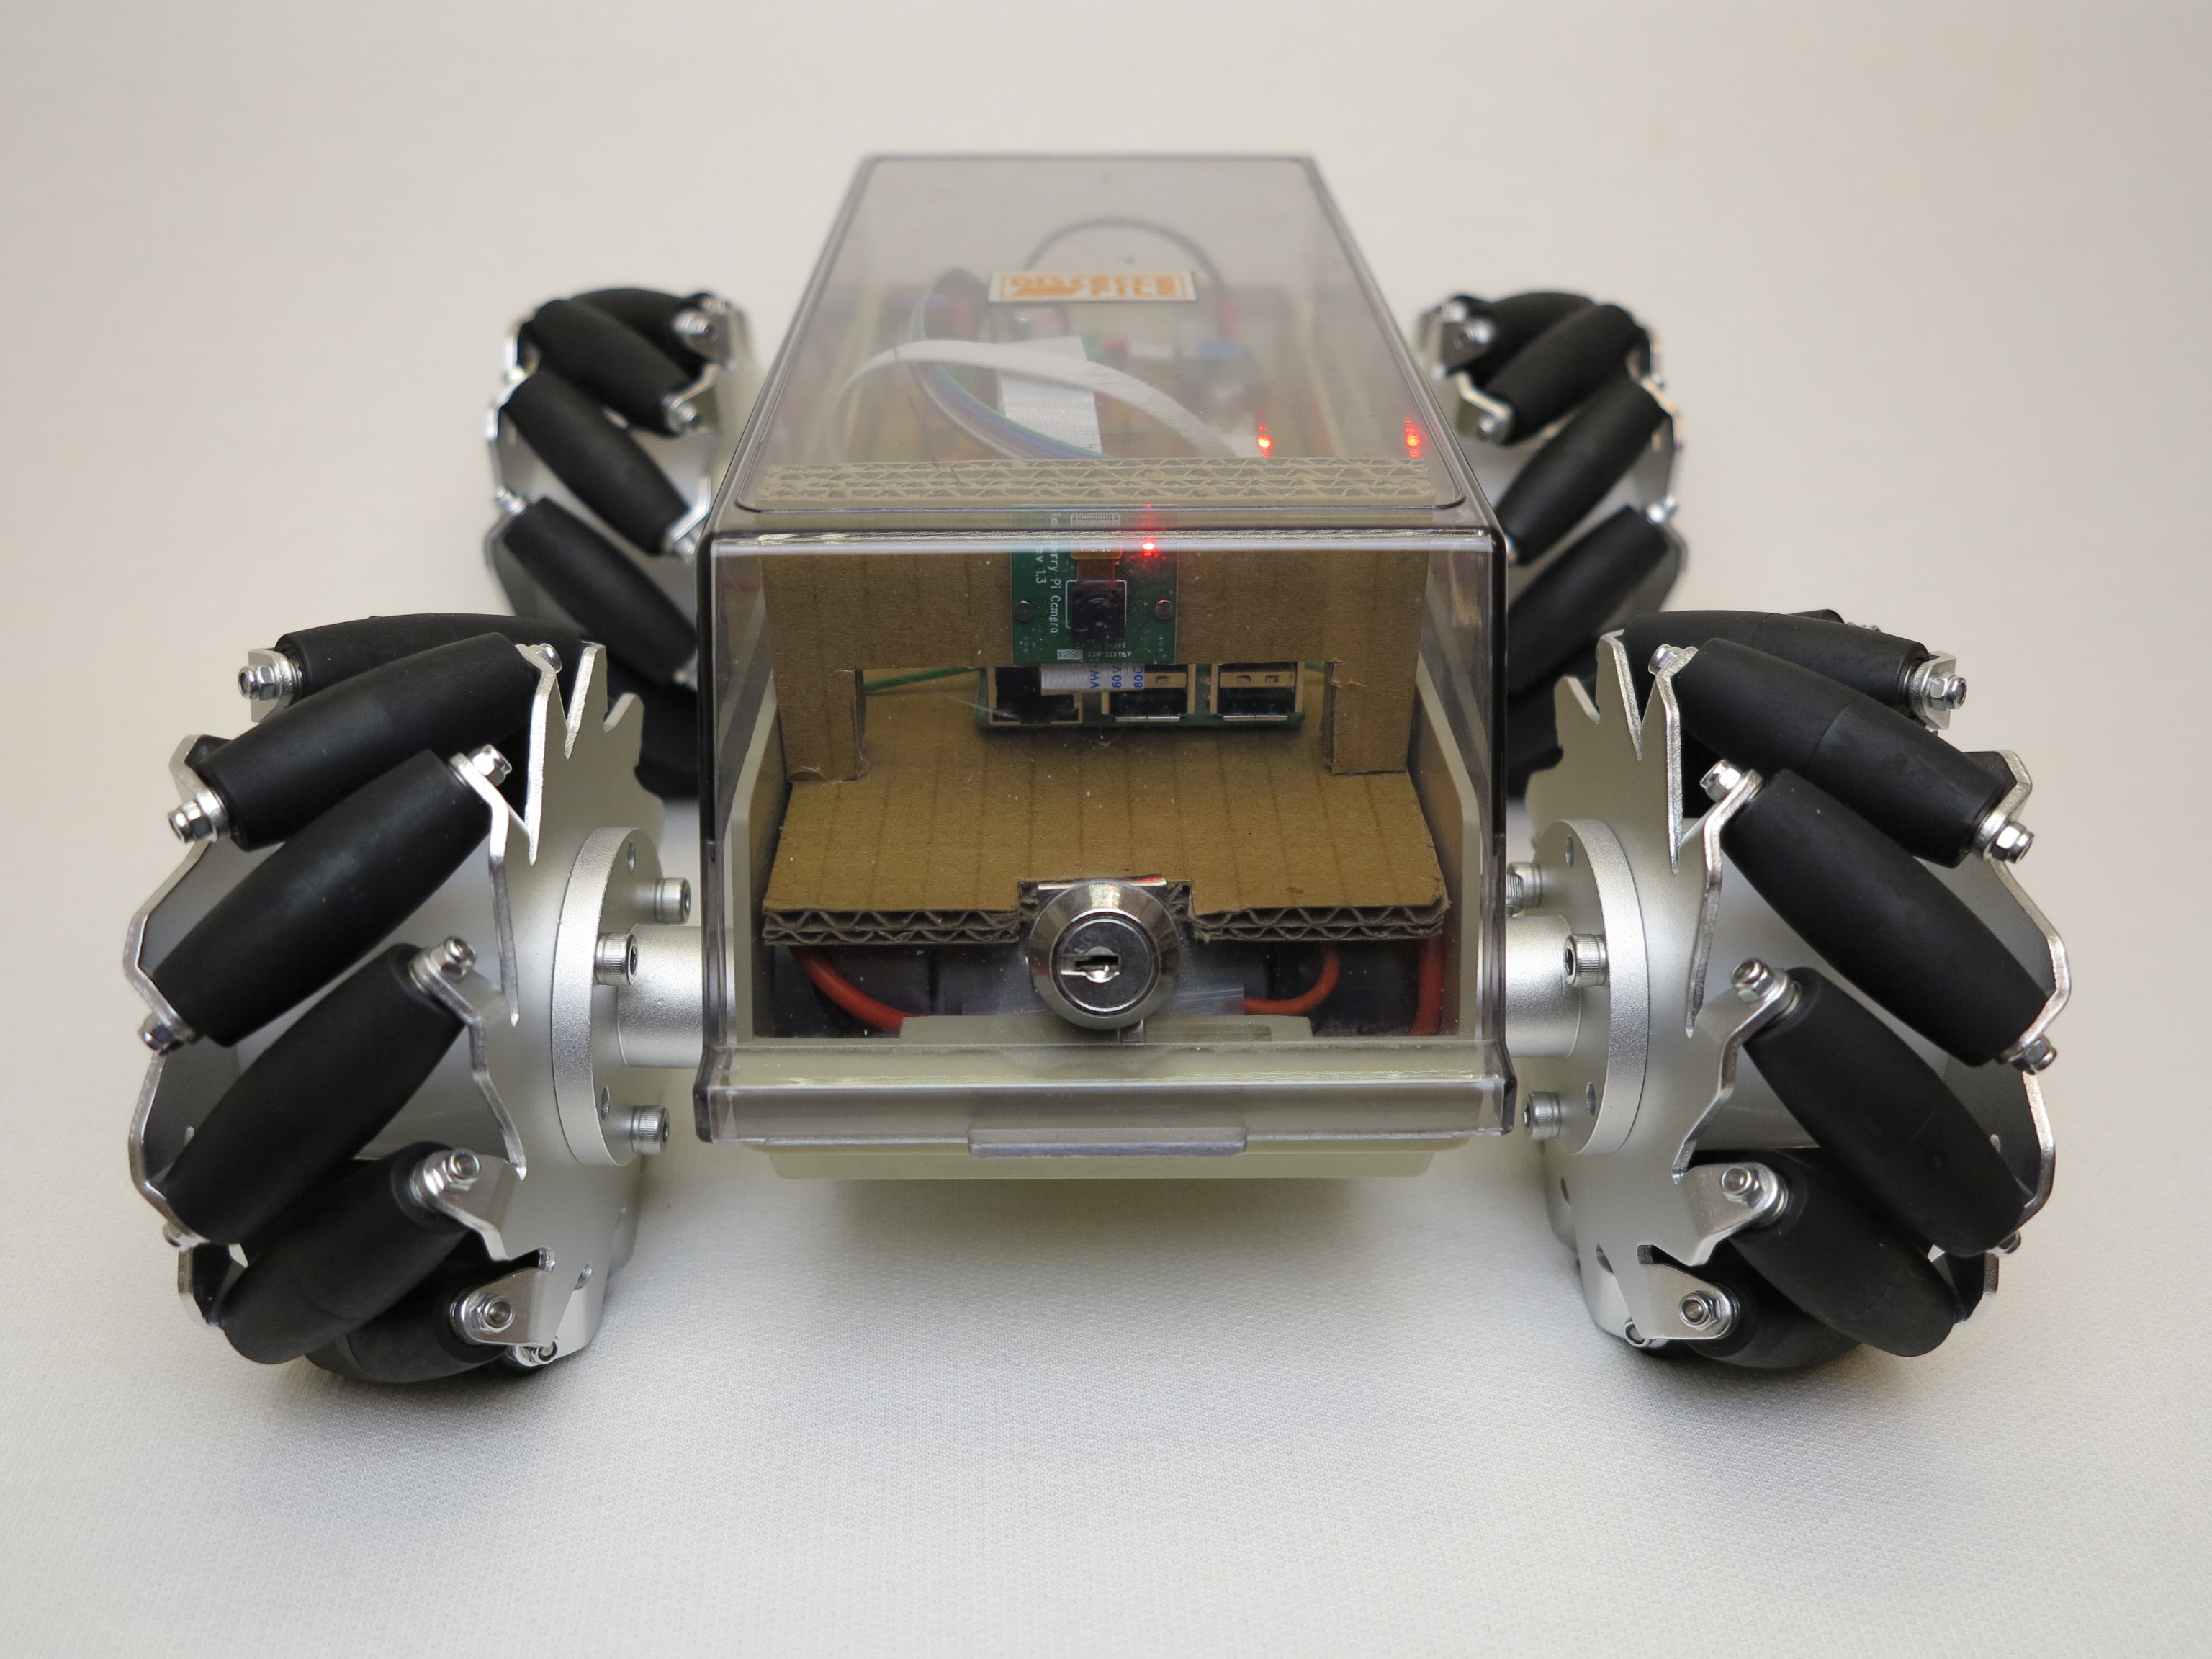
The next picture shows the robot from the front. You see the Raspberry Pi camera in the middle of the chassis. The red LED is indicating that the live video stream is active. The camera pictures was not distubed by the transparent plastic of the chassis.
Now it was time for the robot-car to drive around in my apartment. The wheels and DC motors are a little bit noisy.

Build your own robot car with the Raspberry Pi!
Step by step to your own robot carThis book guides you in two parts through the project phases with the aim of building an individual, autonomously driving robot car. In the first part of the book you will learn the basics of robotics and the interaction of hardware, electricity and software. You build the chassis and wire the individual components - details can be found in the appropriate, richly illustrated chapters. An introduction to software installation and programming with Scratch and Python completes the first part. You do not need any previous knowledge in robotics and programming. In the second part of the book, you will familiarize yourself with the sensors required for autonomous driving. With the acquired knowledge you can individualize and further develop your robot car as you wish. The knowledge you acquire in this book will enable you to implement your own projects with the Raspberry Pi.
This book offers you that:
- Simply get into robotics with the Rasperberry Pi without prior knowledge
- Numerous illustrations, tables, circuit diagrams
- Information boxes with useful tips also for other Raspberry Pi projects
- Project code with syntax highlighting
- Two car projects: remote-controlled robot car via WLAN and self-driving car
- Hardware tips and recommendations for suitable accessories - Extensive project material as download: Raspbian image, parts list, chassis artwork and code
- Special features: Easy and robust cabling, use of high-precision time-of-flight laser distance measurement sensors, introduction to servo motors and suitable servo controllers, control via gamepad, use of an OLED display
Ingmar Stapel studied computer engineering and is currently working internationally as IT project manager and enterprise technical architect; in addition, he has been intensively involved with Raspberry Pi and robotics for years. He likes to share this knowledge with interested people from the tinkering scene at meet-ups on robotics. On his private blogs he also writes about many current technology trends.
Floppy Disc Robot in action:
The video below shows the first test run with the mecanum wheels. It was not so easy to control the movements of the robot-car. But it made a lot of fun.

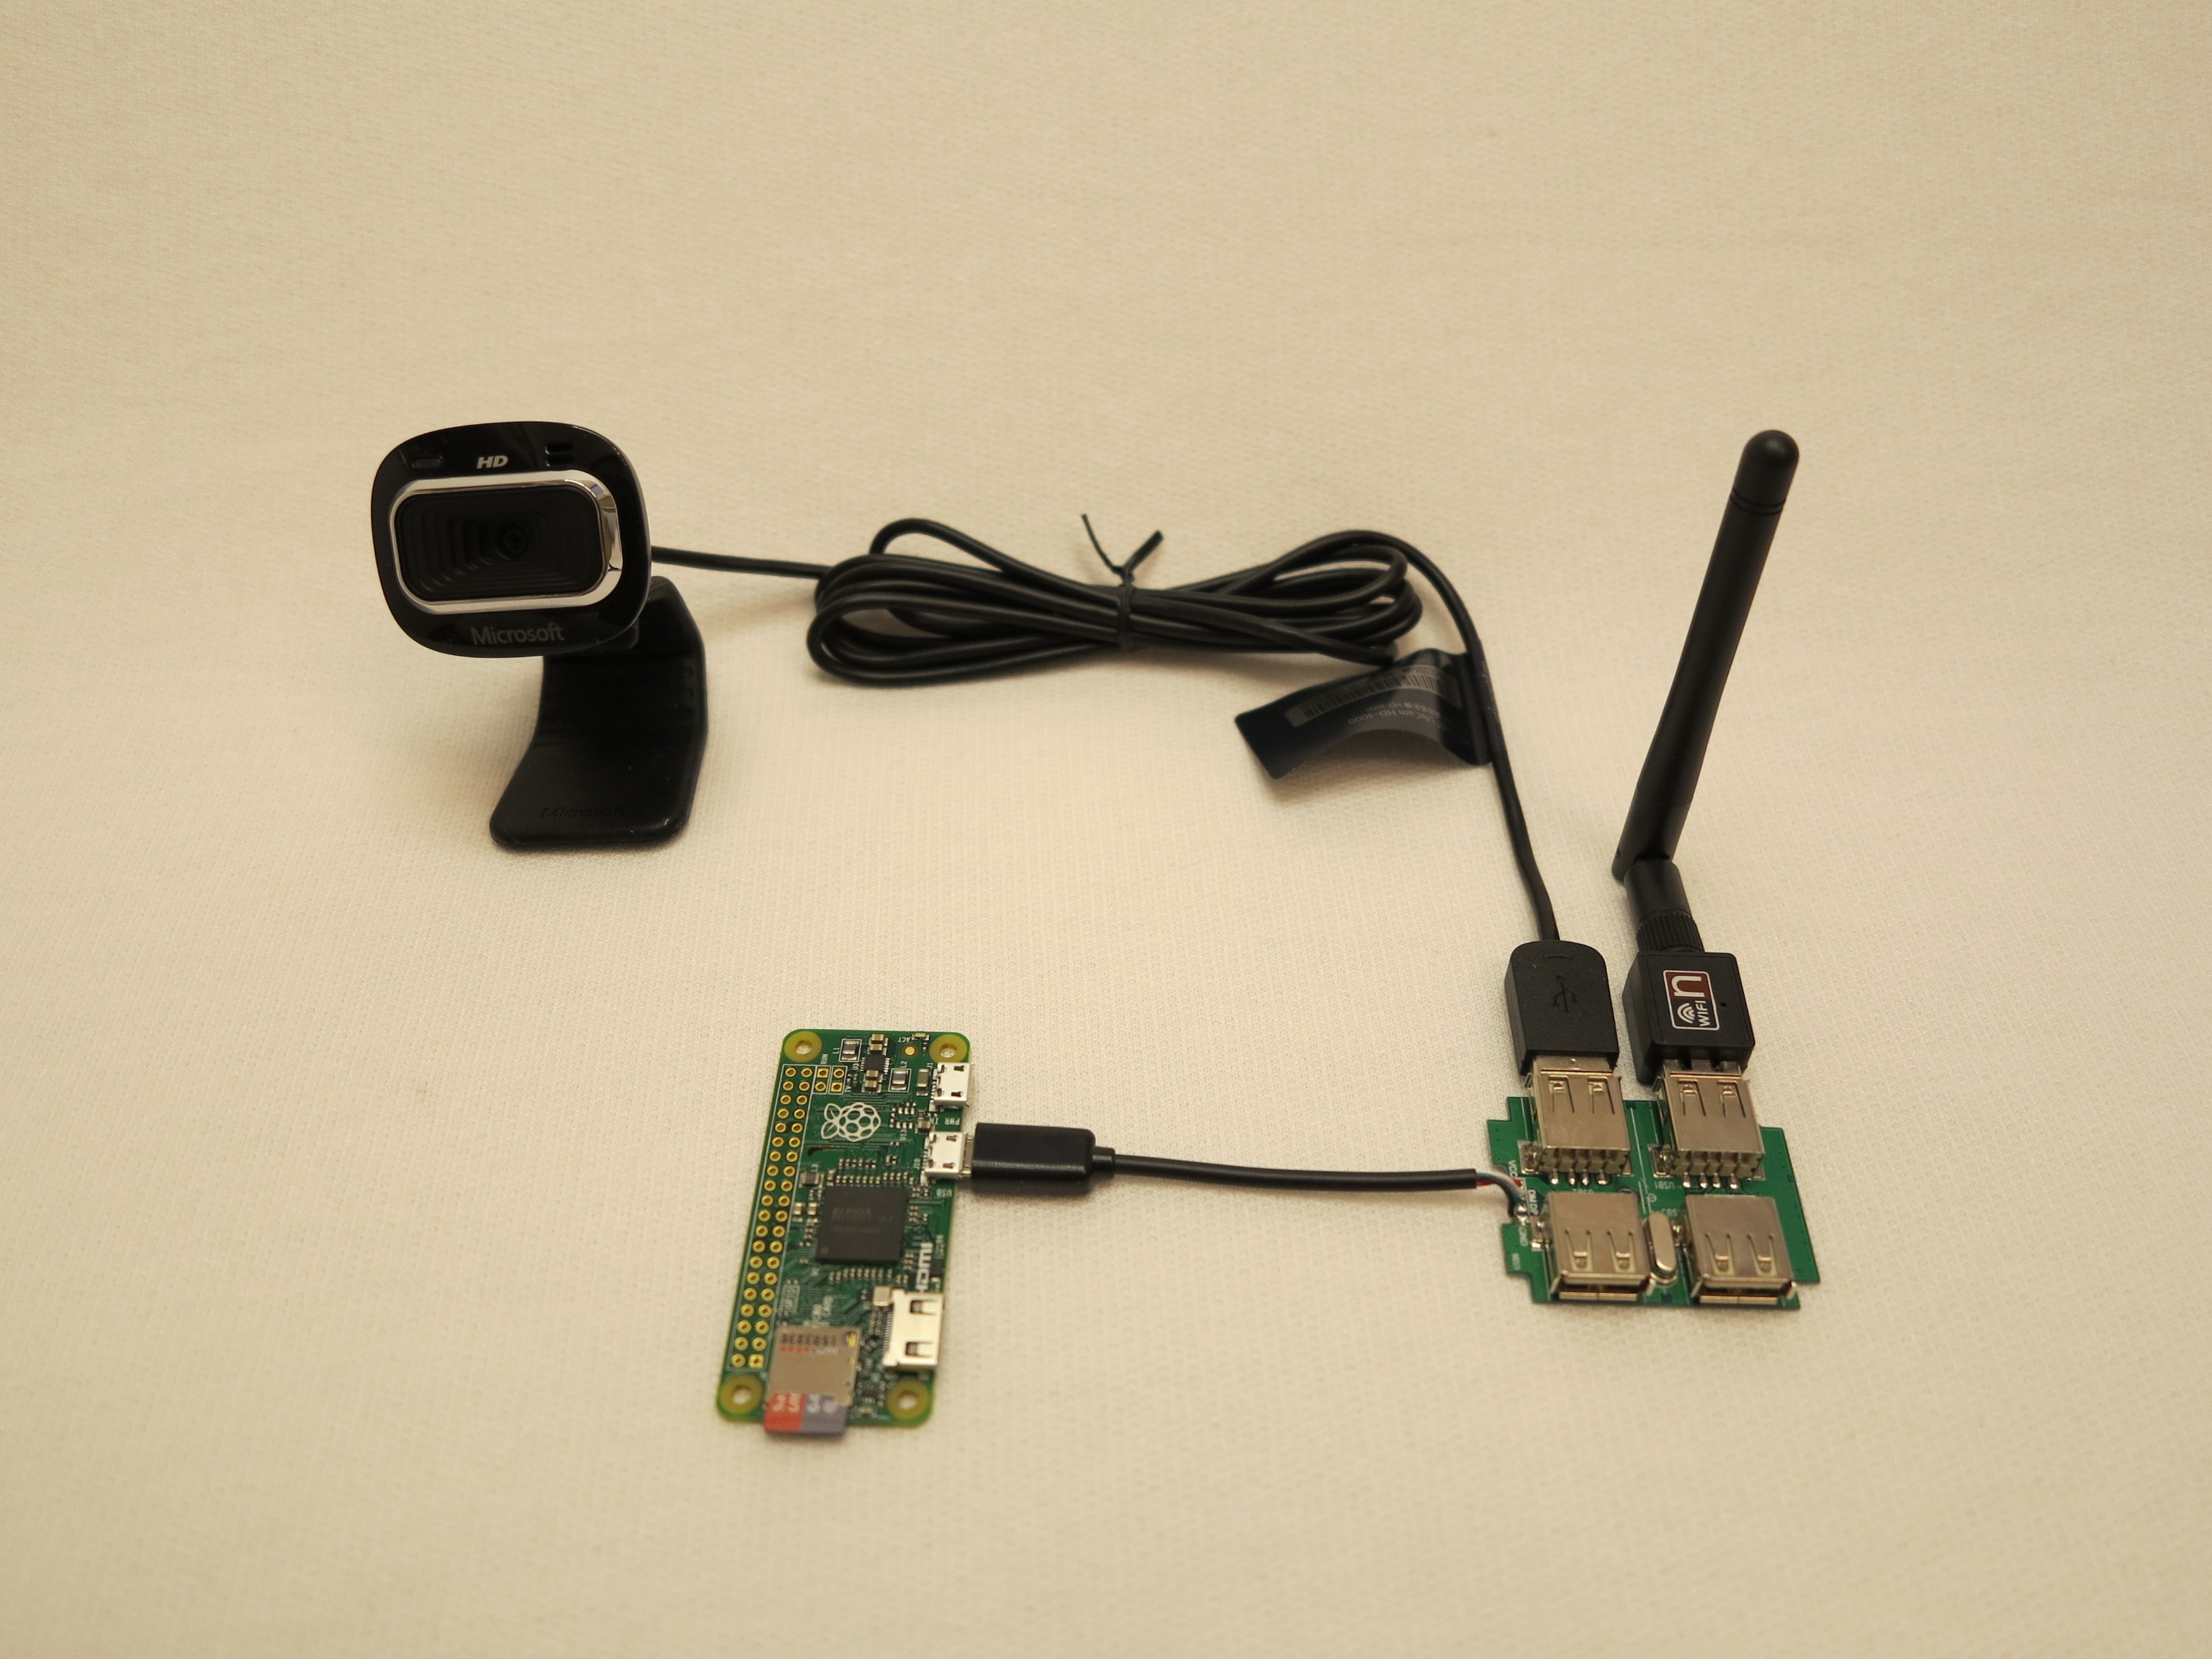
Raspberry Pi Zero – USB Hub
When I got the ZeroBorg motor driver I will replace the Raspberry Pi 3 by the Raspberry Pi Zero. To do so I need two USB-Plugs. One for the webcam and one for the USB WiFi dongle. I opened a mini USB-Hub and replaced the normal USB-cable with a micro-USB cable to directly connect the USB-Hub too the Raspberry Pi Zero.
The picture below shows the mini USB Hub, the web cam and the USB-WIFI dongle.
Raspberry Pi Zero – extended USB connectivity


Can you describe the type of DC motors you used? Specifically, what kind of specifications. What factors did you use to choose them?
Very nice project! In fact, I would go so far as to predict multiple “copycat-robots” within a short amount of time! 🙂
You may be aware of this, but with those type of wheels, I believe you can actually make it drive sideways by driving the front and the back simultaneously toward the “center”.
I love the project and I think I may use this idea… as soon as I “digitize” some of my old floppies and free up some cases, that is! It’s a great idea because it’s the perfect size, and I love to see recycled technology, no matter how low-tech the original was. (A case only barely qualifies as “tech”, IMO, because it held floppies.)
Thanks for taking the time to document and share this,
Leland…
I love those wheels, but they’re just so expensive. Best I can tell, it’s over $100 in the US for four of those wheels. Are there any less-expensive mecanum wheels to be found?