


I now assume that the robot car is already driving in NoPhone mode and everything is working so far. Then it is time to install the app on your Android phone. I installed the app on my Samsung Galaxy S8 and let the robot car drive autonomously. This worked quite well even though the S8 got quite warm and I could watch the battery drain. Nevertheless I am thrilled how well it worked out and I really enjoy this project.
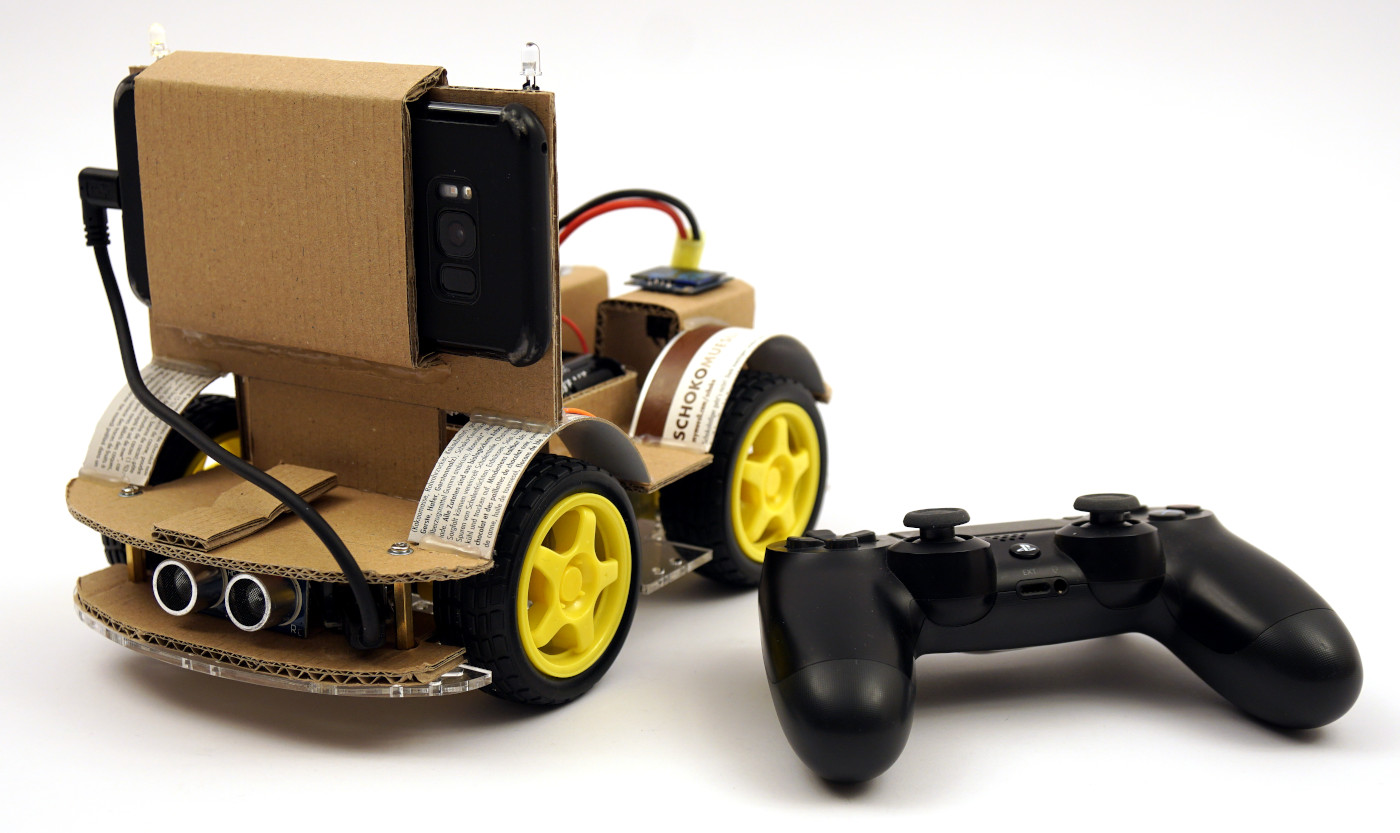
OpenBot ready to run
Android App installation
Installing the app on my Android phone was quite easy. I downloaded the latest version from the OpenBot GitHub repository and transferred the file to my smartphone via USB cable. Then I was able to install the app directly. I was just asked if I trust the source.
You can download the app directly from the Openbot project page: OpenBot
App functions
Data Logger
The Data Logger function is required if you control the robot car by yourself with e.g. the PS4 controller and want to record training data. This recorded training data is then needed to train your own neural network. There are four functions that can be selected for Data Logging. These are listed and briefly explained below.
- only_sensors: All available sensor data of your cell phone will be recorded but no picture will be displayed. This sensor data is less suitable for training the neural network and if only for special training requirements.
- crop_img: It records all sensor data available from your smartphone as well as the corresponding image. The image does not have the full resolution but a much lower resolution which is needed for training the neural network. In my experience, resolutions of 120 x 160 pixels are sufficient for training a neural network. More important is to capture good training data without errors and human characteristics. This is the default setting to be used for training data recording.
- preview_img: All sensor data are recorded and each image is recorded in its full resolution. This quickly leads to a full internal memory. This data is interesting if you want to create a video from the images or from the view of the robot car. For the training of a neural network these large image areas are not an advantage.
- all_imgs: Then there is the function that again records all available sensor data and the small image for training the neural network and the corresponding image in its full resolution. Again, the performance of your smartphone is required and the storage space.
With the button to the right of the option the data recording can be started and stopped. If a PS4 controller is connected this option can be activated with the X button.

OpenBot App Screenshot collect trainings data
USB Connection
Using the drop-down box, different transfer speeds of the USB interface can be selected. It is important that the speed configured in the Arduino firmware matches the speed selected in the app. Therefore nothing needs to be changed here and the 115200 is the correct default option. When the smartphone is connected to the Arduino, the app should automatically detect and activate the connection.
In the picture below you can see the message box that my smartphone displays when I connect the smartphone to the Arduino.
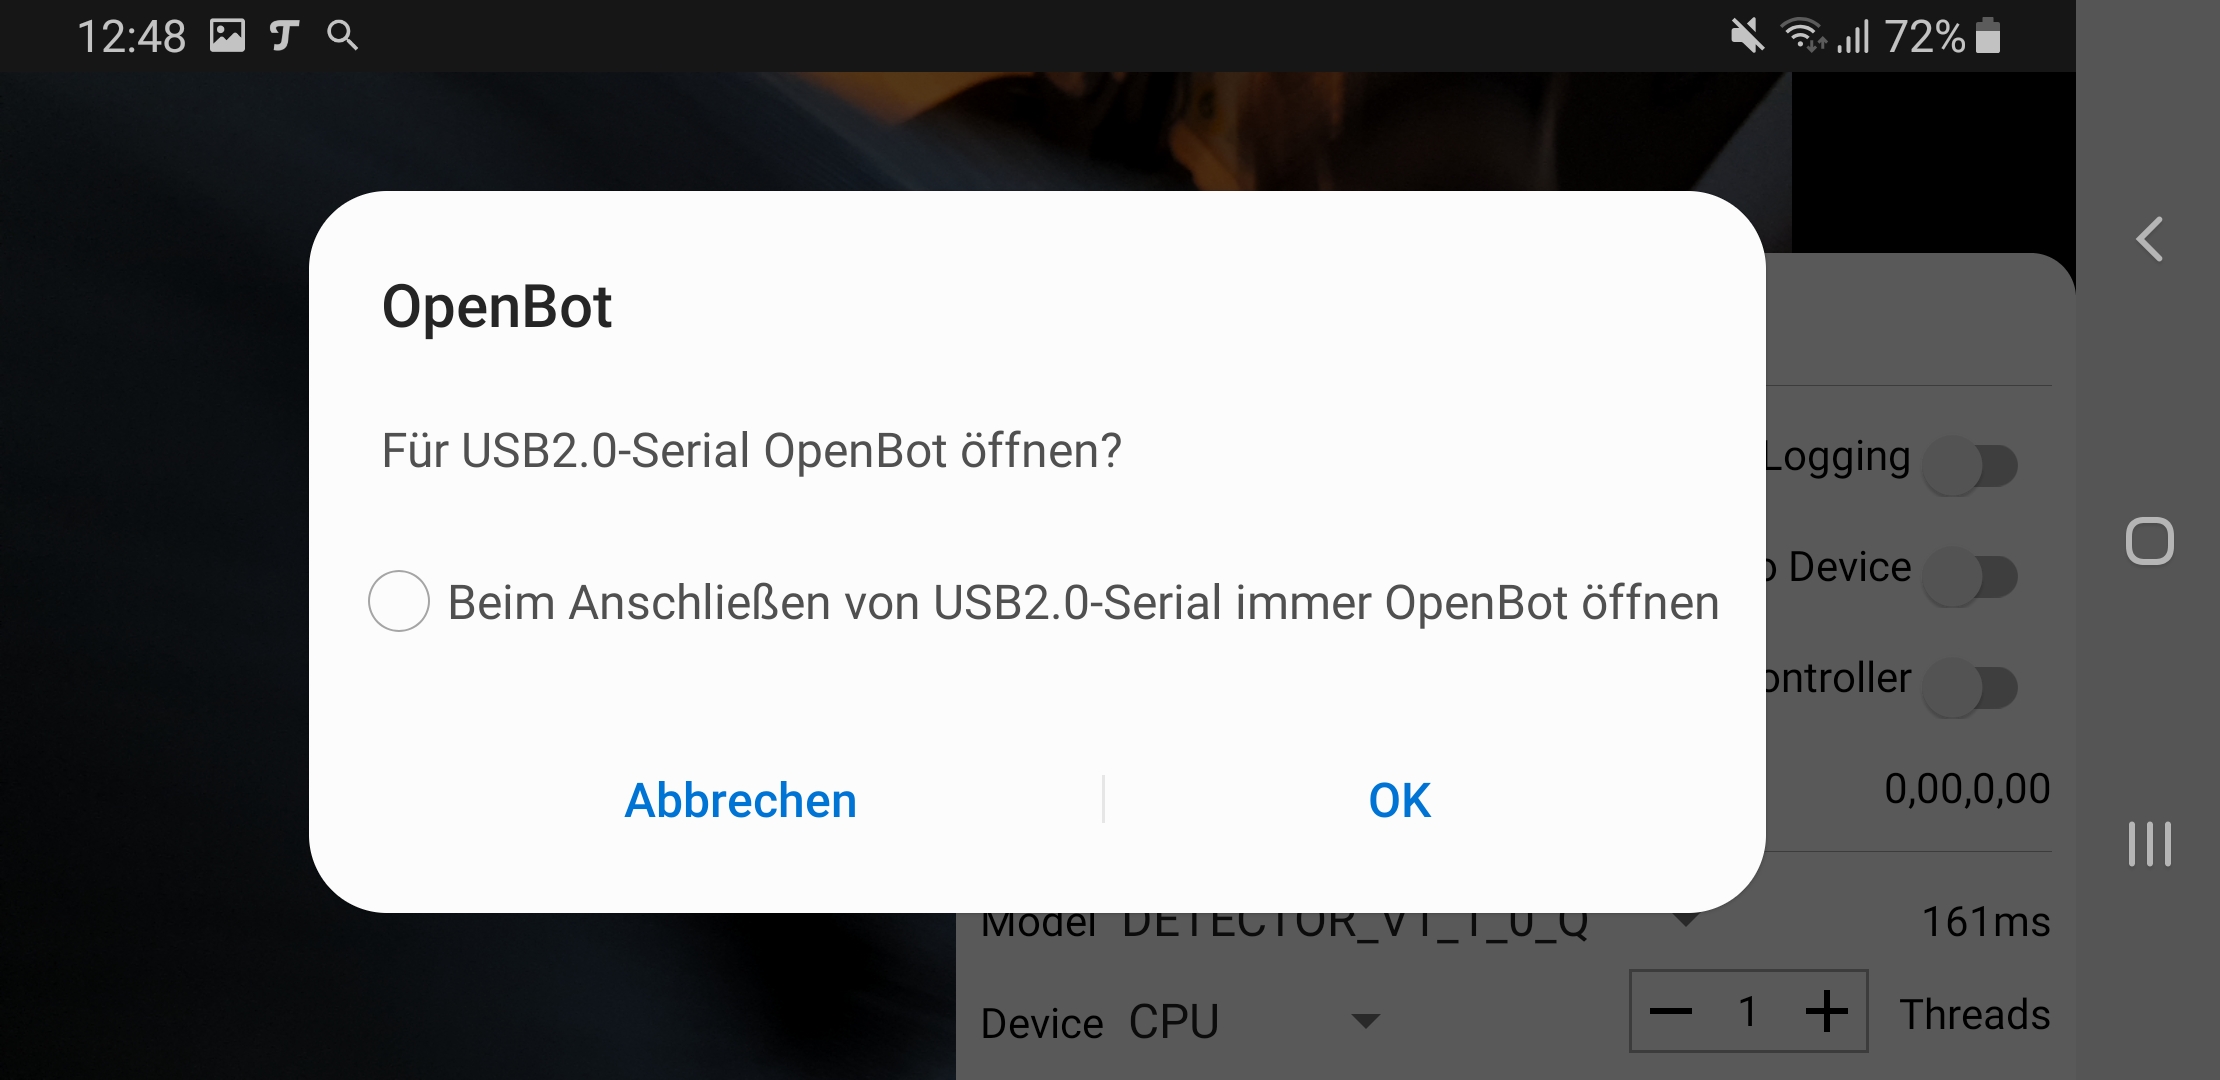
OpenBot App Screenshot USB message
Nevertheless you can end the connection with the switch for the USB Conneciton on the right side and also start again if it would be necessary by simply sliding left or right.
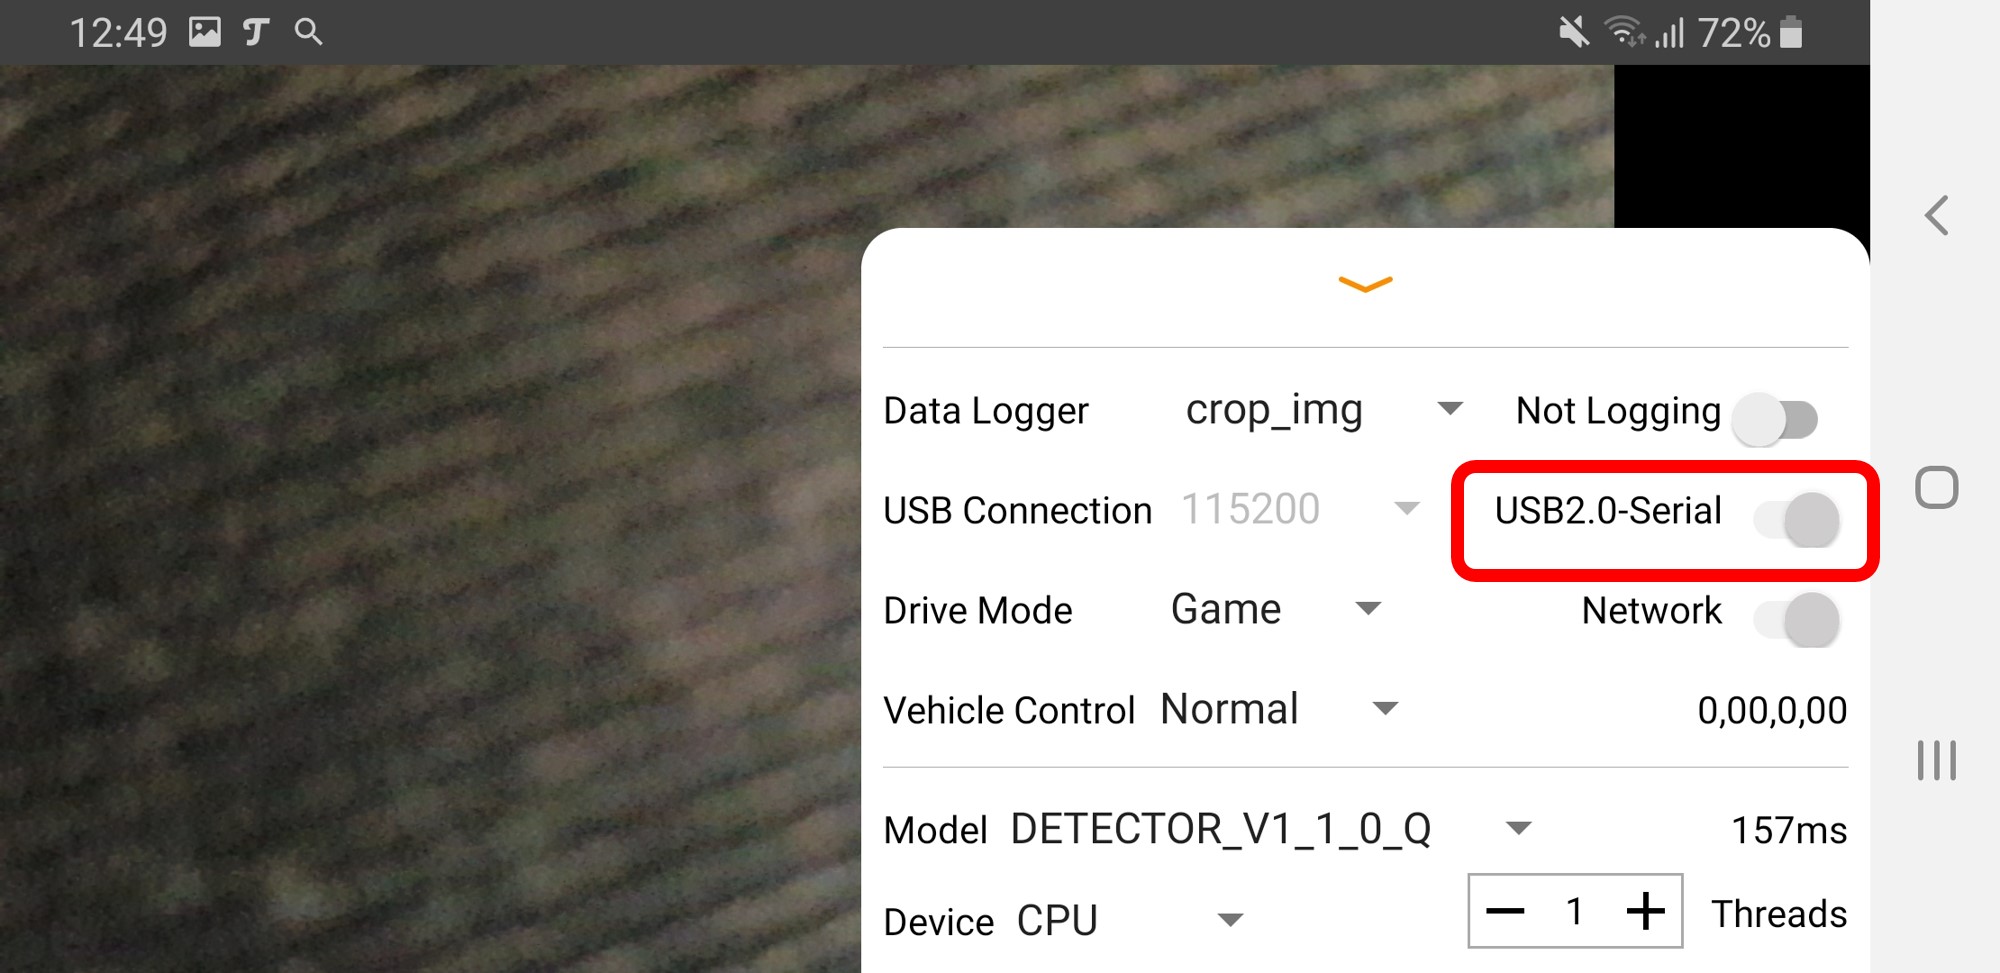
OpenBot App Screenshot USB slider
Drive Mode
Three different modes are available for controlling the robot car with the PS4 controller. Here you have to find the best option for you.
- Game Mode: In this mode, use the R2 and L2 buttons on the PS4 controller together with the joystick for steering. This mode should be known from car racing games. Since I don’t play any games myself I didn’t get along with this mode at all.
- Joystick: If this option is active, the robot car can be controlled with one of the joysticks. I got along with that quite well even if the robot car spontaneously behaves a bit strange when you switch from one maximum deflection to another.
- Dual: This mode is in something like the way a tracked vehicle works. With the left joystick you control the left motors and with the right joystick you control the right motors.
Important: The switch to the right of this option is used to switch between manual control with the joystick and control by the neural network. So if you want the neural network to control the robot car you have to flip the switch. On the PS4 controller you use the R1 button.
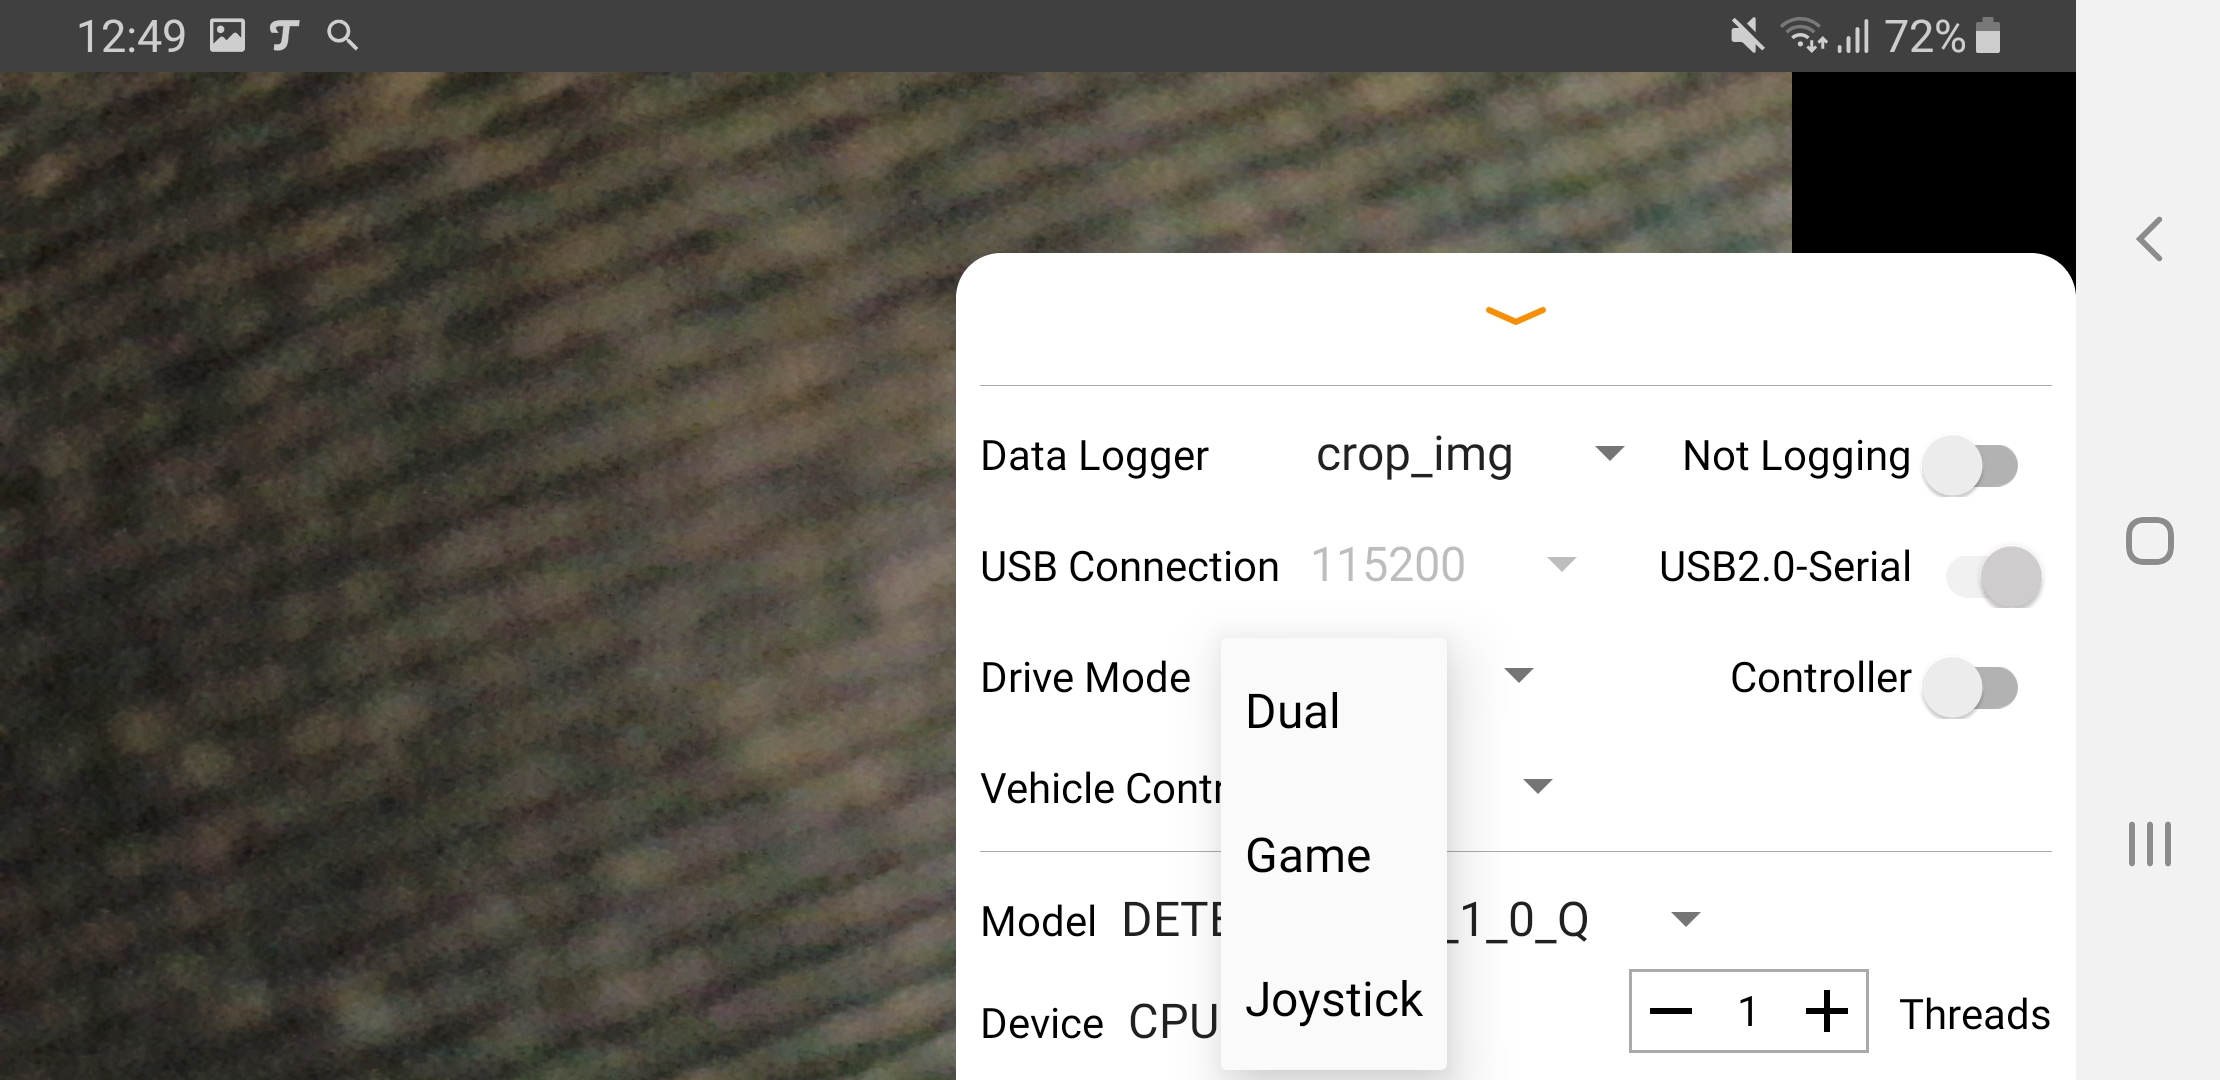
OpenBot App Screenshot mode
Vehicle Control
Three different speeds can be selected at which the robot drives a car. Since the speed is controlled by a PWM signal, it is modified accordingly.
- Slow: The PWM signal is 50% HIGH and this means that the robot is driving car with about 50% power and full voltage from the batteries.
- Normal: The PWM signal is about 75% HIGH and therefore the power is about 75% at full voltage.
- Fast: The PWM signal is 100% HIGH and therefore the full power is applied to the motors. This is also the setting with which the neural network controls the robot car.
On the right in the menu of the app you can see the values with which the motors are controlled. The values appear when the PS4 controller is used to control the motors but also when the neural network makes its predictions when it has control over the robot car.
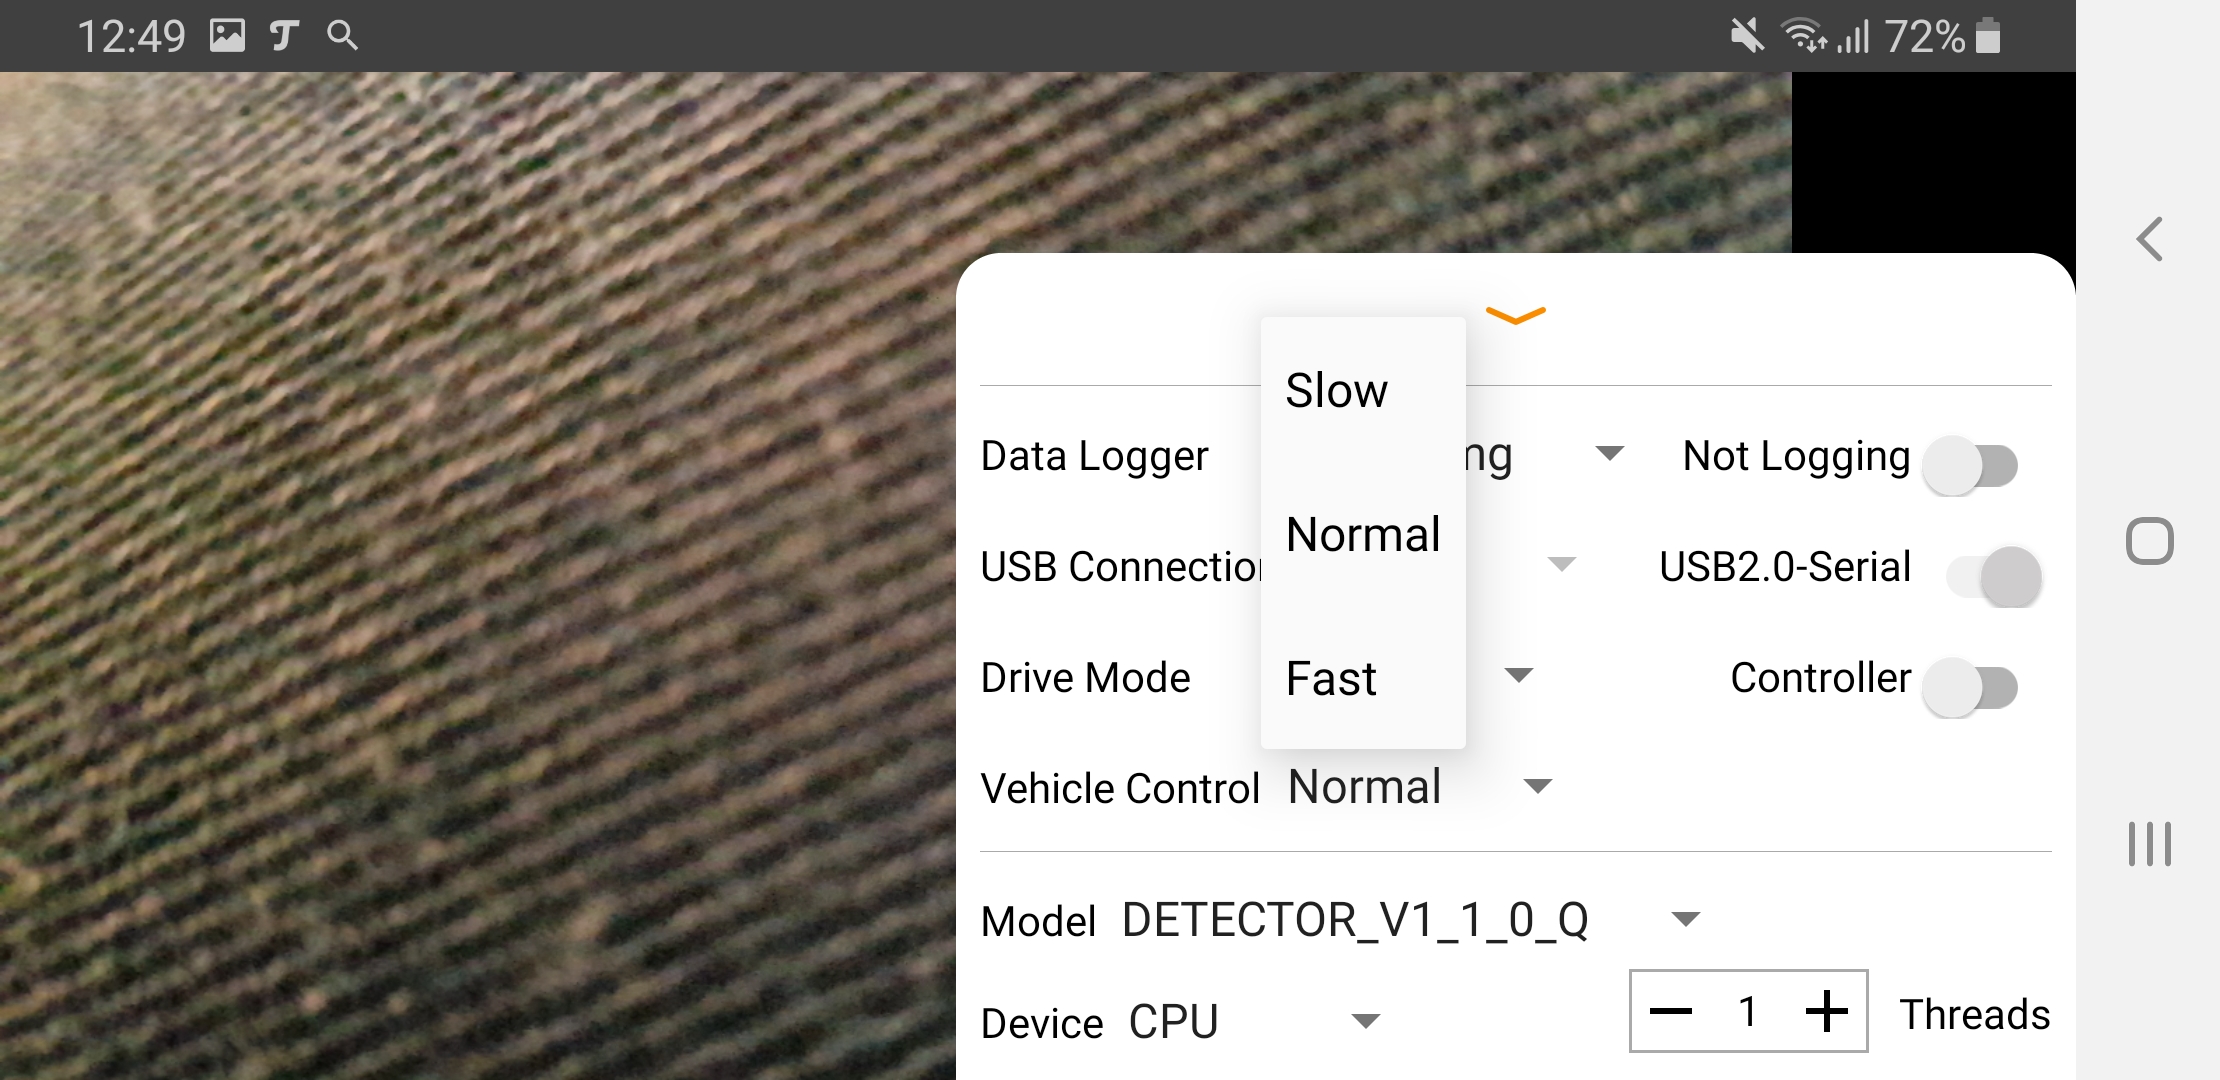
OpenBot App Screenshot drive mode
Model
There are currently three neural networks available in the app which are already trained and can be tested.
- DETECTOR_V1_1_0_Q: This model is based on the MobileNet V1 and is used to follow people. It worked quite well for me when I walked slowly in front of the robot car. The model was adapted for mobile use on a smartphone by the developers of the OpenBot project.
- DETECTOR_V3_S_Q: This model is based on the MobileNet V3 and is used to follow people. For me it worked quite well when I slowly walked in front of the robot car. The model was adapted for mobile use on a smartphone by the developers of the OpenBot project.
- AUTOPILOT_F: This neural network is really amazing and allows the robot to drive a car autonomously. It worked quite well in my apartment and I was really excited. However, it had its challenges because it was not specially trained for my apartment. Nevertheless the performance was impressive for me. If you want to train a neural network yourself, you can read more about Driving Policy at the following link. To do this you have to recompile the Android app to make your own network available there.
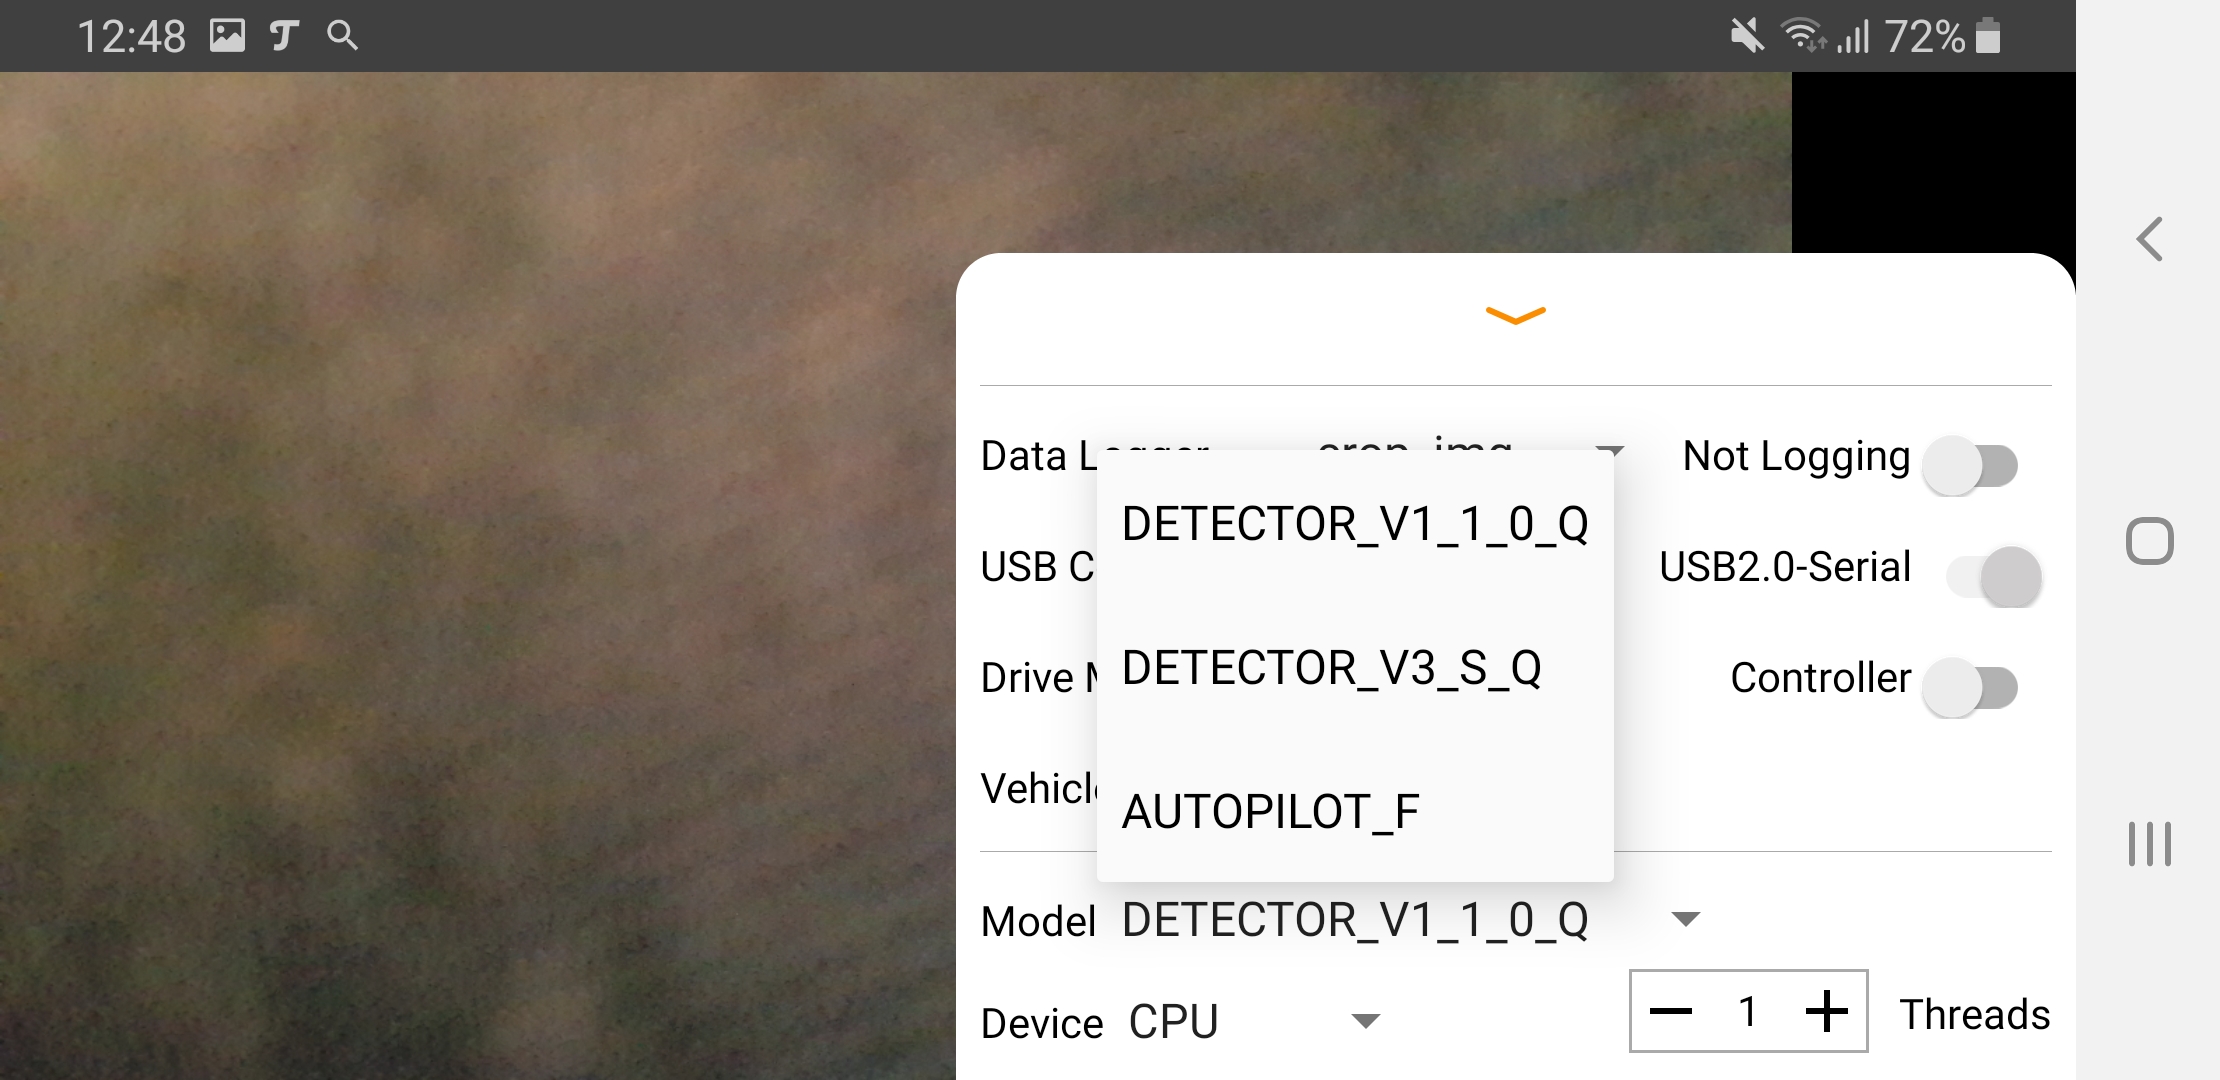
OpenBot App Screenshot neural network model
Device
With the drop down box you can select on which CPU or GPU the neural network should be executed. With my Samsung Galaxy S8 I had no choice because it only has a CPU.
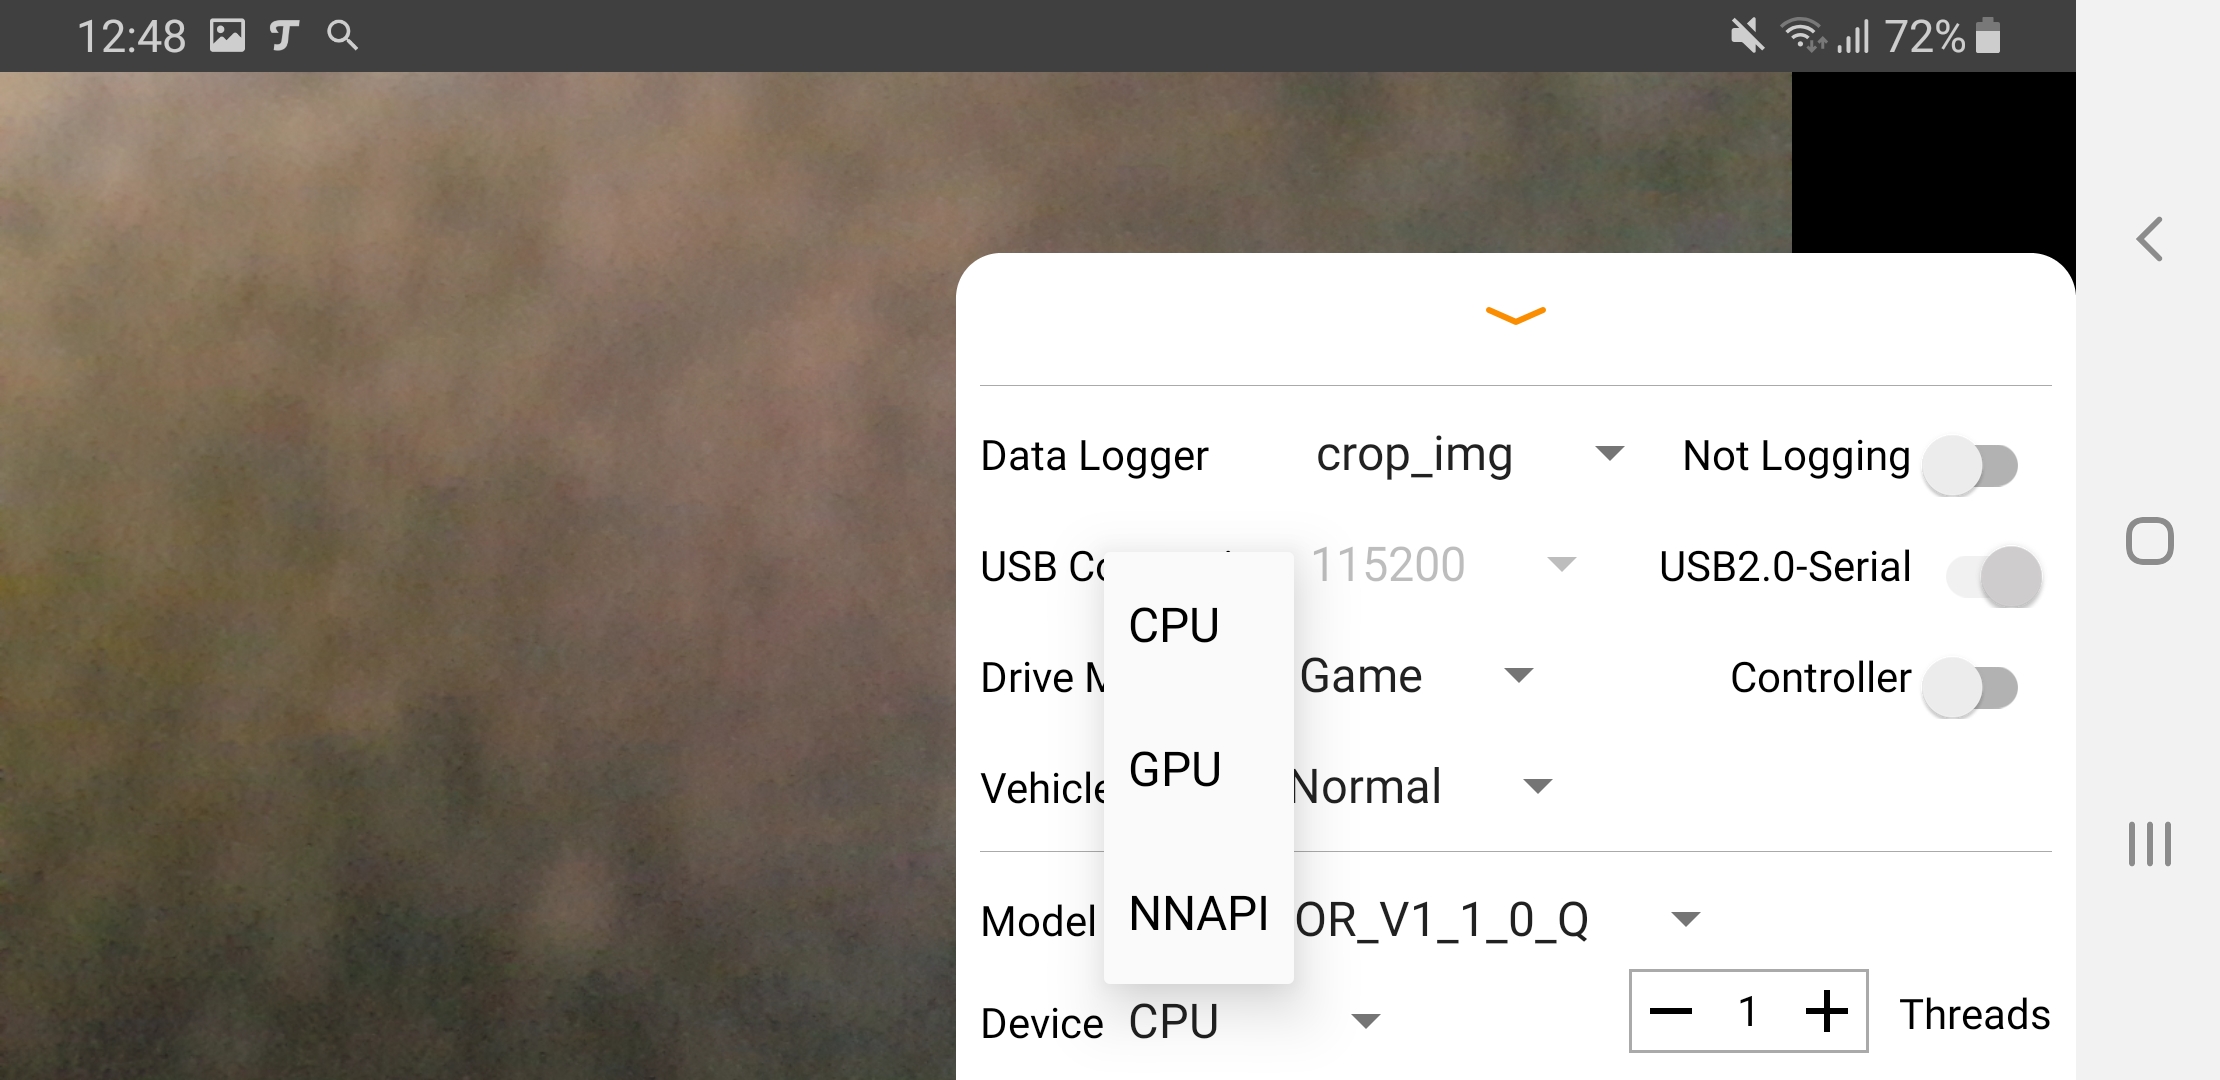
OpenBot App Screenshot device
PS4 Controller
I have a PS4 controller paired with my smartphone. To do this, press the two buttons “SHARE” and the “Playstation Button” on the PS4 controller at the same time. Afterwards the controller flashes very fast and on the Smartphone you can find the controller under Bluetooth devices. Click here to start the pairing. Afterwards you can control the robot car with the app or the smartphone. This is important to be able to control the robot car manually when you record training data later.
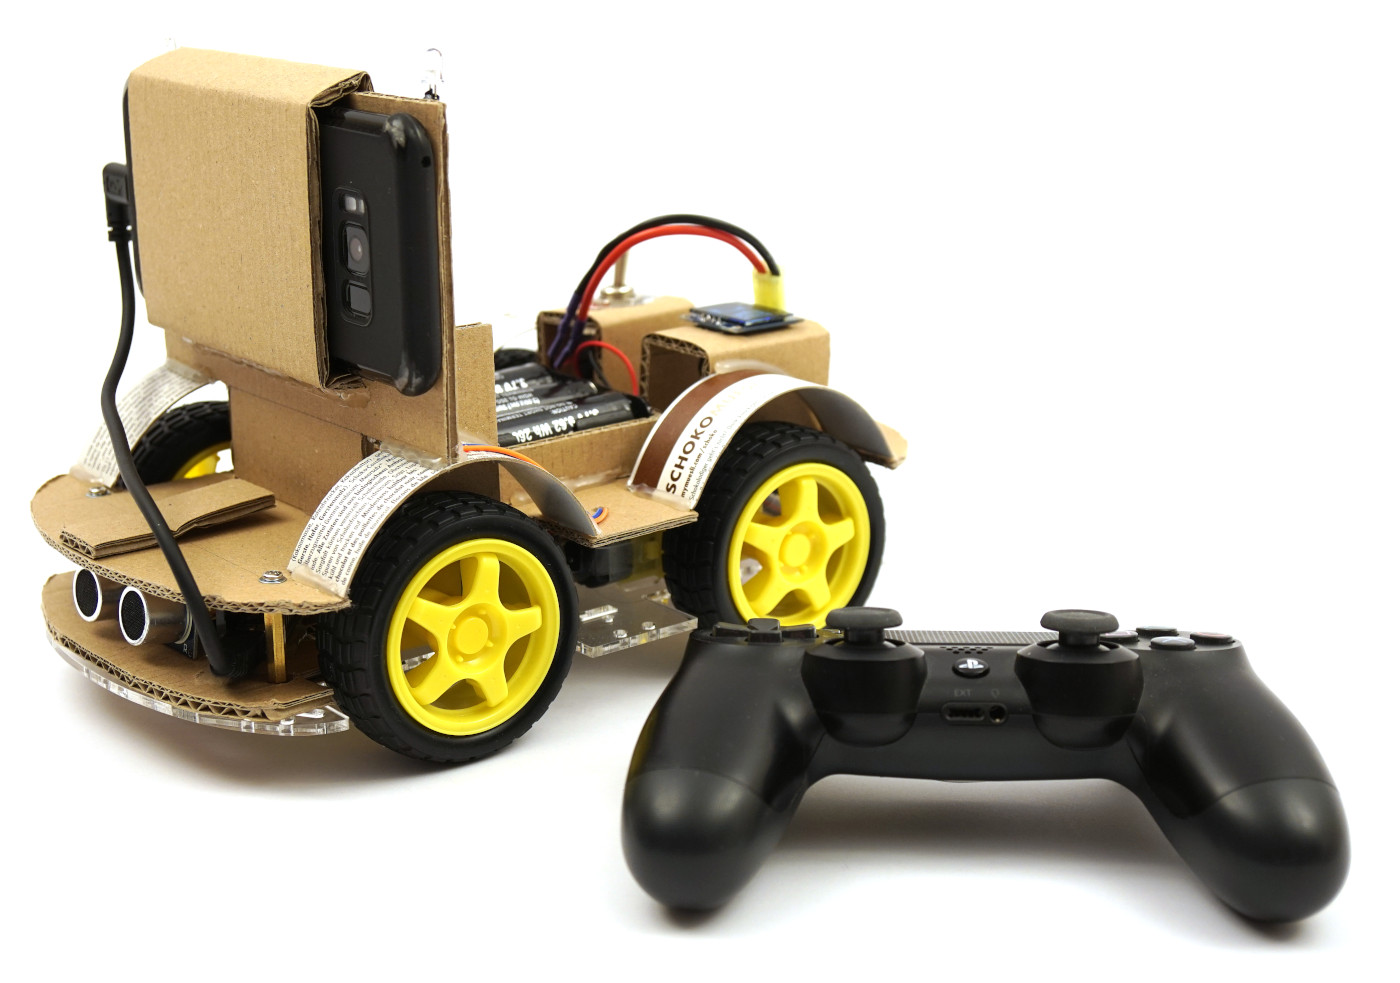
OpenBot ready to run PS4 controller
Let OpenBot run autonomously
Now that it is hopefully clear how to use the app on the Android smartphone, the robot can drive the car autonomously. Very nice for the beginning are the first two neural networks that let the robot follow a person. It is important that the smartphone or the camera of the smartphone is aligned a bit diagonally upwards. In my model I had the camera aligned so that it looks straight ahead. The result is that the camera picks up a lot from the ground which is not really interesting. Therefore the smartphone should be aligned a little bit diagonally 5° – 10° upwards. Then all three nets should be able to use the picture quite well.
The mode for the neural network is activated as shown on the following screenshot.
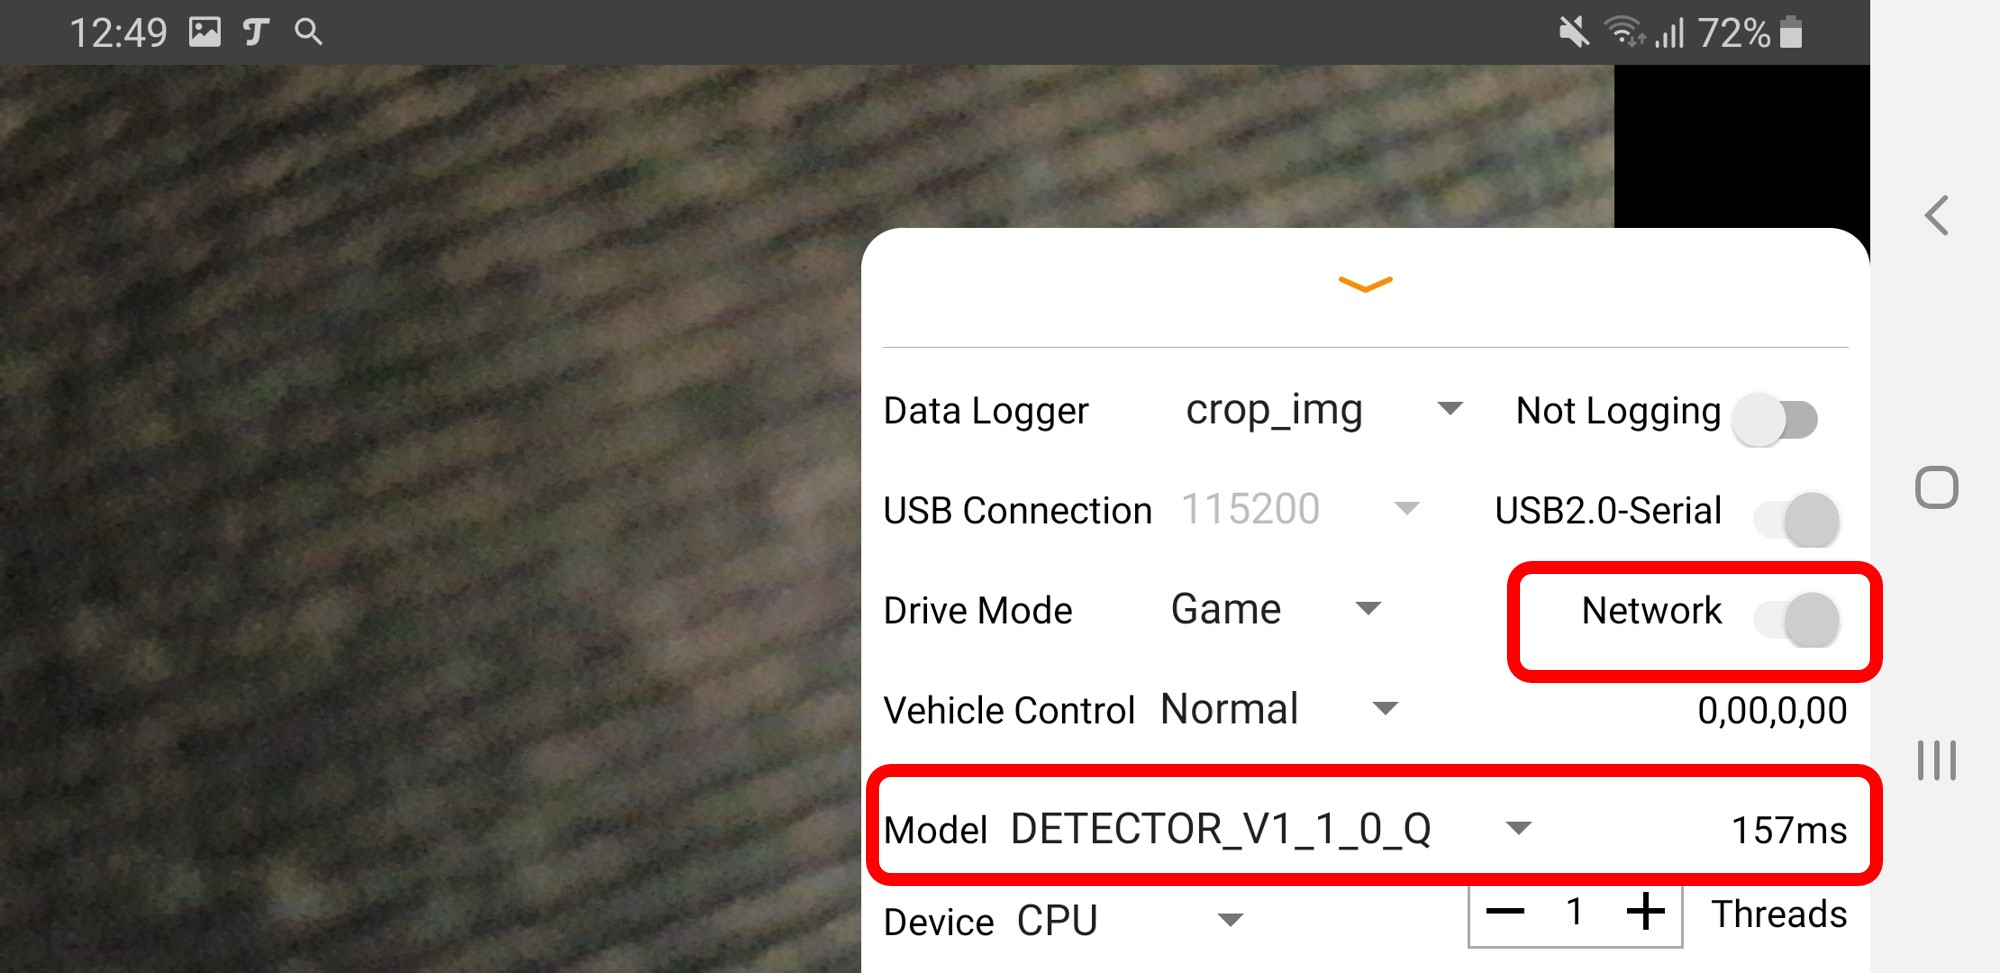
OpenBot App Screenshot active neural network
Summary
With the software provided by the OpenBot project, the robot drives the car really autonomously and is controlled by the smartphone. Everything worked out fine for me and the feeling of success was immediate. So this is a really great project even for beginners. In the following articles we will try to record good training data and train our own neural network or improve the existing one with our own data.
Article Overview OpenBot robot cuto:
OpenBot – Your smartphone controls a robot car – IntroductionOpenBot – Your smartphone controls a robot car – needed parts part 1-2
OpenBot – Your smartphone controls a robot car – needed parts part 2-2
OpenBot – Your smartphone controls a robot car – constructing a chassis
OpenBot – Your smartphone controls a robot car – Wiring
OpenBot – Your smartphone controls a robot car – Flashing the Arduino firmware
OpenBot – Your smartphone controls a robot car – Android App and first test run
OpenBot – Your smartphone controls a robot car – Record training data
OpenBot – Your smartphone controls a robot car – Set up training environment
OpenBot – Your smartphone controls a robot car – train the neural network
OpenBot – Your smartphone controls a robot car – Setting up Android Studio and your Smartphone
OpenBot – Your smartphone controls a robot car – compile your own OpenBot Android app


Hello, I am a beginner of making robot car and not quite familiar with machine learning. I chose the openbot as my first try and thought it would be easier for me.
But my car just cannot turn with the person it follows and is not so sensitivity as Intel’s video. The only sensor I don’t use is the speed sensor. Does it matter or the performance is related to the phone I use? Could you please give me some suggestions and tell me the possible reasons? Thank you.
Hi Xu,
maybe your Training-Data is not perfect und you have to collect some more data to train your OpenBot.
You have to try that and collect some more data and hopefully your trained neural net will performe better…
Best,
Ingmar