


Big Rob is the latest robot I designed for off-road activities. The bot will be equipped with the latest technology like a precise navigation with the differential GPS architecture I built up. You will find more details about the differential GPS setup here. The big buggy tiers enable the Big Rob to drive off road and not to get stuck in rough terrain like the little Raspberry Pi bots I already build and tested in the garden. The DC gear motors have a rotate speed of 35 RPM by 12V. The rated stall current is 1.8 A and the output torque is 15 kg/cm. This is strong enough for the big rob do drive around with all the equipment I will build into the bot. The case is big enough to store a large battery with 12 V and maybe round about 12 Ah from a motor cycle or small car. Not sure if I will only use a Raspberry Pi to control the robot. Maybe I will also add an NVIDIA Jetson TK1 developer kit for computer vision and autonomous driving capabilities.
The picture below shows two gear dc motors and the power train I built to mount the tiers and axels. The big buggy tier is mounted with a 24mm screw on the axel.
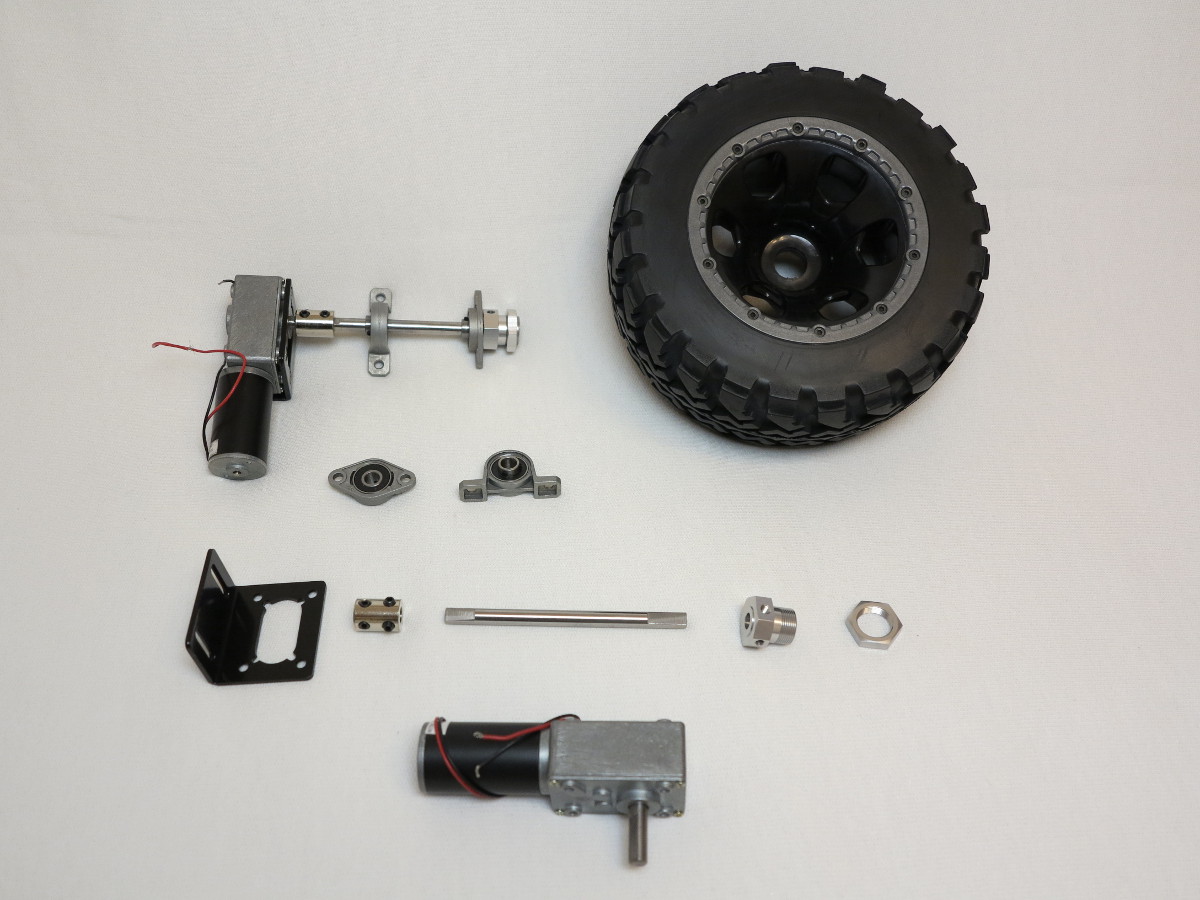
Big Rob – mechanic components
The next pictures shows two tiers and a dc motor with the mounted steel axel. I tried to find the best place to drill the holes into the plastic box to mount the dc motors, axis, ball bearings and tires. The plastic box was very easy to machine.
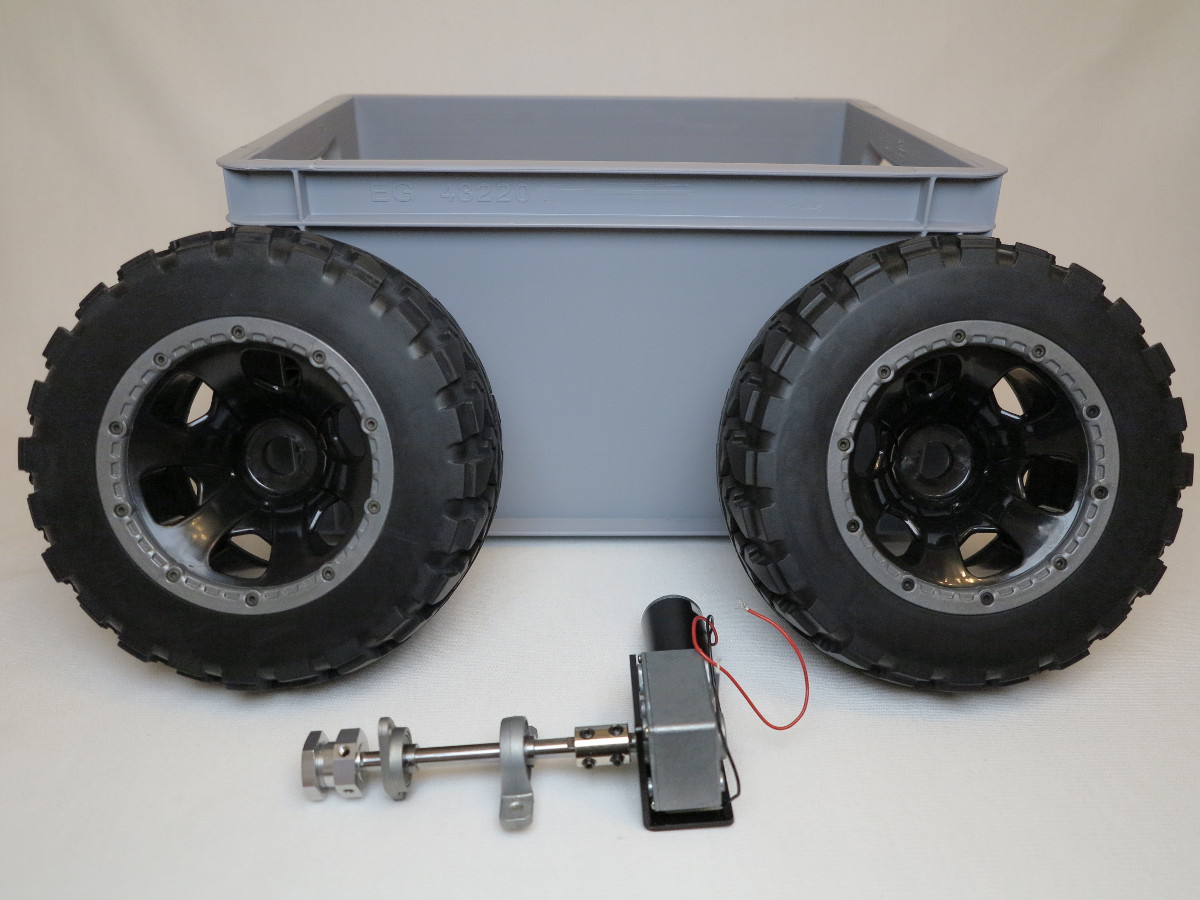
Big Rob – gear motor and power train

Build your own robot car with the Raspberry Pi!
Step by step to your own robot carThis book guides you in two parts through the project phases with the aim of building an individual, autonomously driving robot car. In the first part of the book you will learn the basics of robotics and the interaction of hardware, electricity and software. You build the chassis and wire the individual components - details can be found in the appropriate, richly illustrated chapters. An introduction to software installation and programming with Scratch and Python completes the first part. You do not need any previous knowledge in robotics and programming. In the second part of the book, you will familiarize yourself with the sensors required for autonomous driving. With the acquired knowledge you can individualize and further develop your robot car as you wish. The knowledge you acquire in this book will enable you to implement your own projects with the Raspberry Pi.
This book offers you that:
- Simply get into robotics with the Rasperberry Pi without prior knowledge
- Numerous illustrations, tables, circuit diagrams
- Information boxes with useful tips also for other Raspberry Pi projects
- Project code with syntax highlighting
- Two car projects: remote-controlled robot car via WLAN and self-driving car
- Hardware tips and recommendations for suitable accessories - Extensive project material as download: Raspbian image, parts list, chassis artwork and code
- Special features: Easy and robust cabling, use of high-precision time-of-flight laser distance measurement sensors, introduction to servo motors and suitable servo controllers, control via gamepad, use of an OLED display
Ingmar Stapel studied computer engineering and is currently working internationally as IT project manager and enterprise technical architect; in addition, he has been intensively involved with Raspberry Pi and robotics for years. He likes to share this knowledge with interested people from the tinkering scene at meet-ups on robotics. On his private blogs he also writes about many current technology trends.
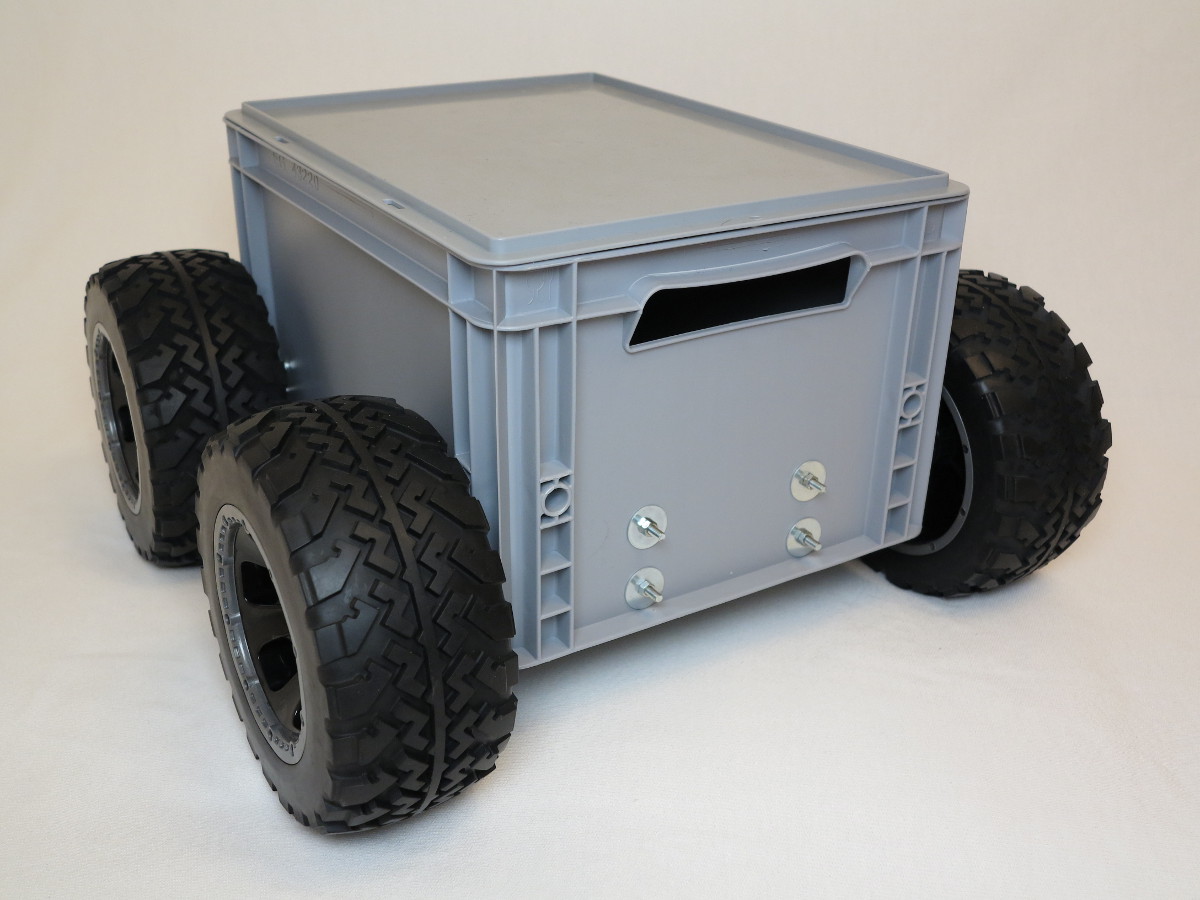
Big Rob – robot design
The idea of the Big Rob design was to build a modular chassis which could be easily extended with an additional plastic box on top of the first box which is the chassis of the robot. The next pictures shows the robots chassis, the four dc gear motors with the four mounted tiers. The tiers are buggy 1:5 tiers with a diameter of 20 cm. Which is big enough for the robot to easily drive around in the garden and not too big for the dc gear motors.

Big Rob robot 4×4 dc motors
On top of the chassis I could easily mount the GPS and WIFI antenna. Actual I am not sure where to mount the camera. I mounted the camera in the middle of the box behind the handle. Maybe I will use a pan and tilt kit for the camera in the future. But I do not have a dome housing for the pan & tilt camera which is water proof.
Big Rob front view
The next pictures shows a small Raspberry Pi robot I build last year and the big rob in the background.

Big Rob with little brother
I wired all the components and installed a Raspberry Pi 2 Model B to test the robot. In the middle of the picture on the top you see the small motor driver which is burned. Not sure what to buy next. But something which is able to deal with more than 10 A I suggest.
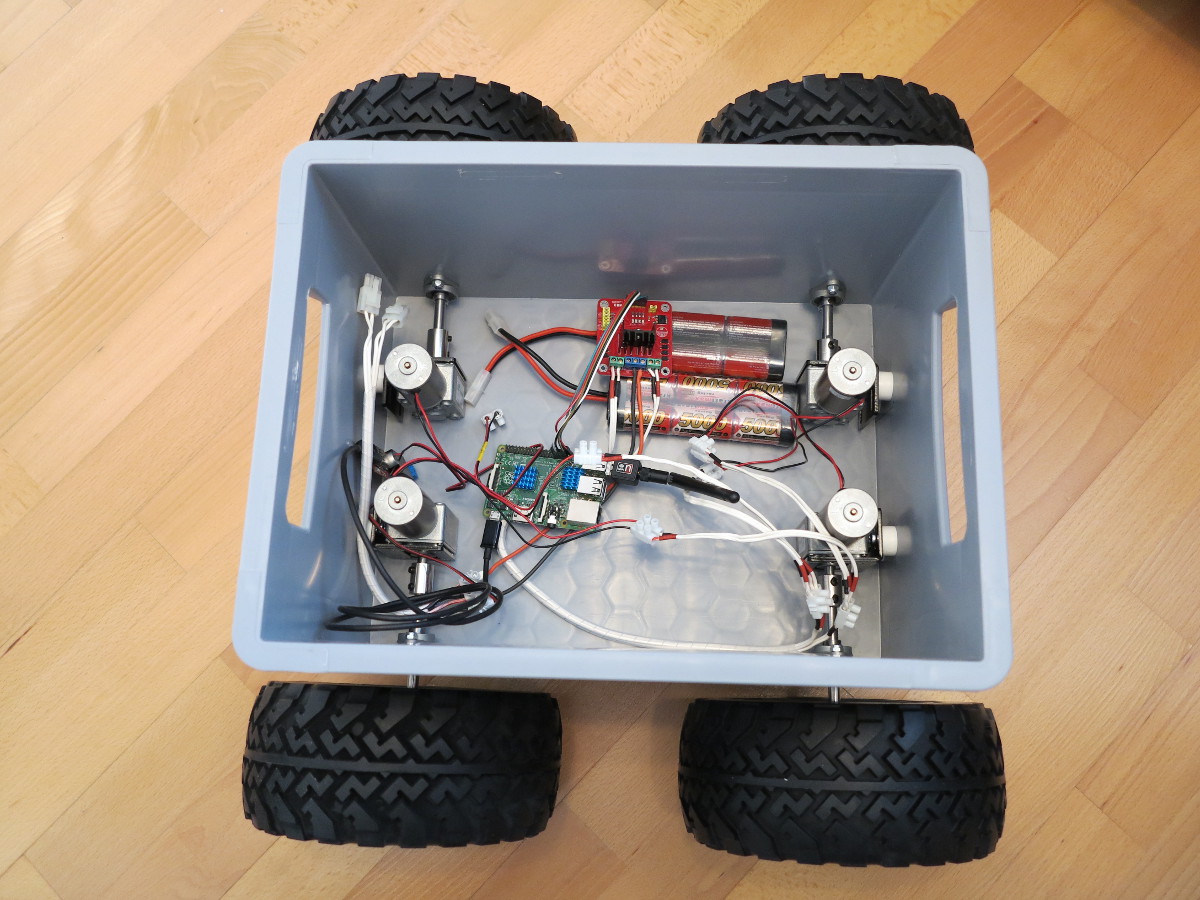
Big Rob prototype setup
Video Big Rob
The video shows the first test drive in my office.

Summary
To build the robot was very easy. The plastic box was easy to machine with a normal drill. I drilled all the holes to mount the four dc motors, the ball bearings as well the hole for the axel. The dc motors are very strong and the robot could easily drive around. I decision to use two BTS7960B motor drivers was the right decision. The BTS7960B motor driver is easy to control with Python and strong enough to supply the two dc motors from each side of the robot.
Article list - Big Rob:
Big Rob – Raspberry Pi robotBig Rob – Raspberry Pi robot power train
Big Rob – Raspberry Pi robot motor driver BTS7960B and Python program
Big Rob – Raspberry Pi robot outdoor camera
Big Rob – Raspberry Pi robot with differential GPS
Big Rob – Raspberry Pi robot with nice teeth
Big Rob – Raspberry Pi robot Peak Power Pack power supply
Big Rob – Raspberry Pi robot videos


Hi,
For that kind of power requirement, you’re going to need a pretty beefy controller board.
Can I suggest taking a look at the Diablo from PiBorg: https://www.piborg.org/diablo which handles 55A per channel. Mind you, it’s only two channels. Same goes for the PicoBorg Reverse (which handles 10A total over two channels) https://www.piborg.org/picoborgrev.
You could also try having a word with @CannonFodder on Twitter as he’s a Pi robotics expert who might be able to point you in the right direction and offer some guidance.
Great to read about your projects – hope you manage to find a solution!
—
Mike
Hi, I think you were part of the inspiration for me to make a Web driven ex-RC car as per my blog attached. At one point I was working to the cardboard-car instructions, But I ended up using WebIOPi. It now works, I just need a separate power supply for the motors. One day I’ll post a video of it.
Hi Peter,
to get a video or some pictures I could show on my blog would be greate.
Maker
Hi! Amazing project. Where you have bought dc motors, tiers and axels?
I am not sure but I think is was via Amazon or Banggood…